Listen to this Post
Introduction:
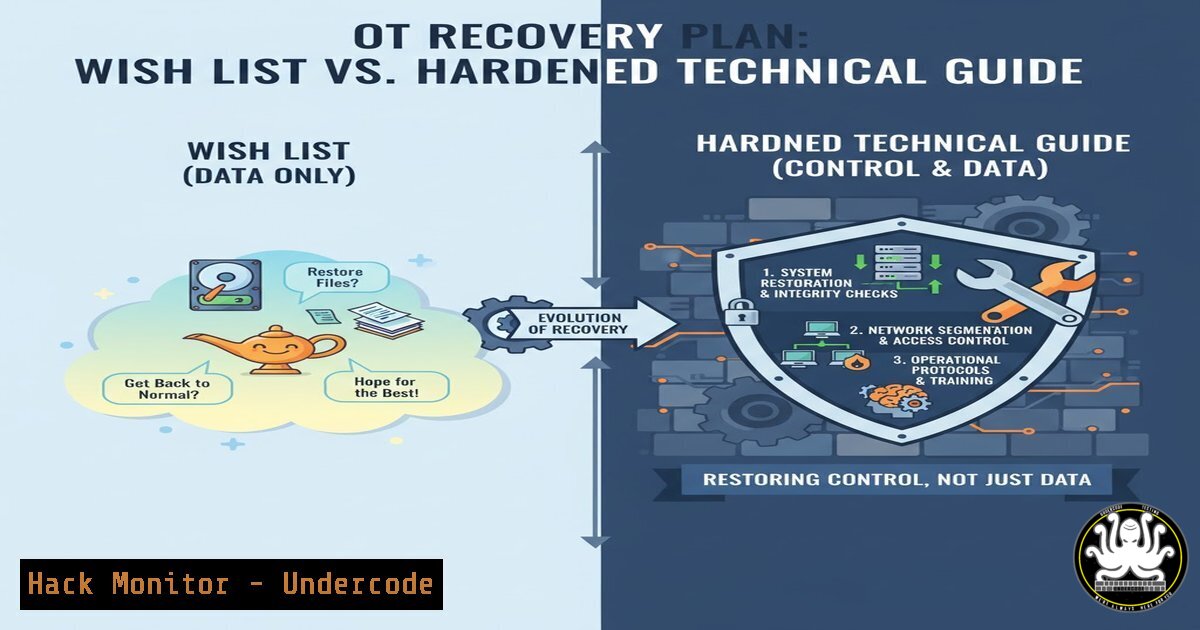
In Operational Technology (OT) environments, a cyber incident isn’t just a data breach; it’s a potential physical shutdown. The core challenge shifts from restoring lost bytes to restoring operational control and safety. This guide moves beyond theoretical plans to provide the verified commands and procedures you need to test and execute a true OT recovery, ensuring your PLCs, HMIs, and critical processes can be brought back online safely and predictably.
Learning Objectives:
- Understand the critical differences between IT data recovery and OT control restoration.
- Learn how to create and verify secure backups of OT system configurations and data.
- Master the commands and steps for simulating a full OT recovery drill in a isolated sandbox environment.
You Should Know:
1. Securing Your OT Configuration Backups
A backup is useless if it’s corrupted, inaccessible, or outdated. These commands ensure your backups are created securely and their integrity is maintained.
Linux: Create a Tamper-Evident Archive & Checksum
 Create a compressed archive of a critical HMI configuration directory
tar -czvf hmi_config_backup_$(date +%Y%m%d).tar.gz /opt/hmi/config/

Generate SHA256 checksum to verify integrity
sha256sum hmi_config_backup_.tar.gz > backup_checksum.sha256

Verify the archive's integrity later
sha256sum -c backup_checksum.sha256
Step-by-step guide: The `tar` command creates a compressed snapshot. The `sha256sum` command generates a unique cryptographic fingerprint. After transferring or storing the backup, running the verification command ensures not a single bit has changed, alerting you to corruption or tampering.
Windows: Exporting a Windows Server/SCADA Host Firewall Configuration
 Export the current firewall rules to a file
Export-NetFirewallRule -PolicyStore ActiveStore -FilePath "C:\OT_Backups\firewall_rules_$(Get-Date -Format 'yyyyMMdd').xml"

To restore the rules later (use with extreme caution in production)
 Import-NetFirewallRule -FilePath "C:\OT_Backups\firewall_rules_20241027.xml"
Step-by-step guide: This PowerShell cmdlet exports all active firewall rules, which are critical for segmenting OT networks. Storing this XML file with your backups allows for a quick restoration of the network access control policy after a system rebuild.
2. Validating Network Segmentation Post-Recovery
After restoring systems, you must verify that network segmentation, a primary OT security control, is intact.
Linux: Using Nmap for Safe, Post-Recovery Network Discovery
 Perform a SYN scan on a specific OT subnet from your jump host (SAFELY)
nmap -sS -T4 -Pn 192.168.1.0/24

Check if only expected ports (e.g., 502 for Modbus) are open on a PLC
nmap -sS -p 502 --open 192.168.1.100

Perform a OS detection scan (use only in authorized drills)
nmap -O 192.168.1.100
Step-by-step guide: The `-sS` flag is a SYN scan, which is stealthier and less intrusive than a full connect scan. Use these commands in your recovery sandbox to confirm that restored devices are on the correct VLANs and that no unintended services are exposed.
Windows: Using PowerShell to Verify Local Firewall Rules on a Restored HMI
 Get all enabled firewall rules, showing their profile and direction
Get-NetFirewallRule | Where-Object {$_.Enabled -eq 'True'} | Format-Table Name, Profile, Direction, Action
Step-by-step guide: After restoring an HMI image, run this command to ensure the local firewall is active and the correct rules (e.g., blocking RDP from the corporate network) are in place as per your security baseline.
3. Verifying the Integrity of Restored PLC Logic
The restored control logic must be bit-for-bit identical to the known-good version and function as intended.
Rockwell Automation (Studio 5000) – Manual Process:
- Export ACD File: From your source control or secure archive, retrieve the verified `.ACD` project file.
- Compare Checksums: Calculate the SHA256 hash of the restored file on the engineering workstation and compare it to the hash from your backup repository.
- Offline Logic Comparison: Open both the source and restored projects in Studio 5000 and use the built-in compare tool to visually verify rung-by-rung logic integrity.
- Go-Online & Verify: Connect to the PLC, go online, and ensure the logic matches without major faults and the program signature is correct.
Siemens (TIA Portal) – CLI for Project Integrity:
On a system with 7-Zip (as .zap files are archives), list contents to verify
"C:\Program Files\7-Zip\7z.exe" l Siemens_Project_Backup.zap

Generate checksum for the .zap or .ap project file
certutil -hashfile "C:\Backups\Siemens_Project.ap" SHA256
Step-by-step guide: This provides a quick, external method to validate the integrity of the project backup file itself before even opening it in TIA Portal, preventing the use of corrupted archives.
4. Simulating a Historian Database Recovery
OT historians contain critical process data. Their recovery is complex and must be tested.
SQL Commands for OSIsoft PI Historian Recovery Validation:
-- Connect to the restored PI Database
-- Check the last recorded data point for a critical tag
SELECT TOP 1 tag, time, value, valueisgood
FROM piarchive..picomp2
WHERE tag = 'SINUSOID' AND valueisgood = 1
ORDER BY time DESC;

-- Verify the count of points ingested in the last hour to check data flow
SELECT COUNT()
FROM piarchive..picomp2
WHERE time > DATEADD(hour, -1, GETDATE());
Step-by-step guide: After restoring a PI Database from a backup, these SQL queries help validate that the restoration was successful. The first confirms you can access recent, valid data for a specific tag. The second checks that the data ingestion process has resumed, indicating a healthy historian.
5. Hardening the Recovery Environment Itself
The systems used for recovery (engineering workstations, jump hosts) must be more secure than the production environment to prevent them from becoming an attack vector.
Linux: Auditing User and Sudo Access on a Recovery Jump Host
 List all users with a login shell (potential access)
grep -v "/nologin|/false" /etc/passwd

Audit sudo privileges for all users
grep -Po '^[^]\w+:' /etc/sudoers /etc/sudoers.d/ 2>/dev/null | cut -d: -f2 | sort -u

Check for failed login attempts (indication of brute-force)
lastb -a -n 20
Step-by-step guide: Regularly run these commands on your recovery infrastructure. Limit users with shell access to only those absolutely necessary and regularly review sudo rules to adhere to the principle of least privilege.
Windows: Hardening an Engineering Workstation with Local Policy
 Force a group policy update to apply the latest security settings
gpupdate /force

Check the status of key security-related services
Get-Service | Where-Object { $<em>.Name -like "WinDefend" -or $</em>.Name -like "EventLog" -or $_.Name -eq "RemoteRegistry" }

Disable the obsolete and dangerous SMBv1 protocol
Set-SmbServerConfiguration -EnableSMB1Protocol $false -Force
Step-by-step guide: These commands ensure your recovery workstations are pulling the latest security policies, that critical services like antivirus and logging are running, and that known-vulnerable protocols are disabled.
6. Automating Recovery Pre-Checks with Scripts
Automation reduces human error during the high-stress recovery process.
Windows PowerShell: Pre-Recovery System Health Check
 Script to check disk space, service status, and network connectivity
$drive = Get-PSDrive -Name C
if ($drive.Free -lt 10GB) { Write-Warning "Low disk space on C: drive!" }

$services = @("Spooler", "WinRM")
foreach ($service in $services) {
if ((Get-Service -Name $service).Status -ne 'Running') {
Write-Warning "Service $service is not running."
}
}

Test-NetConnection -ComputerName 192.168.1.50 -Port 44818  Test AB EtherNet/IP
Step-by-step guide: Run this script on a restored HMI or engineering station before placing it back into service. It performs basic health checks to prevent a recovery failure due to simple issues like a full disk or a stopped service.
What Undercode Say:
- A Plan Untested is a Plan Failed. The complexity of OT systems means theoretical recovery steps will inevitably miss undocumented dependencies, leading to catastrophic failure during a real incident.
- Recovery is a Live Security Operation. The process itself is a target. Hardening the recovery infrastructure and validating the integrity of every restored component is as important as the restoration act.
The gap between a backup and a recovered state of control is vast, filled with technical debt and silent failures. The community post highlights a brutal truth: what you call a “plan” is often just a collection of untested hypotheses. Our technical analysis shows that successful recovery hinges on relentless, automated validation at every step—from checksums to control logic. Without embedding these verification commands into your drills, you are not practicing recovery; you are merely rehearsing for a collapse.
Prediction:
Within the next 18-24 months, we will see a major industrial incident not caused by the initial cyber-attack itself, but by the failed and rushed recovery attempt that follows. This will force regulators to mandate not just the existence of recovery plans, but proven, regularly demonstrated technical capabilities, making OT recovery drills as standardized and critical as safety shutdown tests.
🎯Let’s Practice For Free:
IT/Security Reporter URL:
Reported By: Otsecurityprofessionals Otsecprotip – Hackers Feeds
Extra Hub: Undercode MoN
Basic Verification: Pass ✅


