Listen to this Post
Introduction:
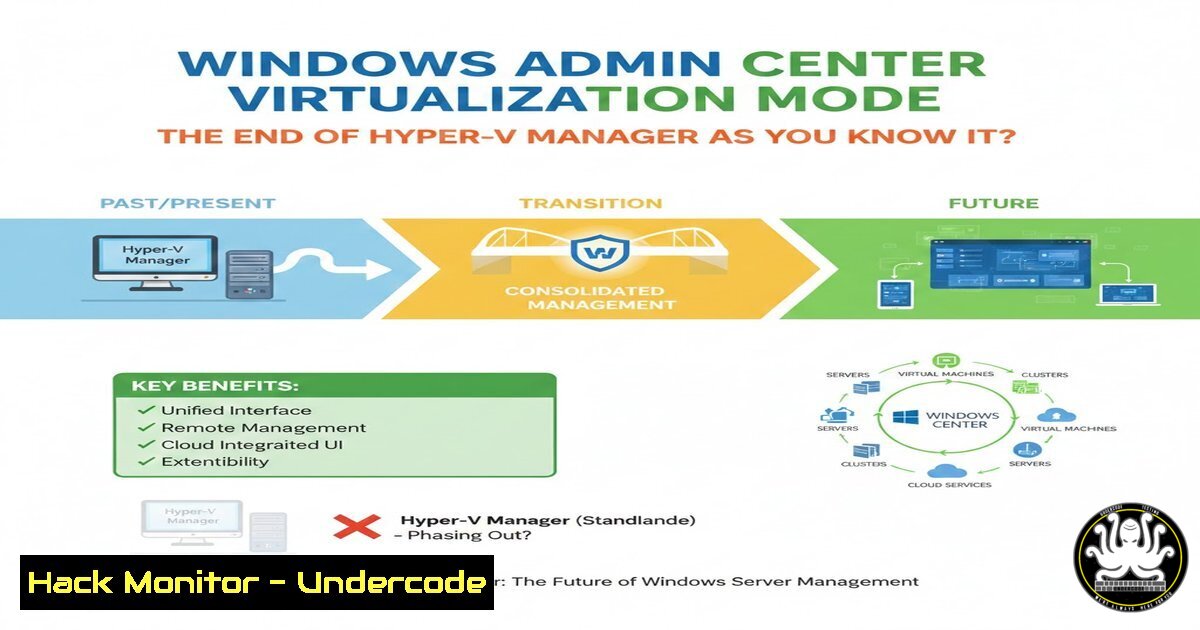
Microsoft is revolutionizing Hyper-V management with the introduction of a dedicated Virtualization Mode in the Windows Admin Center (WAC). This new, purpose-built interface is designed to provide a centralized, streamlined, and powerful management fabric for your on-premises, hybrid, and Azure Stack HCI hyper-converged infrastructures. Moving beyond the legacy Hyper-V Manager, this tool represents a significant step towards a unified administrative experience for modern data centers.
Learning Objectives:
- Understand the core architecture and deployment methods for Windows Admin Center Virtualization Mode.
- Learn how to perform essential virtualization tasks like VM creation, migration, and resource optimization within the new interface.
- Grasp the security and access control model to harden your virtualization management fabric.
You Should Know:
1. Architecture and Deployment: Beyond the Legacy Console
The Windows Admin Center Virtualization Mode is not a simple plugin; it’s a dedicated operational mode for the WAC gateway. It provides a centralized pane of glass for managing multiple Hyper-V hosts and clusters, replacing the need to connect individually to each server via Hyper-V Manager. It can be deployed either as a gateway on a Windows Server or as a lightweight, containerized solution on an Azure Stack HCI cluster.
Step-by-step guide:
Step 1: Install Windows Admin Center. Download the latest version from the Microsoft website. The installation is straightforward.
 Example: Installing WAC via command line (if using an MSI)
Msiexec /i WindowsAdminCenter.msi /qn SSL_CERTIFICATE_OPTION=generate
Step 2: Access and Configure the Gateway. Navigate to `https://
Step 3: Add Hyper-V Hosts and Clusters. Within the WAC dashboard, use the “Add” function to register your Hyper-V hosts or failover clusters using appropriate credentials. This centralizes all managed entities.
Step 4: Switch to Virtualization Mode. Once your hosts are added, you can access the dedicated Virtualization Mode interface to see a unified view of your entire virtualization environment.
2. Centralized VM Lifecycle Management
This mode consolidates all virtual machine operations. From a single web interface, you can create, start, stop, connect to, and delete VMs across any managed host or cluster. This eliminates the context-switching required when using the standalone Hyper-V Manager.
Step-by-step guide:
Step 1: Navigate to the “Virtual Machines” tab. This presents a consolidated list of all VMs across all managed hosts.
Step 2: Create a New Virtual Machine. Click “Add” and follow the guided workflow to specify VM name, generation, memory, network, and virtual hard disk. You can create a new VHDX, use an existing one, or attach an ISO for installation.
Step 3: Perform Live Migrations. Right-click a running VM and select “Move”. The wizard will guide you through selecting a destination host (within a cluster or with shared storage) for a seamless live migration with minimal downtime.
3. Enhanced Networking and Storage Configuration
Virtualization Mode provides deep visibility and control over virtual switches and storage. You can create, modify, and remove virtual switches (Standard or Hyper-V Virtual Switch) and manage VM storage, including VHDX files and their paths, from the central console.
Step-by-step guide:
Step 1: Access Host Settings. Select a Hyper-V host from your inventory, not a specific VM.
Step 2: Navigate to “Virtual Switches”. Here you can view existing vSwitches and create new ones. For instance, creating an internal switch for host-VM communication.
Step 3: Create a New Virtual Switch. Click “New”, provide a name, select the type (External, Internal, Private), and bind it to the correct physical network adapter if creating an external switch.
4. Performance Monitoring and Resource Optimization
The interface includes integrated tools for monitoring the real-time performance of both hosts and VMs. You can track key metrics like CPU usage, memory demand, network throughput, and disk I/O, allowing for proactive resource management and bottleneck identification.
Step-by-step guide:
Step 1: Select a Resource to Monitor. Click on either a host or a specific VM from the inventory list.
Step 2: Navigate to the “Performance” tab. This will display live graphs of critical performance counters.
Step 3: Adjust VM Resources. Based on performance data, you can dynamically adjust a VM’s resource allocation (e.g., memory, virtual processor count) by going to the VM’s “Settings” and modifying the corresponding hardware entry, even while the VM is running.
5. Security Hardening and Role-Based Access Control (RBAC)
A critical advantage of WAC is its robust security model. It leverages Role-Based Access Control (RBAC) to delegate permissions precisely, ensuring administrators have only the access they need. This is a significant improvement over the all-or-nothing approach often associated with direct RDP access to hosts.
Step-by-step guide:
Step 1: Configure Gateway Access. In WAC settings, define which Active Directory users or groups can connect to the gateway and with what roles (e.g., Gateway Administrators, Gateway Users).
Step 2: Define Resource Groups. Create logical groups for your servers (e.g., “Production-Cluster-A”, “Development-Hosts”).
Step 3: Assign Granular Permissions. Use the “Access” tab for a resource group to assign specific roles (like “Hyper-V Administrator” or “VM Operator”) to users/groups, scoping their control to only those resources.
6. Disaster Recovery and Resiliency Features
The tool integrates deeply with Hyper-V resiliency features. You can easily configure and manage Hyper-V Replica, enabling asynchronous replication of VMs to a secondary host for disaster recovery purposes, all from within the web interface.
Step-by-step guide:
Step 1: Enable Replication on a Host. On the designated Replica server, use Hyper-V settings (accessible via WAC) to enable it as a Replica server and specify authentication methods.
Step 2: Configure VM for Replication. Right-click a VM on the primary host, select “Enable Replication”, and follow the wizard to specify the Replica server, authentication parameters, and recovery history settings (e.g., additional snapshots).
Step 3: Test Failover. You can perform a test failover on the Replica server to validate the DR process without impacting the primary VM.
7. Scripting and Automation Integration
For advanced scenarios and automation, WAC’s PowerShell scripting extension allows you to run scripts directly against managed nodes. This bridges the gap between the GUI and the power of PowerShell Desired State Configuration (DSC) and other automation frameworks.
Step-by-step guide:
Step 1: Install the “PowerShell” tool extension in WAC if not already present.
Step 2: Select a target server or VM.
Step 3: Open the PowerShell tool. This provides an interactive console where you can run commands. For example, to get a list of all VMs on a host:
Get-VM -ComputerName "Hyper-V-Host-01"
Or to create a new VM via script:
New-VM -Name "NewWebServer" -MemoryStartupBytes 4GB -Path "D:\VMs" -NewVHDPath "D:\VHDs\NewWebServer.vhdx" -NewVHDSizeBytes 127GB
What Undercode Say:
- Centralization is King: WAC Virtualization Mode is Microsoft’s definitive answer to fragmented management, pushing administrators towards a single, web-based control plane that is essential for hybrid cloud operations.
- The GUI is a Gateway to Automation: While providing a rich GUI, the deep integration with PowerShell and scripts ensures that this tool empowers, rather than replaces, infrastructure-as-code and automated workflows.
This shift signifies the phasing out of legacy, MMC-based tools like Hyper-V Manager. By embedding management into a secure, centrally accessible web service, Microsoft is aligning on-premises virtualization with cloud operational models. The focus on RBAC and granular permissions directly addresses modern security concerns, making it a more enterprise-ready platform than its predecessor. The ability to manage both Azure Stack HCI and traditional Hyper-V from the same interface is a clear indicator of Microsoft’s “hybrid first” strategy.
Prediction:
The introduction and continued refinement of Windows Admin Center Virtualization Mode will accelerate the retirement of the standalone Hyper-V Manager. Future development will likely focus on deeper Azure Arc integration, allowing on-premises Hyper-V environments to be managed directly from the Azure portal, blurring the lines between on-prem and cloud even further. AI-powered operations (AIOps) for predictive resource scaling and failure analysis will become native features within this management layer, making the virtualization fabric fundamentally more self-healing and autonomous.
🎯Let’s Practice For Free:
IT/Security Reporter URL:
Reported By: Orin Thomas – Hackers Feeds
Extra Hub: Undercode MoN
Basic Verification: Pass ✅


