
Listen to this Post
Introduction:
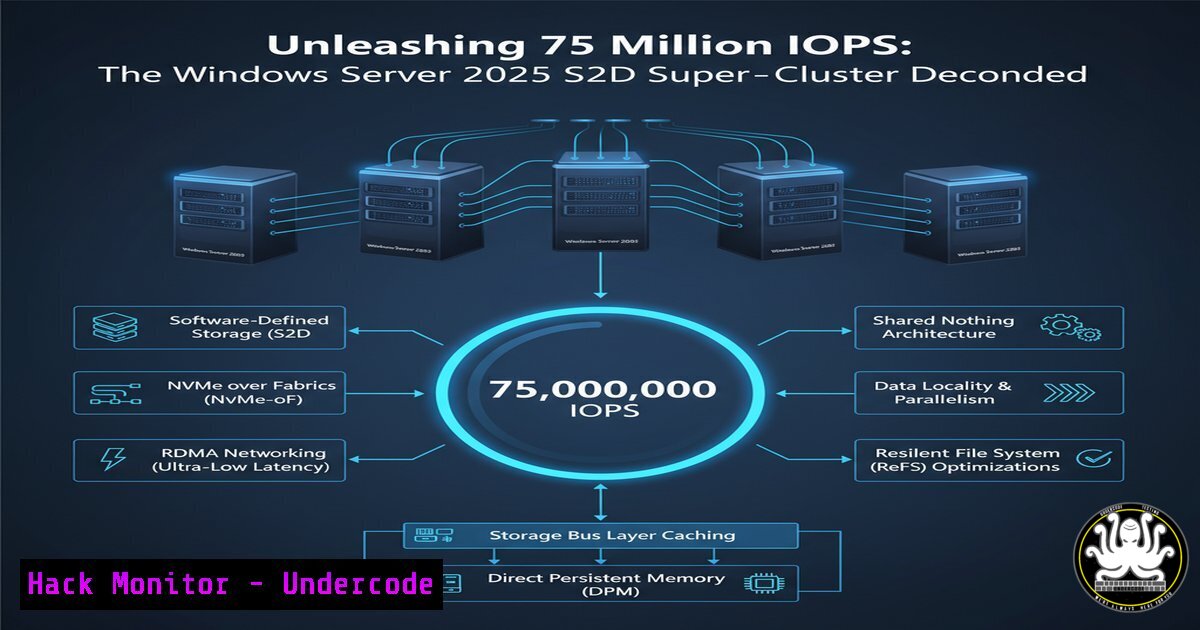
A recent performance test of a Windows Server 2025 Hyper-Converged Infrastructure (HCI) cluster has demonstrated a staggering 7.5 million IOPS using Storage Spaces Direct (S2D). This breakthrough, achieved with an 8-node Dell infrastructure, showcases the enterprise-grade power of the same technology underpinning Azure’s cloud services, signaling a new era for on-premises data center capabilities.
Learning Objectives:
- Understand the core components and architecture of a high-performance S2D cluster.
- Learn the essential PowerShell commands for deploying, managing, and validating an S2D environment.
- Master performance testing and monitoring techniques using tools like VMFleet and built-in PowerShell cmdlets.
You Should Know:
1. Validating Cluster Health and Configuration
Before diving into performance tuning, a foundational step is to validate the health and configuration of your failover cluster and Storage Spaces Direct. These commands provide a snapshot of your system’s readiness.
 Get the current state of the Failover Cluster
Get-Cluster

Display the health status of all cluster nodes
Get-ClusterNode | Format-List Name, State

Retrieve the Storage Spaces Direct cluster configuration
Get-ClusterS2D

List all physical disks in the Storage Spaces Direct pool
Get-PhysicalDisk | Select-Object FriendlyName, SerialNumber, HealthStatus, Size, MediaType
Step-by-step guide:
Begin by opening Windows PowerShell with administrative privileges. The `Get-Cluster` command provides a high-level overview of your cluster’s status. Following this, `Get-ClusterNode` enumerates all nodes, confirming they are in the “Up” state. The most critical command, Get-ClusterS2D, confirms that S2D is enabled and reports on the cache and capacity configuration. Finally, `Get-PhysicalDisk` allows you to verify that all NVMe drives are recognized, healthy, and correctly identified as the `MediaType` “SSD”.
- Creating and Managing Storage Pools and Virtual Disks
S2D automatically creates a storage pool, but understanding the manual process and virtual disk management is crucial for troubleshooting and advanced scenarios.
 View the automatically created S2D storage pool (Read-Only)
Get-StoragePool -IsPrimordial $false | Get-StorageReliabilityCounter

Create a new Virtual Disk (Volume) on the S2D pool
New-Volume -FriendlyName "HighPerfVolume" -FileSystem CSVFS_ReFS -StoragePoolFriendlyName "S2D" -Size 1TB

Retrieve all virtual disks and their properties
Get-VirtualDisk | Select-Object FriendlyName, Size, HealthStatus, ResiliencySettingName

Set the file system integrity (checksums) for an ReFS volume (Optimizes for VMs)
Set-FileIntegrity -FileName "C:\ClusterStorage\HighPerfVolume\" -Enable $false
Step-by-step guide:
After S2D is enabled, a storage pool is created automatically. Use `Get-StoragePool` to inspect it. To provision storage, the `New-Volume` cmdlet is your primary tool. Specify a friendly name, choose the CSVFS_ReFS filesystem for optimal performance and data integrity, and target the S2D pool. The `Get-VirtualDisk` command then lists all created volumes. For maximum performance with virtual machine workloads, disable file integrity on the ReFS volume using Set-FileIntegrity, as this reduces write overhead.
3. Network Configuration with Network ATC
Network ATC (Automatic Template Creator) simplifies the complex network provisioning required for S2D, ensuring consistency across all cluster nodes for management, compute, and storage traffic.
 Define the intent for your cluster network configuration
$Intent = @(
@{ Name = "Management"; Type = "Management" }
@{ Name = "Compute"; Type = "Compute" }
@{ Name = "Storage"; Type = "Storage" }
)

Deploy the network configuration intent to the cluster
Add-NetworkIntent -Cluster "S2DCluster" -Name "S2D_Network_Config" -Intent $Intent

Check the provisioning status of Network ATC
Get-NetworkIntentStatus -Cluster "S2DCluster" -Name "S2D_Network_Config"

Manually trigger synchronization if needed
Sync-NetworkIntent -Cluster "S2DCluster" -Name "S2D_Network_Config"
Step-by-step guide:
Network ATC abstracts the complexity of Software Defined Networking (SDN) for S2D. First, define your network intent in a PowerShell variable, specifying the roles for your physical network adapters (e.g., two 25GbE for Storage). The `Add-NetworkIntent` command pushes this configuration to the entire cluster. Use `Get-NetworkIntentStatus` to monitor the deployment progress across nodes, which should eventually report a “Success” state. `Sync-NetworkIntent` can remediate configuration drift.
4. Performance Testing with VMFleet
VMFleet is the industry-standard tool for simulating high-intensity storage workloads on a Windows HCI cluster, as used in the 7.5M IOPS benchmark.
 Download and initialize the VMFleet toolkit (run on one node)
Initialize-VMFleet

Start a synthetic I/O workload (Example: 8 threads, 16K blocks, 100% Read)
Start-VMFleet -IoThreads 8 -BlockSize 16KB -ReadPercentage 100

Monitor the real-time IOPS and latency performance
Get-VMFleetMetrics

Stop all running VMFleet tests
Stop-VMFleet
Step-by-step guide:
VMFleet is not a built-in cmdlet but a separate toolkit that must be deployed. After initialization, `Start-VMFleet` is used to generate load. The parameters are critical: `-IoThreads` controls the number of simultaneous I/O operations, `-BlockSize` (4K, 8K, 16K) mimics different application workloads, and `-ReadPercentage` defines the mix. While the test runs, `Get-VMFleetMetrics` provides a live dashboard of IOPS, throughput (MB/s), and latency. Always use `Stop-VMFleet` to conclude testing and clean up resources.
5. Advanced Performance Monitoring with Cluster-Aware Updating
High IOPS can expose bottlenecks. These commands help you monitor system resources to identify if you are constrained by CPU, network, or disk.
 Get live performance counters for Storage Spaces Direct
Get-ClusterPerf -VolumeName "S2D"

Monitor cluster shared volume I/O latency
Get-ClusterPerf -ClusterNode "Node01" -MetricName "Avg. Disk sec/Read", "Avg. Disk sec/Write"

Check for physical disk latency and backlog
Get-PhysicalDisk | Get-StorageReliabilityCounter | Select-Object DeviceId, ReadLatencyMax, WriteLatencyMax, Temperature

Analyze network interface throughput and errors
Get-NetAdapterStatistics -Name "StorageNic1", "StorageNic2" | Select-Object Name, ReceivedBytes, SentBytes, ReceivedPacketsWithErrors
Step-by-step guide:
Continuous monitoring is key. `Get-ClusterPerf` is your first stop for aggregate cluster performance data. To drill down, target specific nodes and latency metrics. The `Get-StorageReliabilityCounter` cmdlet provides deep physical disk telemetry, including maximum latencies and health data like temperature, which can throttle performance. Simultaneously, monitor your dedicated storage network adapters with `Get-NetAdapterStatistics` to ensure you are not hitting bandwidth limits or experiencing packet errors that could degrade performance.
6. Security Hardening for the S2D Cluster
A high-performance cluster is a high-value target. Implementing core security practices is non-negotiable.
 Enable Windows Defender Antivirus exclusions for S2D and Hyper-V (Critical for performance)
Add-MpPreference -ExclusionPath "C:\ClusterStorage\"
Add-MpPreference -ExclusionProcess "vmwp.exe"

Verify the SMB Signing configuration for intra-cluster communication
Get-SmbServerConfiguration | Select-Object EnableSMB1Protocol, RequireSecuritySignature

Harden the SMB settings (Run on each node)
Set-SmbServerConfiguration -EnableSMB1Protocol $false -RequireSecuritySignature $true -Confirm:$false

Check the firewall status for core cluster services
Get-NetFirewallRule -DisplayName "File and Printer Sharing" | Where-Object {$_.Enabled -eq 'True'}
Step-by-step guide:
Security configuration begins with performance in mind. Antivirus real-time scanning can cripple storage performance, so exclusions for the cluster storage path and Hyper-V processes are essential using Add-MpPreference. For communication security, ensure that the outdated and insecure SMB1 protocol is disabled and that SMB signing is required using the `Set-SmbServerConfiguration` cmdlet. Finally, audit the Windows Firewall rules to ensure that only the necessary ports for clustering and SMB are open.
7. Disaster Recovery and Data Integrity
Protecting your data involves more than just performance. These commands help you validate data integrity and prepare for failure scenarios.
 Initiate a data rebalance across the cluster (e.g., after adding a new node)
Start-StorageRebalance -CimSession "S2DCluster"

Check the operational status and repair history of storage spaces
Get-StorageJob

Perform a repair operation on the ReFS file system
Repair-FileSystem -FileName "C:\ClusterStorage\HighPerfVolume\" -Scan

Test the failover resilience of a virtual machine
Move-VM -Name "TestVM" -DestinationNode "Node02"
Step-by-step guide:
Proactive maintenance ensures longevity. The `Start-StorageRebalance` command redistributes data evenly across all nodes, which is vital for maintaining performance after scaling the cluster. Use `Get-StorageJob` to monitor background storage tasks like repairs and rebalancing. Periodically, run a repair scan on your ReFS volumes to correct any latent corruption. Finally, regularly test your cluster’s resilience by live-migrating VMs between nodes with `Move-VM` to ensure failover works as expected.
What Undercode Say:
- The Bottleneck Has Shifted: The revelation that CPU and network, not storage media, were the limiting factors in a 7.5M IOPS test is the single most important takeaway. This signifies a fundamental change in data center design priorities, forcing architects to invest equally in high-core-count processors and low-latency, high-throughput networking (e.g., 25/100GbE) to fully utilize NVMe storage.
- Democratizing Azure-Grade Performance: The fact that this technology stack (S2D, Network ATC) is available in a standard Windows Server SKU effectively brings Azure’s core infrastructure to on-premises and hybrid deployments. This blurs the line between cloud and local datacenters, empowering organizations to build “Azure Local” environments that offer consistent performance, management, and application compatibility.
This performance benchmark is not just a number; it’s a validation of the hyper-converged vision. It proves that with the correct implementation of Windows Server 2025’s integrated software stack, organizations can achieve cloud-scale performance without proprietary hardware lock-in. The use of standardized Dell servers and generic NVMe drives underscores a move towards commoditized hardware powered by intelligent software.
Prediction:
The proven capability of Windows Server 2025 S2D will accelerate the adoption of hyper-converged infrastructure in performance-sensitive sectors like financial trading, real-time analytics, and high-density VDI, directly competing with specialized proprietary solutions. Furthermore, this performance parity with the public cloud will act as a catalyst for the “Hybrid by Default” model, where workloads dynamically span on-premises S2D clusters and Azure services based on policy, cost, and latency requirements, rather than technical limitation. We predict the next major performance barrier will be broken not by storage hardware, but by the integration of DPU (Data Processing Unit) technology to offload the identified CPU and network bottlenecks directly into the server fabric.
🎯Let’s Practice For Free:
IT/Security Reporter URL:
Reported By: Kbisnett911 Microsoft – Hackers Feeds
Extra Hub: Undercode MoN
Basic Verification: Pass ✅


