
Listen to this Post
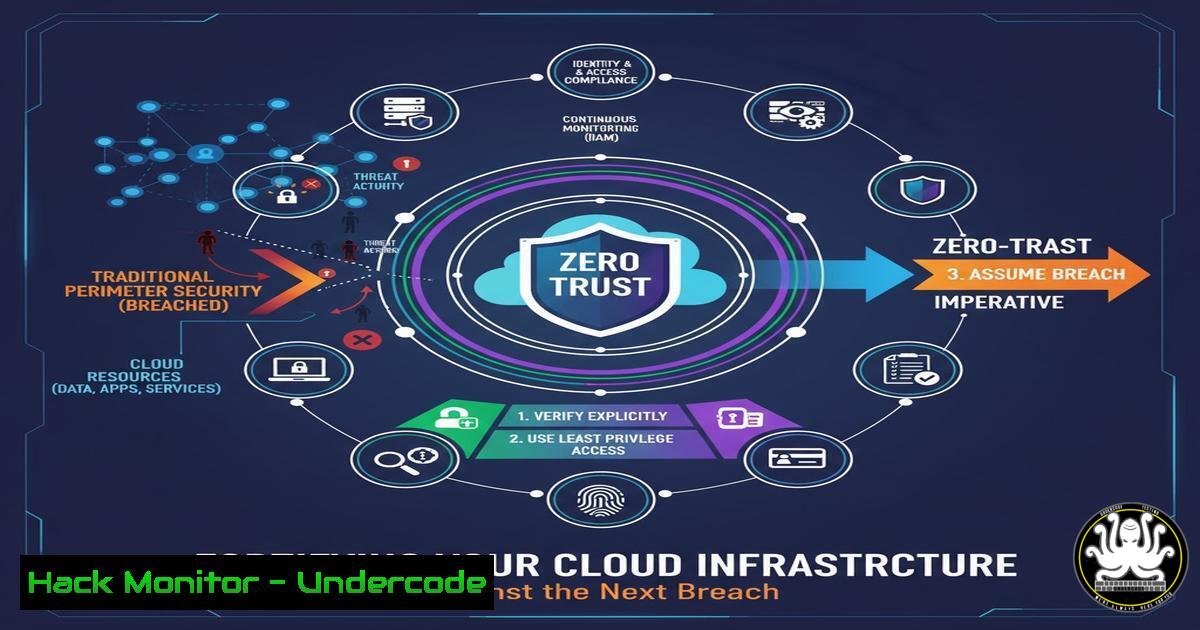
Introduction:
The traditional security model of a hardened perimeter and implicit internal trust is obsolete in the era of cloud-native development and sophisticated supply chain attacks. Adopting a Zero-Trust Architecture (ZTA) is no longer a forward-thinking strategy but a critical necessity for protecting sensitive data and applications. This article provides a tactical guide to implementing core Zero-Trust principles, moving beyond theory into actionable command-level configurations.
Learning Objectives:
- Understand and implement the core tenets of Zero-Trust: explicit verification, least-privileged access, and assume-breach.
- Configure key technologies like Identity and Access Management (IAM), network segmentation, and logging.
- Apply hardening techniques across cloud platforms (AWS, Azure) and operating systems.
You Should Know:
1. The Principle of Least Privilege in IAM
The foundation of Zero-Trust is granting only the permissions absolutely necessary for a task. Over-permissive IAM roles are a primary attack vector.
Verified AWS IAM Policy (JSON):
{
"Version": "2012-10-17",
"Statement": [
{
"Effect": "Allow",
"Action": [
"s3:GetObject",
"s3:ListBucket"
],
"Resource": [
"arn:aws:s3:::secure-data-bucket/",
"arn:aws:s3:::secure-data-bucket"
]
}
]
}
Step-by-step guide:
- This policy explicitly allows two actions: `ListBucket` and
GetObject. - It restricts these actions to a specific S3 bucket resource (
secure-data-bucket), preventing access to any other services or buckets. - Attach this policy to a user or role instead of using broad, pre-existing policies like
AmazonS3FullAccess.
Verified Azure PowerShell Command:
 Get the specific role definition for a "Virtual Machine Contributor"
$role = Get-AzRoleDefinition -Name "Virtual Machine Contributor"
 Assign the role to a user for a specific resource group only
New-AzRoleAssignment -ObjectId <UserObjectId> -RoleDefinitionId $role.Id -ResourceGroupName "Prod-RG"
Step-by-step guide:
- Use `Get-AzRoleDefinition` to retrieve the exact permissions of a built-in role.
- The `New-AzRoleAssignment` cmdlet scopes that role to a specific resource group (
Prod-RG), preventing the user from managing VMs in any other resource group.
2. Micro-Segmentation with Network Security Groups
Assume your network is already compromised. Micro-segmentation limits lateral movement by controlling traffic between workloads.
Verified Azure CLI Command:
 Create a Network Security Group (NSG)
az network nsg create --resource-group Prod-RG --name App-Tier-NSG
 Create a rule that allows HTTP traffic ONLY from the Web Tier NSG
az network nsg rule create --resource-group Prod-RG --nsg-name App-Tier-NSG --name Allow-WebTier-HTTP --priority 100 --source-address-prefixes 10.0.1.0/24 --destination-address-prefixes 10.0.2.0/24 --destination-port-ranges 80 --protocol Tcp --access Allow
Step-by-step guide:
- The `az network nsg create` command establishes a new security group.
- The `az network nsg rule create` command adds a rule that explicitly allows TCP traffic on port 80.
- Crucially, the `–source-address-prefixes` is set to the subnet of the web tier (
10.0.1.0/24), and the `–destination-address-prefixes` is set to the app tier subnet (10.0.2.0/24). This denies all other traffic, including internal scans.
3. Enforcing Multi-Factor Authentication (MFA)
Passwords are a single point of failure. MFA is a non-negotiable control for all users, especially privileged administrators.
Verified Microsoft 365 PowerShell Command:
 Create a new Conditional Access policy requiring MFA for all users
New-CsConditionalAccessPolicy -PolicyName "Require MFA for All Cloud Apps" -State Enabled -Applications All -Users All -UserActions All -Conditions All -AccessControls RequireMfa
Step-by-step guide:
- This command uses the `New-CsConditionalAccessPolicy` cmdlet to create a comprehensive policy.
- The parameters `-Applications All -Users All -UserActions All` ensure the policy applies universally.
- The `-AccessControls RequireMfa` setting blocks access unless the user completes an MFA challenge.
4. System Hardening with CIS Benchmarks
Hardened operating systems reduce the attack surface. The CIS Benchmarks provide consensus-based best practices.
Verified Linux Command (Audit):
 Check the password aging policy for users (CIS Benchmark 5.4.1.1)
sudo chage -l root
 Check if unnecessary services like FTP are running (CIS Benchmark 2.2.16)
systemctl is-enabled ftp
 Verify permissions on /etc/passwd are 644 (CIS Benchmark 6.1.2)
ls -l /etc/passwd
Step-by-step guide:
1. `chage -l root` displays the password expiration settings for the root account, ensuring it’s configured.
2. `systemctl is-enabled ftp` checks if the insecure FTP service is enabled; it should return ‘disabled’ or ‘masked’.
3. `ls -l /etc/passwd` should show -rw-r--r--, preventing unauthorized writes.
Verified Windows Command (PowerShell):
 Check the status of Windows Defender Antivirus (CIS Benchmark 18.9.4.1)
Get-MpComputerStatus
 Audit the local firewall profile settings (CIS Benchmark 9.1.1)
Get-NetFirewallProfile | Format-Table Name, Enabled
Step-by-step guide:
1. `Get-MpComputerStatus` confirms that real-time protection and other Defender features are active.
2. `Get-NetFirewallProfile` outputs the status of the Domain, Private, and Public firewall profiles. All should be ‘True’.
5. Exploiting and Mitigating Command Injection
Understanding common vulnerabilities is key to mitigating them. Command injection remains a prevalent threat.
Vulnerable Python Code Snippet:
import os
hostname = user_supplied_input  e.g., "google.com; rm -rf /"
os.system("ping -c 4 " + hostname)  This is dangerous!
Step-by-step guide (The Exploit):
- The `os.system` call blindly concatenates user input into a shell command.
- An attacker can supply input like `google.com; rm -rf /` to terminate the intended command and execute a malicious one.
Verified Mitigation (Python using subprocess):
import subprocess
hostname = user_supplied_input  e.g., "google.com"
try:
 Use subprocess.run with a list of arguments to avoid shell injection
result = subprocess.run(["ping", "-c", "4", hostname], capture_output=True, text=True, timeout=10)
print(result.stdout)
except subprocess.TimeoutExpired:
print("Request timed out")
Step-by-step guide (The Mitigation):
- The `subprocess.run` function is called with a list of arguments, not a string.
- The shell is never invoked, so metacharacters like `;` and `&` have no special meaning.
- A `timeout` is added to prevent denial-of-service attacks.
6. Proactive Logging and Threat Hunting
Assuming a breach means actively looking for one. Centralized logging and specific queries are essential.
Verified KQL (Azure Sentinel) Query for Brute Force Attacks:
SigninLogs
| where ResultType == "50125" // Invalid credentials
| summarize FailedAttempts = count(), IPAddresses = makeset(IPAddress) by UserPrincipalName, bin(TimeGenerated, 15m)
| where FailedAttempts > 5
| sort by FailedAttempts desc
Step-by-step guide:
- This query filters the `SigninLogs` table for failed sign-ins (ResultType 50125).
- It summarizes the events, counting failures and collecting the source IPs per user in 15-minute bins.
- Finally, it filters for bins with more than 5 failures, highlighting potential brute-force attacks.
7. Secret Management with Vaults
Hard-coded API keys and passwords in source code are a severe security anti-pattern.
Verified Terraform Configuration for AWS Secrets Manager:
resource "aws_secretsmanager_secret" "database_credentials" {
name = "prod/database/app-user"
}

resource "aws_secretsmanager_secret_version" "creds" {
secret_id = aws_secretsmanager_secret.database_credentials.id
secret_string = jsonencode({
username = var.db_username
password = var.db_password
})
}

Application retrieves secret dynamically
data "aws_secretsmanager_secret_version" "current" {
secret_id = aws_secretsmanager_secret.database_credentials.id
}
Step-by-step guide:
1. The `aws_secretsmanager_secret` resource defines a secret store.
- The `aws_secretsmanager_secret_version` resource stores the actual credentials, which are passed via variables, not hard-coded.
- The application uses the `data` block to retrieve the latest secret version at runtime, eliminating hard-coded secrets from the infrastructure code.
What Undercode Say:
- Identity is the New Perimeter. The most critical attacks pivot on compromised credentials, not network flaws. Investing in robust IAM and MFA yields a higher security ROI than any next-gen firewall.
- Assume Breach, Minimize Blast Radius. The goal is not to prevent 100% of intrusions but to make them expensive and short-lived. Micro-segmentation and least privilege are the keys to containment, rendering a compromised account or server nearly useless to an attacker.
The shift to Zero-Trust is a fundamental architectural and cultural change. It moves security from a static, perimeter-based gatekeeping function to a dynamic, identity-centric, and data-focused practice. While the initial configuration overhead seems high, the automation and granular control it provides create a more resilient and auditable environment. The commands and code snippets provided are the building blocks; consistent application across your entire ecosystem is the ultimate defense.
Prediction:
The convergence of AI-powered code generation and software supply chains will be the next major attack frontier. We predict a significant rise in “AI-Enabled Supply Chain Poisoning,” where threat actors subtly manipulate training data or exploit prompt vulnerabilities in AI coding assistants to generate code with hidden backdoors. These vulnerabilities will be baked into open-source libraries and commercial software at an unprecedented scale, making manual code review insufficient. The Zero-Trust principle of explicit verification will have to extend to the software development lifecycle itself, requiring mandatory software bills of materials (SBOMs), automated binary analysis, and a “never trust, always verify” approach to third-party code, regardless of its origin.
🎯Let’s Practice For Free:
IT/Security Reporter URL:
Reported By: Dampes Salut – Hackers Feeds
Extra Hub: Undercode MoN
Basic Verification: Pass ✅


