
Listen to this Post
Introduction:
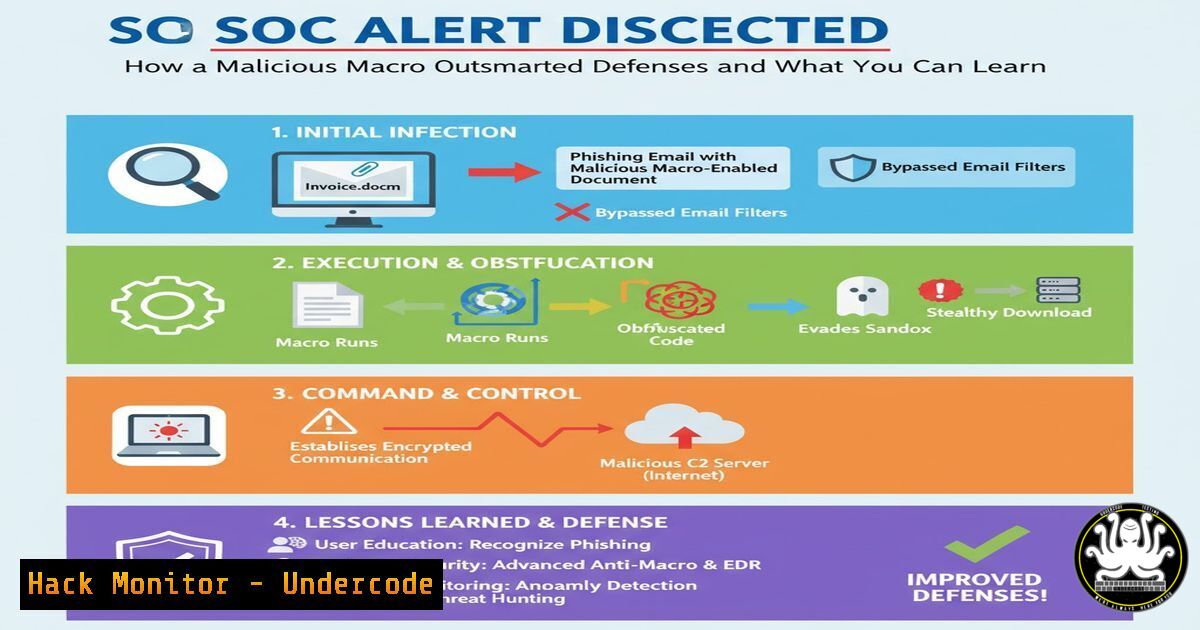
A recent SOC alert from a LetsDefend simulation provides a stark reminder of the persistent threat posed by malicious Microsoft Office macros. A single document, edit1-invoice.docm, acted as a Trojan downloader, successfully executing on an endpoint to perform reconnaissance, establish persistence, and communicate with a command-and-control (C2) server. This incident underscores the critical need for robust endpoint detection, granular logging, and analyst proficiency in dissecting attack chains.
Learning Objectives:
- Decode the step-by-step execution chain of a malicious macro attack.
- Identify and utilize key Windows event logs for forensic investigation.
- Apply practical commands to detect, analyze, and mitigate macro-based threats.
You Should Know:
- The Initial Infection Vector: Document with Malicious Payload
The attack begins with a socially engineered document. The `.docm` extension is key, indicating a macro-enabled document.
Command to Identify Suspicious Files:
`Get-ChildItem -Path C:\Users\ -Include .doc, .xls, .ppt -Recurse -Force | Where-Object {$_.Extension -match “m$”} | Select-Object FullName, Length, CreationTime`
Step-by-step guide: This PowerShell command recursively searches all user directories for Microsoft Office files, specifically filtering for those with an extension ending in “m” (like .docm, .xlsm), which are macro-enabled. It then displays the file path, size, and creation time, helping to quickly locate potential initial attack vectors for further analysis.
Command to Calculate File Hash:
`Get-FileHash -Path “C:\Users\LetsDefend\Downloads\edit1-invoice.docm” -Algorithm SHA256`
Step-by-step guide: Once a suspicious file is located, use this cmdlet to generate its SHA-256 hash. This hash is a unique fingerprint that can be used to check against threat intelligence platforms (like VirusTotal) to confirm maliciousness, as was the case here with 33 vendors flagging it.
2. Detecting Macro Execution with Windows Event Logs
When the user enables macros, Windows generates specific event logs. The key is Event ID 4688, which logs new process creation.
Command to Query for Process Creation Events:
`Get-WinEvent -FilterHashtable @{LogName=’Security’; ID=4688; StartTime=(Get-Date).AddHours(-1)} | Where-Object {$_.Message -like “winword.exe”} | Format-List`
Step-by-step guide: This command searches the Security log for all process creation events (4688) in the last hour and filters for those related to `winword.exe` (Microsoft Word). This helps pinpoint the exact moment the macro was executed and what child processes it spawned, which is critical for timeline reconstruction.
Command to Examine PowerShell Logs:
`Get-WinEvent -FilterHashtable @{LogName=’Microsoft-Windows-PowerShell/Operational’; ID=4104; StartTime=(Get-Date).AddHours(-1)} | Format-List -Property TimeCreated, Message`
Step-by-step guide: Malicious macros often use PowerShell as a next step. This command retrieves Script Block Logging events (ID 4104) from the PowerShell Operational log, which captures the actual code of the PowerShell scripts that were executed. This is invaluable for understanding the attacker’s intent.
3. Network-Based Threat Hunting
The macro initiated an outbound network connection to download a secondary payload. Identifying this communication is crucial for containment.
Command to Check for Established Connections:
`netstat -anob | findstr “ESTABLISHED”`
Step-by-step guide: Run from an elevated command prompt, this command lists all established network connections (-a), displays the executable involved (-b), in numeric form (-n), and filters for “ESTABLISHED” connections. It can reveal unauthorized processes communicating with external IPs, such as the C2 server 92.204.221.16.
Command to Block Malicious IP via Firewall:
`netsh advfirewall firewall add rule name=”Block C2 Server” dir=out remoteip=92.204.221.16 action=block`
Step-by-step guide: As an immediate containment measure, this command creates a new Windows Firewall rule to block all outbound traffic to the identified malicious IP address. This prevents further data exfiltration or communication with the C2.
4. Analyzing the Payload Delivery
The macro’s ultimate goal was to download and execute a secondary payload (messbox.exe).
Command to Simulate & Analyze the Download (Safety):
`curl -I –max-time 5 “http://www.greyhathacker.net/tools/messbox.exe”`
Step-by-step guide: From an isolated analysis machine, use `curl` with the `-I` (head) option to fetch only the HTTP headers of the suspected malicious URL. This can reveal information about the server without downloading the potentially dangerous file. The `–max-time` flag limits the connection time for safety.
Command to Hunt for Downloaded Files:
`Get-ChildItem -Path $env:USERPROFILE\Downloads, $env:TEMP -Recurse -Force -ErrorAction SilentlyContinue | Where-Object {$_.Name -like “messbox”}`
Step-by-step guide: This PowerShell command searches common user download and temporary directories for any file with “messbox” in its name, helping to confirm if the secondary payload successfully landed on the disk.
5. Endpoint Isolation and Containment
The alert noted the host was “contained via EDR.” While EDR tools automate this, understanding the manual process is vital.
Command to Isolate a Host from Network (Manual):
`netsh advfirewall firewall set allprofiles state on`
`netsh advfirewall set allprofiles firewallpolicy blockinbound,blockoutbound`
Step-by-step guide: These two commands form a manual containment strategy. The first ensures the Windows Firewall is enabled for all profiles. The second configures it to block all inbound and outbound traffic, effectively isolating the compromised machine from the network to prevent lateral movement or further C2 communication.
Command to Kill a Malicious Process:
`taskkill /IM “messbox.exe” /F`
Step-by-step guide: If the malicious process is identified and running, this command forcefully (/F) terminates the process by its image name (/IM). This is a critical step in stopping an active attack.
6. Proactive Defense: Disabling Macros via GPO
The most effective mitigation is to prevent macros from running in the first place.
Registry Key to Disable Macros (Group Policy):
`Path: Computer Configuration\Policies\Administrative Templates\Microsoft Word 2016\Word Options\Security\Trust Center`
`Policy: Disable all macros without notification`
Step-by-step guide: This is configured via Group Policy Editor (gpedit.msc). Navigate to the specified path and enable the policy “Disable all macros without notification.” This setting, when deployed across the enterprise, drastically reduces the attack surface by preventing users from enabling macros in documents from the internet.
7. Building Custom Detections
Go beyond default alerts by creating custom queries based on known attack patterns.
Sigma Rule for Macro-Spawned PowerShell:
title: Word Spawning PowerShell
logsource:
product: windows
service: security
detection:
selection:
EventID: 4688
ParentImage: '\WINWORD.EXE'
NewProcessName: '\powershell.exe'
condition: selection
Step-by-step guide: This is a Sigma rule, a generic signature format that can be converted for use in SIEMs like Splunk or Elasticsearch. It detects the specific behavior observed in this alert: a process creation event where the parent process is `WINWORD.EXE` and the child process is powershell.exe. Deploying such rules helps in early detection of similar attacks.
What Undercode Say:
- The Human Firewall is the Last Line of Defense. While technical controls to block macros are paramount, this attack relied on a user enabling content. Continuous, engaging security awareness training is non-negotiable to condition users against social engineering.
- Depth in Defense Trumps Single Solutions. The incident was caught because multiple layers (AV, EDR, logging) were in place. A defense-in-depth strategy, where the failure of one control (the user) is caught by another (EDR detecting the suspicious file and subsequent behavior), is the only reliable way to manage modern threats. The manual forensic steps demonstrated are the bedrock of effective incident response, allowing teams to understand the “how” and “why” to prevent recurrence.
Prediction:
The use of malicious macros will continue to evolve, becoming more targeted and obfuscated. We will see a rise in “living-off-the-land” techniques where macros leverage trusted system tools like `mshta.exe` or `rundll32.exe` for execution, making detection by traditional AV more difficult. Furthermore, attackers will increasingly use file-less malware techniques, where the macro writes payloads directly into memory without touching the disk, pushing the requirement for advanced EDR and behavioral analytics to the forefront of cybersecurity defense strategies. The arms race will shift from signature-based detection to anomaly-based behavioral analysis.
🎯Let’s Practice For Free:
IT/Security Reporter URL:
Reported By: Edukayky Letsdefend – Hackers Feeds
Extra Hub: Undercode MoN
Basic Verification: Pass ✅


