
Listen to this Post
Introduction:
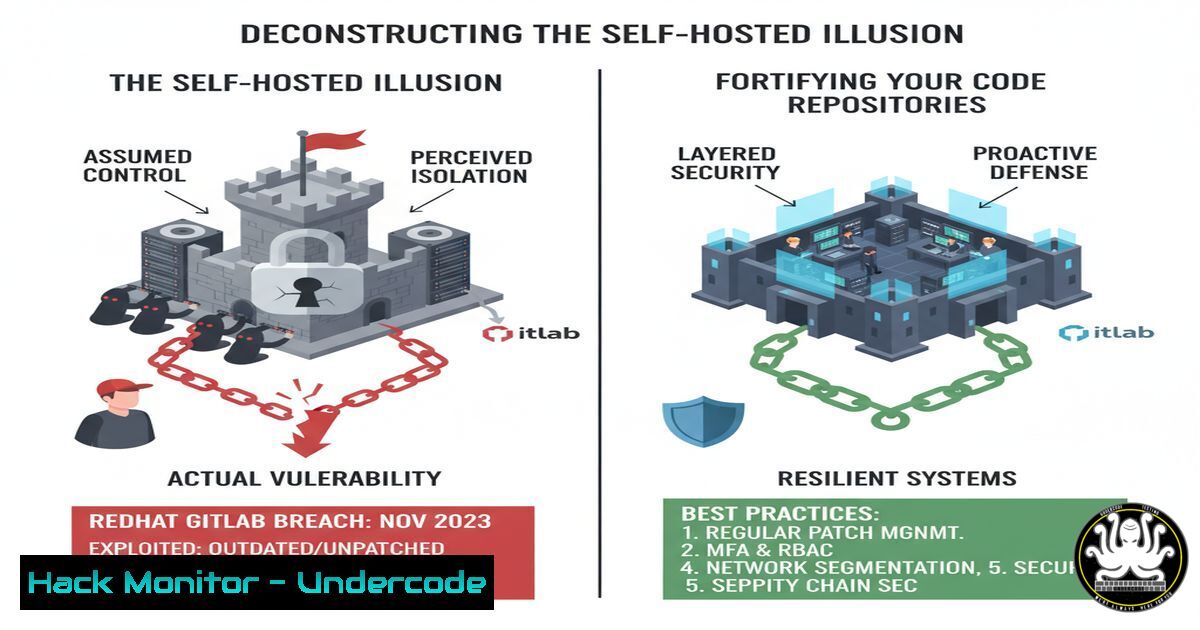
The recent compromise of a self-hosted RedHat GitLab instance, resulting in the exfiltration of 28,000 customer-related source code repositories, serves as a stark reminder that on-premise infrastructure is not inherently more secure than the cloud. This incident underscores a critical vulnerability in modern software supply chains: the management and hardening of self-managed development platforms. The breach exposed internal reports for over 800 customers, highlighting the catastrophic domino effect a single unsecured component can have on an entire ecosystem.
Learning Objectives:
- Understand the common misconfigurations and vulnerabilities that plague self-hosted GitLab instances.
- Learn critical commands and procedures to harden your GitLab deployment and secure your software supply chain.
- Develop a proactive strategy for monitoring, patching, and auditing your development infrastructure.
You Should Know:
1. Vulnerability and Patch Management
The root cause of many self-hosted breaches is a failure to apply timely updates. GitLab, like any complex software, regularly discloses critical vulnerabilities. Automating the discovery and application of patches is your first line of defense.
Verified Commands & Tutorials:
- Check for GitLab Updates (Omnibus):
sudo apt update && sudo apt list --upgradable | grep gitlab
This command checks for available package updates, filtering for GitLab specifically on Debian/Ubuntu systems.
-
Automate Security Updates (Ubuntu):
sudo dpkg-reconfigure -plow unattended-upgrades
This command configures automatic security updates, a crucial practice for any internet-facing service.
-
GitLab Version Check:
sudo gitlab-rake gitlab:env:info
This Rake task displays your current GitLab version and environment details, allowing you to compare it against the latest secure release.
Step-by-step guide:
Regularly review the GitLab Release Blog. Subscribe to security mailing lists. Establish a monthly patch cycle where you use the `apt update` and `gitlab-rake` commands to audit your version. Automate minor patch deployments using `unattended-upgrades` to mitigate known vulnerabilities swiftly.
2. Network Security and Exposure
An internet-facing GitLab instance is a high-value target. Minimizing its attack surface by controlling network access is paramount.
Verified Commands & Tutorials:
- Check Listening Ports (Linux):
sudo netstat -tulpn | grep :80|:443
This identifies processes listening on standard web ports (HTTP/80, HTTPS/443), confirming your GitLab’s network exposure.
-
Firewall Rule to Restrict Access (UFW):
sudo ufw allow from 192.168.1.0/24 to any port 80,443
sudo ufw deny 80 && sudo ufw deny 443
These commands first allow access only from a specific internal IP range (e.g., 192.168.1.0/24) and then explicitly deny all other access on ports 80 and 443.
-
Nginx Configuration for IP Whitelisting:
location / {
allow 192.168.1.0/24;
deny all;
proxy_pass http://gitlab-workhorse;
}
This snippet, placed in GitLab’s Nginx configuration, provides an application-layer block, denying access to all IPs not in the whitelist.
Step-by-step guide:
Use `netstat` to audit what services are exposed. Implement a firewall policy using UFW or iptables to block all unnecessary ports. For GitLab, configure your web server (Nginx/Apache) to only accept connections from trusted corporate IP ranges or a VPN subnet, moving it entirely off the public internet.
3. System Hardening and Integrity Checks
A compromised system often shows signs of alteration. Regular integrity checks and system hardening can detect and prevent persistent threats.
Verified Commands & Tutorials:
- Check File Integrity (AIDE):
sudo aide --check
AIDE (Advanced Intrusion Detection Environment) creates a database of file hashes and attributes, and this command checks for changes against that baseline.
-
Scan for Rootkits (chkrootkit/rkhunter):
sudo rkhunter --check
This command runs a scan for known rootkits, backdoors, and local exploits.
-
Audit User Accounts:
sudo awk -F: '($3 == 0) {print}' /etc/passwdThis command lists all users with UID 0 (root privileges). There should typically only be one: ‘root’.
Step-by-step guide:
Install AIDE (sudo apt install aide) and initialize its database (sudo aideinit). Schedule a daily `aide –check` via cron. Similarly, install `rkhunter` and configure it for regular scans. The user audit should be part of a weekly security checklist.
4. GitLab-Specific Hardening
GitLab has a vast array of security settings that are often left at their permissive defaults.
Verified Commands & Tutorials:
- Enforce Two-Factor Authentication (GitLab Admin):
sudo gitlab-rails console
In the console:
ApplicationSetting.first.update!(require_two_factor_authentication: true)
This Rails console command forces all users to configure 2FA.
-
Check Project Visibility Settings:
sudo gitlab-rails console
Find projects with public visibility
Project.where(visibility_level: 20).each { |p| puts p.full_path }
This script identifies all projects set to ‘Public’ visibility (level 20), which may be inappropriate for internal code.
-
Audit User Sessions & Activity:
sudo gitlab-rails console
User.active.each { |u| puts "User: {u.email}, Last Activity: {u.last_activity_on}" }
This helps identify dormant or potentially compromised accounts.
Step-by-step guide:
Access the GitLab Rails console and enforce 2FA organization-wide. Regularly run the project visibility audit to ensure no sensitive code has been accidentally made public. Review the user activity log to deactivate stale accounts.
5. Logging, Monitoring, and Incident Response
Without comprehensive logging, a breach can go undetected for months. You must be able to see what is happening on your system.
Verified Commands & Tutorials:
- Tail GitLab Application Logs:
sudo tail -f /var/log/gitlab/gitlab-rails/production.log
This command follows the main application log in real-time, useful for monitoring current activity.
-
Search Logs for Authentication Failures:
sudo grep "Failed password" /var/log/auth.log
This searches system authentication logs for failed login attempts, a key indicator of brute-force attacks.
-
Audit API Usage (GitLab):
sudo gitlab-rails console
PersonalAccessToken.active.where("expires_at IS NULL OR expires_at > ?", Time.now).each { |t| puts "Token: {t.token[0..5]}..., User: {t.user.email}" }
This script lists all active, non-expired personal access tokens, which are powerful credentials that need monitoring.
Step-by-step guide:
Centralize your logs using a SIEM (Security Information and Event Management) system. Create alerts for patterns like “Failed password” or “git clone” operations from unexpected IP addresses. Regularly audit API and personal access tokens, revoking any that are unnecessary or overly permissive.
What Undercode Say:
- Key Takeaway 1: The perceived security of self-hosting is a dangerous myth; its actual security is directly proportional to the rigor of your patching, hardening, and monitoring regimen. Control over infrastructure does not equal safety—it equals responsibility.
- Key Takeaway 2: A single unhardened, internet-facing service like GitLab can become a pivot point to compromise an entire customer base, transforming a development tool into a supply chain weapon.
The RedHat breach is not an anomaly but a predictable outcome of operational complexity. The comments on the original post correctly speculate about unpatched software and internet-facing exposure. The real failure is often organizational: a disconnect between the team that wants control (development) and the team that provides security (operations). This incident proves that “self-hosted” must be synonymous with “professionally secured,” requiring dedicated resources, expertise, and continuous vigilance that many organizations underestimate. The cloud-vs-on-premise debate is a red herring; the real battle is against complacency.
Prediction:
This breach will accelerate three major trends. First, we will see a surge in automated software supply chain attacks targeting self-hosted development tools, making them a primary attack vector in 2025. Second, there will be increased regulatory and customer pressure for mandatory, auditable security controls around code management, similar to SOC2 or ISO 27001. Finally, the industry will witness a consolidation towards managed cloud-based DevSecOps platforms, not because they are invulnerable, but because they can amortize the cost of elite security teams and rapid response across a massive user base, a resource model inaccessible to most individual enterprises. The future of secure development is specialized, not self-hosted.
🎯Let’s Practice For Free:
IT/Security Reporter URL:
Reported By: Mccartypaul Ouch – Hackers Feeds
Extra Hub: Undercode MoN
Basic Verification: Pass ✅


