Listen to this Post
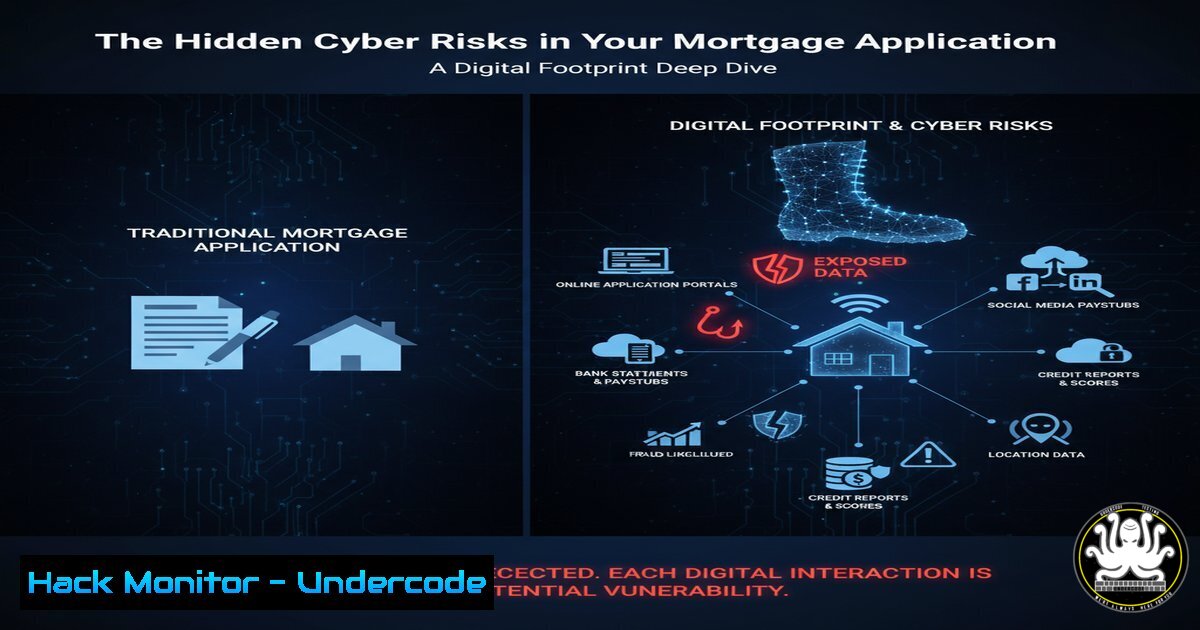
Introduction:
The mortgage application process is a well-known financial stressor, but its significant cybersecurity and data privacy implications are often overlooked. From the initial pre-approval to the final closing, applicants generate a massive digital footprint containing highly sensitive personal and financial data, making them prime targets for social engineering and identity theft. This article deconstructs the digital lifecycle of a mortgage application and provides critical technical commands to audit, secure, and monitor your personal data throughout this vulnerable period.
Learning Objectives:
- Identify the critical data points collected during a mortgage application and their value to cybercriminals.
- Implement command-line and tool-based techniques to discover your own digital footprint and harden your online security posture.
- Apply proactive monitoring strategies to detect unauthorized use of your personal and financial information.
You Should Know:
1. Discovering Your Public Digital Footprint with `theHarvester`
Before you even apply, criminals can use open-source intelligence (OSINT) to build a profile on you. The `theHarvester` tool is a Python-based OSINT powerhouse for reconnaissance.
 Install theHarvester (Kali Linux pre-installed)
sudo apt-get update && sudo apt-get install theharvester

Basic usage to discover emails, subdomains, and hosts associated with a domain (e.g., your realtor's company)
theharvester -d example-reality.com -l 100 -b google
Step-by-step guide:
- Installation: The command updates your package list and installs
theharvester. - Execution: The command `theharvester -d example-reality.com -l 100 -b google` instructs the tool to query the domain (
-d) “example-reality.com”, limit results to 100 (-l), and use Google as the data source (-b). - Analysis: Review the output for exposed employee emails (e.g., your agent), which can be used for targeted phishing attacks. This demonstrates how much information about an organization is publicly available.
2. Securing Document Transfers with SCP and SFTP
Never email sensitive PDFs like tax returns or pay stubs. Use secure file transfer protocols like SCP (Secure Copy Protocol) which encrypts data in transit.
 Securely copy a document from your local machine to a trusted server
scp -P 22 /path/to/your/tax_return.pdf [email protected]:/secure/upload/directory/

For interactive file management, use SFTP
sftp -P 22 [email protected]
sftp> put /path/to/your/bank_statement.pdf
sftp> bye
Step-by-step guide:
- Prerequisite: You need access to a secure server (e.g., your own VPS or a service provided by a trusted party).
- SCP Command: The `scp` command connects to the server on port 22 (
-P 22), copies the local file `tax_return.pdf` to the specified directory on the remote server. The entire session is encrypted via SSH. - SFTP Session: The `sftp` command opens an interactive shell. The `put` command uploads the file, and `bye` closes the connection. This is far more secure than unencrypted email attachments.
3. Analyzing Email Headers for Phishing Attempts
After applying, you may be targeted by phishing emails impersonating your lender. Analyzing email headers can reveal the true origin of a message.
 On a Linux/macOS system, save a suspicious email as a .eml file and use grep to inspect headers
grep -E '(Received:|From:|Return-Path:|Message-ID:)' suspicious_email.eml

For a deeper analysis of the originating IP, use a command like 'whois'
grep 'Received: from' suspicious_email.eml | tail -1
 Then take the IP address and query it
whois 192.0.2.123
Step-by-step guide:
- Extract Headers: Save the email source as a text file (
.eml). The `grep` command filters for key header fields showing the email’s path. - Trace the Source: The second command finds the last “Received” header, which often contains the original sender’s IP address.
- Investigate IP: The `whois` query on that IP can reveal its registered owner and location, helping you verify if it aligns with your lender’s known infrastructure.
4. Hardening Your Home Wi-Fi Network
Your home network is the gateway for all your mortgage-related activity. Ensure it is not an easy entry point for attackers.
 Check what devices are currently on your network using nmap
nmap -sn 192.168.1.0/24

Scan your own router for open ports (replace with your router's IP)
nmap -sV -p 1-1000 192.168.1.1
Step-by-step guide:
- Network Discovery: The `nmap -sn` command performs a ping sweep on your local subnet (adjust the IP range to match yours) to list all active devices. Identify any unknown devices.
- Router Audit: The `nmap -sV -p 1-1000` command scans your router’s first 1000 ports, attempting to determine what services are running (
-sV). If you see open ports for Telnet (23), FTP (21), or unknown services, it’s a sign your router needs configuration review and firmware updates.
5. Monitoring for Data Breaches with HIBP CLI
Have I Been Pwned (HIBP) is a critical service for checking if your email or phone number has been involved in a data breach.
 Install the HIBP CLI tool via pip
pip install hibp

Check an email address against the HIBP database
hibp --email [email protected]

Check a password (this only sends a partial hash, never the full password)
hibp --password "YourPassword123!"
Step-by-step guide:
- Tool Installation: Install the official HIBP command-line interface using
pip. - Email Check: The `hibp –email` command will list all known breaches containing that email address. If your lender or realtor suffers a breach, this is how you might find out.
- Password Audit: The `hibp –password` command checks if your password has been exposed in any breaches. If you are reusing a password across sites, this is a critical check to perform.
-
Windows PowerShell: Auditing Local User Accounts and Shares
Ensure no unauthorized user accounts or open file shares exist on your personal computer that could be used to access your financial documents.
 Get a list of all local user accounts
Get-LocalUser

Get a list of all shared folders on the system
Get-SmbShare

Check the membership of the Administrators group
Get-LocalGroupMember -Group "Administrators"
Step-by-step guide:
- Open PowerShell: Run Windows PowerShell as an administrator.
- User Audit: `Get-LocalUser` lists all accounts. Look for any unknown or enabled guest accounts.
- Share Audit: `Get-SmbShare` shows all file shares. Ensure no sensitive directories are shared unnecessarily.
- Privilege Audit: `Get-LocalGroupMember -Group “Administrators”` confirms only trusted accounts have elevated privileges.
7. Verifying Website SSL/TLS Certificates
Always ensure you are on your lender’s legitimate, secure website (HTTPS) before entering any login credentials.
 Use openssl to check the certificate details of a website
openssl s_client -connect www.your-lender.com:443 -servername www.your-lender.com < /dev/null | openssl x509 -noout -subject -dates
Step-by-step guide:
- Command Execution: This `openssl` command initiates a connection to the web server and retrieves its SSL certificate.
- Output Analysis: The output shows the `subject` (who the certificate was issued to) and the `dates` (validity period). Verify that the subject name matches the expected organization and that the certificate is not expired. A mismatch or expiry could indicate a spoofing site.
What Undercode Say:
- The mortgage process is a concentrated data hemorrhage, creating a high-value target from disparate but interconnected sources: the individual, the realtor, the lender, the title company, and more.
- Proactive, command-level hygiene is no longer optional for the privacy-conscious. Individuals must adopt the mindset of a security administrator for their own digital lives, especially during high-stakes transactions.
The convergence of financial and personal data during a mortgage application creates a uniquely attractive and vulnerable dataset for cybercriminals. The technical commands outlined are not just for IT professionals; they are essential tools for modern financial literacy. By understanding how to discover one’s digital footprint, secure data transfers, audit local systems, and monitor for exposure, individuals can reclaim a measure of control. The responsibility for data security is increasingly diffuse, and the most effective mitigation is an empowered and technically proficient user base.
Prediction:
The future of mortgage-related cybercrime will shift from broad phishing campaigns to highly targeted, AI-powered social engineering attacks and deepfake audio/video synthesis. Criminals will use OSINT to build detailed profiles of applicants and then use synthesized voices or videos to impersonate real estate agents or loan officers in real-time, instructing victims to wire funds to fraudulent accounts. Furthermore, we will see a rise in supply-chain attacks targeting the software platforms used by title and escrow companies, allowing for the mass exfiltration of complete mortgage application packages, leading to systemic identity theft on an unprecedented scale.
🎯Let’s Practice For Free:
IT/Security Reporter URL:
Reported By: Trina Az – Hackers Feeds
Extra Hub: Undercode MoN
Basic Verification: Pass ✅


