Listen to this Post
Introduction:
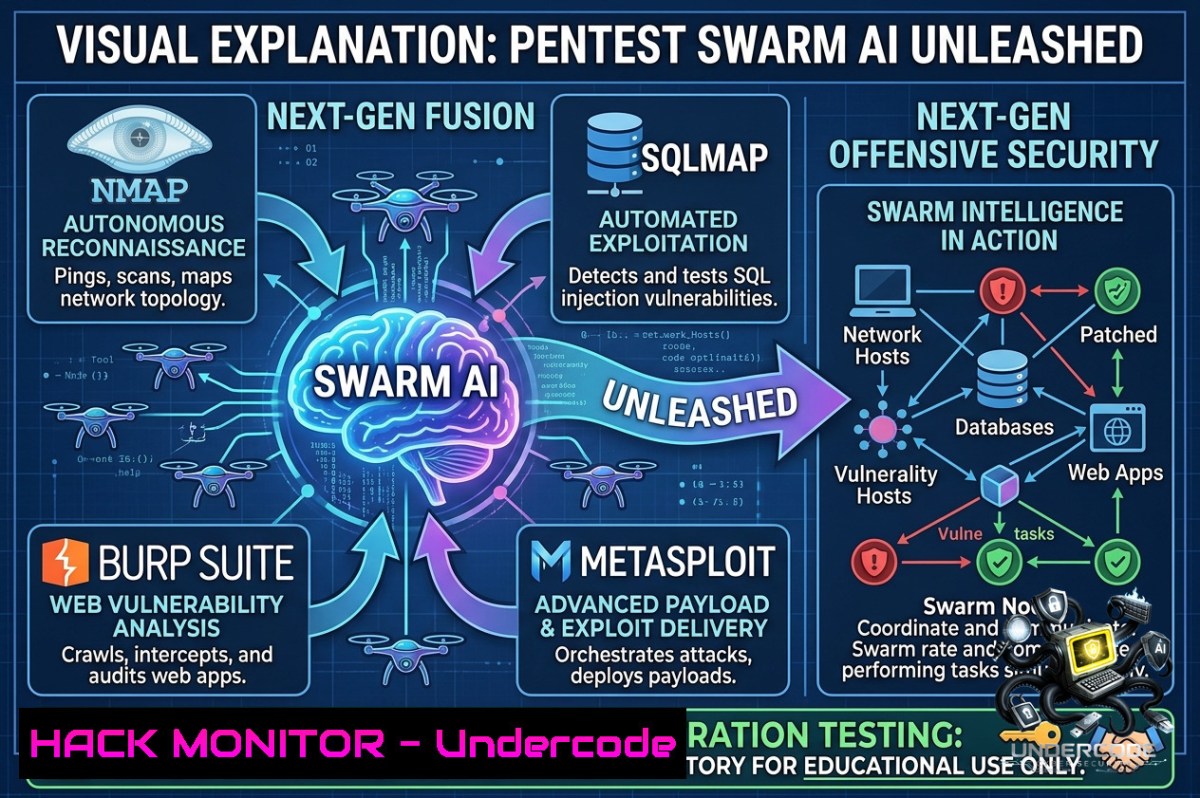
A new paradigm in autonomous security testing has arrived. Pentest Swarm AI is the first open‑source penetration testing platform built on a true swarm intelligence architecture, where multiple specialist AI agents collaborate through a shared blackboard to dynamically orchestrate reconnaissance, exploitation, and reporting—moving far beyond the rigid, sequential execution of traditional multi‑agent tools. Developed by Armur AI, this Go‑native framework provides live, coordinated access to the entire offensive stack, including ProjectDiscovery tools (subfinder, httpx, nuclei, naabu, katana, dnsx, gau) and a fully parsed nmap adapter with built‑in scope validation, while planning future integrations for sqlmap, Burp Suite MCP bridge, Metasploit, and ZAP.
Learning Objectives:
– Understand the core concepts of swarm intelligence (stigmergy, pheromone‑based signalling) and how they differ from conventional automation in penetration testing.
– Gain practical knowledge of installing Pentest Swarm AI, configuring AI backends (Claude, Ollama, OpenAI‑compatible models), and integrating essential security tools.
– Learn how to orchestrate autonomous agent teams for full‑cycle security assessments, from passive reconnaissance to automated exploitation and submission‑ready reporting.
You Should Know:
1. Swarm Mechanics: How Pentest Swarm AI Actually Works
Swarm intelligence in Pentest Swarm AI is built on three foundational mechanisms: indirect collaboration (stigmergy), pheromone‑weighted signalling with decay, and decentralised scheduling. Instead of a central controller dictating steps, each agent writes discoveries to a shared blackboard. Other agents read this board, and based on pheromone values (which decay over time), they independently decide their next action. This allows the attack chain to emerge naturally rather than being pre‑programmed. The platform supports multiple operational modes—bug bounty (with HackerOne/Bugcrowd scope integration), continuous security monitoring (ASM), and CTF automation—making it adaptable to various red‑team scenarios.
Step‑by‑Step Guide:
1. Understand the Swarm vs. Multi‑Agent Distinction: In traditional multi‑agent systems, agents execute a fixed pipeline (e.g., recon → scanning → exploitation). In Pentest Swarm AI, agents run in parallel, share findings, and adapt in real time.
2. Review the Agent Roles: Recon agents (subfinder, amass) discover assets. Classification agents analyse open ports and services. Exploitation agents (nuclei, sqlmap, metasploit) attempt to exploit identified vulnerabilities. Reporting agents capture evidence and generate reports.
3. Observe Pheromone Mechanics: When an agent discovers a high‑value asset, it writes a “pheromone” signal with an initial weight. Other agents are more likely to prioritise that asset. The weight decays over time, ensuring the swarm doesn’t get stuck on old data.
4. Examine the Blackboard Data Flow: All tool outputs (nmap XML, nuclei JSON, etc.) are normalised and stored on the blackboard. Agents subscribe to relevant data types and react when new information appears.
2. Deploying Pentest Swarm AI and Configuring the AI Backend
Pentest Swarm AI is written in Go and can be deployed on any Linux distribution (including Kali Linux) or Windows via WSL2. The framework supports multiple AI providers: Claude Sonnet/Opus, any OpenAI‑compatible model (including local deployments via Ollama or LM Studio), and air‑gapped LLM setups.
Step‑by‑Step Guide:
1. Prerequisites: Install Go (≥1.21), Docker (optional for containerised tools), and Git. Ensure basic tools like nmap and curl are available.
2. Clone the Repository: `git clone https://github.com/Armur-Ai/Pentest-Swarm-AI.git && cd Pentest-Swarm-AI`
3. Build the Binary: `go build -o pentest-swarm ./cmd/pentest-swarm` (Note: adjust path if different)
4. Set AI API Keys: Export your chosen provider’s key as an environment variable, e.g., `export ANTHROPIC_API_KEY=”your-key-here”`. For Ollama, ensure the service is running and models are pulled (`ollama pull llama3`).
5. Configure the YAML: Edit `config.yaml` (or the default configuration file) to set your AI provider, model name, and tool paths. For local models, use the `local` provider and specify the endpoint URL.
6. Verify Installation: Run `./pentest-swarm –help` to confirm the binary works. A successful build will display available commands and flags.
3. Integrating and Using the Native Tools (ProjectDiscovery + nmap)
Out of the box, Pentest Swarm AI ships with eight ProjectDiscovery tools and an nmap XML adapter with automatic scope validation. These tools are invoked automatically by the swarm agents based on the current phase of testing.
Step‑by‑Step Guide:
1. Install ProjectDiscovery Tools (if not already present): Use Go to install each tool, e.g., `go install github.com/projectdiscovery/subfinder/v2/cmd/subfinder@latest`, `go install github.com/projectdiscovery/nuclei/v3/cmd/nuclei@latest`, `go install github.com/projectdiscovery/katana/cmd/katana@latest`.
2. Add Tools to System PATH: Ensure the Go binary path (`~/go/bin`) is in your `$PATH`.
3. Run a Basic Recon Swarm: Execute the framework with a target domain: `./pentest-swarm recon -d example.com`. The swarm will automatically use subfinder for subdomains, httpx for live host detection, and naabu for port scanning.
4. Perform Vulnerability Scanning: Once recon is complete, trigger the vulnerability phase: `./pentest-swarm vuln -d example.com`. The swarm will use nuclei with its default template set.
5. Parse nmap Results: If you have an existing nmap scan (XML format), place it in the `data/` directory. The swarm will automatically parse it and validate the targets against your defined scope, preventing out‑of‑scope scanning.
4. Orchestrating the Full Offensive Stack: Recon to Exploitation
The true power of Pentest Swarm AI emerges when you run a full autonomous assessment. The swarm will progress from passive reconnaissance through to exploitation and reporting, with all evidence captured and deduplicated.
Step‑by‑Step Guide:
1. Define Scope: Create a `scope.txt` file with target domains, IP ranges, or exclusions. The swarm will respect these boundaries throughout the engagement.
2. Launch a Full Autonomous Pentest: `./pentest-swarm full -d example.com -o ./reports/engagement-1`
3. Monitor Agent Activity: The console output will show each agent’s actions in real time—e.g., `[bash] subfinder found 142 subdomains`, `[bash] httpx identified 23 live hosts`, `[bash] nuclei found CVE-2024-1234 on host 10.0.0.5`.
4. Inject Manual Overrides (Optional): You can pause the swarm and manually run a tool (e.g., Burp Suite) against a specific host, then resume the swarm. The injected findings will be added to the blackboard and considered by other agents.
5. Generate Report: After completion, the swarm will output a JSON report containing all findings, evidence (screenshots, request/response pairs), and exploitation steps. This report is formatted for submission to bug bounty platforms or internal stakeholders.
5. Advanced Configuration and Future Adapters
The roadmap for Pentest Swarm AI includes Wave 2 adapters for sqlmap, Burp Suite MCP bridge, Metasploit, and ZAP. However, advanced users can already integrate these tools manually using custom scripts and the framework’s adapter API.
Step‑by‑Step Guide:
1. Writing a Custom Adapter: Adapters are Go plugins that implement a standard interface (`Discover()`, `Execute()`). Place your adapter in the `adapters/` directory and rebuild the binary.
2. Manual Integration with sqlmap (Pre‑Adapter): Use the `–exec` flag to run sqlmap manually: `./pentest-swarm exec –tool sqlmap –args “-u http://target.com/page?id=1 –batch –dbs”`. The output will be captured and added to the blackboard.
3. Connect Burp Suite via MCP: Install the Model Context Protocol (MCP) server for Burp. Configure Burp to proxy traffic through the MCP bridge, then set the bridge URL in Pentest Swarm AI’s config. The swarm will then be able to send requests through Burp and analyse responses.
4. Automate with GitHub Actions: The framework can be triggered via GitHub Actions for continuous security monitoring. Use the provided `swarm.yml` workflow file to run nightly scans against your infrastructure.
5. Extend with Custom AI Prompts: Modify the prompt templates in `prompts/` to change how agents reason about certain vulnerabilities. For example, you can add a custom rule for detecting business logic flaws.
What Undercode Say:
– Key Takeaway 1: Traditional penetration testing is linear and operator‑dependent; swarm intelligence introduces emergent, parallel, and adaptive testing that scales effortlessly to hundreds of targets.
– Key Takeaway 2: While Pentest Swarm AI democratises advanced security testing, it also lowers the barrier for malicious actors—organisations must invest in defensive AI monitoring to counter autonomous offensive tools.
The rise of autonomous swarm‑based pentesting marks a fundamental shift in offensive security. No longer is testing limited by human speed or sequential tool execution. Pentest Swarm AI’s open‑source nature means the entire community can inspect, improve, and harden the platform, leading to faster vulnerability discovery cycles. However, this power is a double‑edged sword. As offensive AI tools become more accessible, defenders must adopt equally autonomous monitoring systems, anomaly detection powered by AI, and continuous validation of security controls. The organisations that embrace agent‑based red teaming today will be better prepared for the AI‑driven threat landscape of tomorrow.
Prediction:
– +1 The adoption of swarm‑based autonomous pentesting will reduce the average time to discover critical vulnerabilities from weeks to hours, enabling organisations to patch flaws before they are exploited in the wild.
– -1 The proliferation of open‑source offensive AI tools like Pentest Swarm AI will lead to a surge in automated, low‑skill attacks, forcing security teams to invest heavily in AI‑powered defence and threat‑hunting capabilities.
– +1 As the platform matures and integrates with CI/CD pipelines, continuous security validation will become a standard DevOps practice, embedding security testing into every code commit and deployment.
▶️ Related Video (68% Match):
🎯Let’s Practice For Free:
🎓 Live Courses & Certifications:
[Join Undercode Academy for Verified Certifications](https://undercode.co.uk/certifications/)
🚀 Request a Custom Project:
Secure, high-velocity infrastructure and disruptive technological engineering. Contact our engineering team for high-tier development and proprietary systems:
[[email protected]](mailto:[email protected])
💎 Smart Architecture | 🛡️ Secure by Design | ⭐ Trusted by Thousands
IT/Security Reporter URL:
Reported By: [Cybersecuritynews Opensourcetool](https://www.linkedin.com/posts/cybersecuritynews-opensourcetool-cybersecuritytool-share-7467624753139314688-k9c5/) – Hackers Feeds
Extra Hub: Undercode MoN
Basic Verification: Pass ✅
🔐JOIN OUR CYBER WORLD [ CVE News • HackMonitor • UndercodeNews ]
[💬 Whatsapp](https://undercode.help/whatsapp) | [💬 Telegram](https://t.me/UndercodeCommunity)
📢 Follow UndercodeTesting & Stay Tuned:
[𝕏 formerly Twitter 🐦](https://x.com/undercodeupdate) | [@ Threads](https://www.threads.net/@undercodetesting) | [🔗 Linkedin](https://www.linkedin.com/company/undercodetesting/) | [🦋BlueSky](https://bsky.app/profile/undercode.bsky.social)


