Listen to this Post
Introduction:
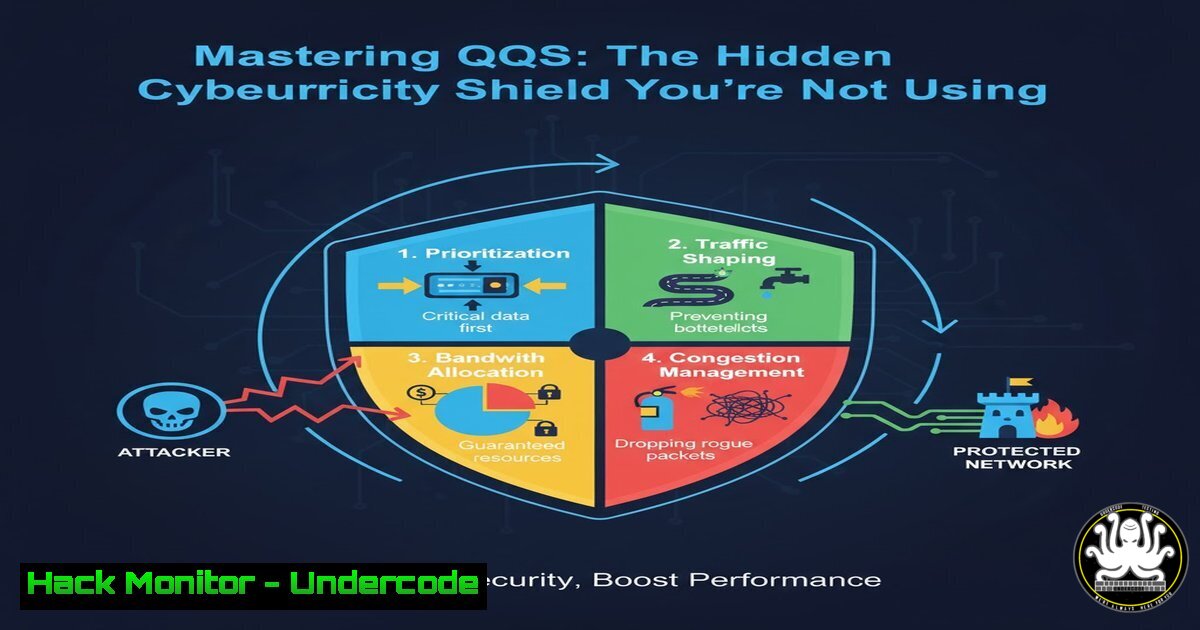
Quality of Service (QoS) is often viewed as a simple traffic management tool, but its strategic implementation forms a critical, often overlooked, layer of network defense. By intelligently prioritizing and controlling data flows, QoS can isolate critical systems, mitigate the impact of volumetric attacks, and prevent network abuse, directly enhancing your security posture.
Learning Objectives:
- Understand how to configure QoS for security-centric traffic isolation and DDoS mitigation.
- Learn to identify and correctly classify sensitive versus non-essential network traffic.
- Master the commands and tools for implementing QoS on Cisco IOS and Windows-based systems.
You Should Know:
1. Classifying and Marking Traffic with Access-Lists
To effectively prioritize traffic, you must first identify it. Using Cisco IOS, we can create access control lists (ACLs) to classify different types of traffic for marking.
! Create ACL to identify VoIP traffic
access-list 110 permit udp any any range 16384 32767

! Create ACL for secure management protocols (SSH)
access-list 120 permit tcp any any eq 22

! Create a class-map to match the VoIP traffic
class-map match-any VOICE-TRAFFIC
match access-group 110

! Create a class-map for management traffic
class-map match-any MGMT-TRAFFIC
match access-group 120

! Create a policy-map to mark the traffic
policy-map MARK-TRAFFIC
class VOICE-TRAFFIC
set dscp ef
class MGMT-TRAFFIC
set dscp cs6
Step-by-step guide:
- The `access-list` commands define what traffic we are interested in. ACL 110 matches UDP traffic on the standard VoIP port range (16384-32767), while ACL 120 matches SSH traffic on port 22.
- The `class-map` commands create traffic classes named “VOICE-TRAFFIC” and “MGMT-TRAFFIC”. The `match access-group` statement links them to the respective ACLs.
- The `policy-map` called “MARK-TRAFFIC” applies an action to the matched traffic. We use the `set dscp` command to mark the packets with a Differentiated Services Code Point (DSCP) value. ‘EF’ (Expedited Forwarding) is for low-latency voice, and ‘CS6’ is typically for network management, giving it high priority.
2. Configuring Low-Latency Queuing (LLQ) on Cisco IOS
Once traffic is marked, you must apply a queuing strategy to enforce prioritization. LLQ is the recommended method for providing strict priority to sensitive traffic like voice.
! Define a policy-map for the interface output queue
policy-map WAN-EDGE-QOS
class VOICE-TRAFFIC
priority percent 10
class MGMT-TRAFFIC
bandwidth percent 5
class class-default
fair-queue

! Apply the policy to the WAN interface
interface GigabitEthernet0/1
service-policy output WAN-EDGE-QOS
Step-by-step guide:
- The `policy-map WAN-EDGE-QOS` defines how traffic will be handled on the outbound (output) direction of an interface.
- The `class VOICE-TRAFFIC` section uses the `priority` command. This creates a strict-priority queue, guaranteeing 10% of the interface bandwidth for voice packets and ensuring they are always sent first, minimizing jitter and delay.
- The `class MGMT-TRAFFIC` uses
bandwidth, which guarantees it a minimum of 5% of the bandwidth within the “guaranteed” traffic classes.
4. `class class-default` is a catch-all for all unclassified traffic. `fair-queue` applies Weighted Fair Queuing to prevent any single non-priority flow from starving others. - Finally, the policy is applied to the physical WAN interface (
GigabitEthernet0/1) with the `service-policy output` command.
3. Throttling Suspicious Traffic with Policing
While queuing manages congestion, policing can be used as a security tool to limit the rate of specific, potentially malicious traffic types, such as ICMP (often used in reconnaissance and floods).
! Create a class-map for ICMP traffic
class-map match-any ICMP-TRAFFIC
match protocol icmp

! Create a policy to police ICMP to 1 Mbps
policy-map POLICE-ICMP
class ICMP-TRAFFIC
police 1000000 8000 exceed-action drop

! Apply the policy to the inbound interface
interface GigabitEthernet0/0
service-policy input POLICE-ICMP
Step-by-step guide:
- A `class-map` matches all ICMP traffic using the `match protocol` statement.
- The `policy-map POLICE-ICMP` uses the `police` command to enforce a rate limit. Here, `1000000` is the committed information rate (1 Mbps), and `8000` is the normal burst size in bytes.
- The `exceed-action drop` command dictates that any ICMP packets exceeding this 1 Mbps rate will be immediately dropped.
- Applying this policy to an inbound interface (
input) helps protect your network from ICMP-based flood attacks.
4. Implementing QoS via Group Policy in Windows
QoS isn’t just for routers. You can enforce traffic policies at the source on Windows clients using Group Policy, ensuring traffic is marked correctly before it even reaches the network.
 PowerShell to create a QoS Policy (can be deployed via GPO)
New-NetQosPolicy -Name "Priority_VoIP" -AppPathNameMatchCondition "teams.exe" -IPProtocolMatchCondition Both -IPSrcPortStartMatchCondition 50000 -IPSrcPortEndMatchCondition 50020 -DSCPAction 46

New-NetQosPolicy -Name "Throttle_Updates" -AppPathNameMatchCondition "svchost.exe" -IPSrcPortMatchCondition 80 -ThrottleRateActionBytesPerSecond 1000000
Step-by-step guide:
- The first command uses `New-NetQosPolicy` to create a policy named “Priority_VoIP”. It identifies traffic from the `teams.exe` application using a specific source port range (50000-50020) and marks it with a DSCP value of 46 (which is equivalent to EF).
- The second command creates a policy “Throttle_Updates” that identifies update traffic from `svchost.exe` on port 80 and uses `ThrottleRateActionBytesPerSecond` to limit its bandwidth to 1 Mbps, preventing it from consuming all available bandwidth.
5. Leveraging Wireshark Display Filters for QoS Verification
After deployment, you must verify that QoS markings are correct. Wireshark is an essential tool for this validation.
 Wireshark Display Filters
dscp.ef && ip.src==192.168.1.100  Show only EF traffic from a specific IP
dscp != 0  Show all packets that have a DSCP marking
ip.dsfield.dscp == 0x2e  Show packets with DSCP 46 (EF) in hex
udp.port == 16384 && dscp.ef  Verify VoIP traffic on port 16384 is marked EF
Step-by-step guide:
1. Capture traffic on a critical network segment.
- Apply the filter `dscp.ef && ip.src==192.168.1.100` to check if a specific host (192.168.1.100) is correctly marking its priority traffic as EF.
- Use `dscp != 0` to filter out all unmarked (best-effort) traffic, allowing you to focus only on traffic that has been classified.
- The filter `udp.port == 16384 && dscp.ef` is a precise check to confirm that traffic on a common VoIP port is indeed receiving the correct DSCP marking.
6. Hardening NTP with QoS for Security
Network Time Protocol (NTP) is critical for logging and security event correlation but can be abused. Use QoS to protect your NTP server.
! On a Cisco router/switc
class-map match-any NTP-TRAFFIC
match access-group 130

! ACL for NTP
access-list 130 permit udp any any eq 123

policy-map PROTECT-NTP
class NTP-TRAFFIC
police 128000 8000 exceed-action drop
bandwidth percent 1
class class-default
fair-queue
Step-by-step guide:
- An ACL (130) and `class-map` are created to identify NTP traffic (UDP 123).
- The `POLICE-NTP` policy-map does two things: First, the `police` command aggressively rate-limits all NTP traffic to 128 Kbps, dropping excess packets to prevent the server from being overwhelmed by a flood. Second, the `bandwidth` command guarantees a small amount of bandwidth for legitimate NTP queries.
7. Using NetFlow to Monitor QoS and Anomalies
NetFlow or IPFIX can be used to audit your QoS implementation and detect traffic that is not conforming to policies, which can indicate misconfiguration or malicious activity.
! Enable NetFlow on a Cisco Interface
interface GigabitEthernet0/1
ip flow ingress
ip flow egress

! Configure a flow exporter and record
flow exporter MY-EXPORTER
destination 10.1.1.50 ! IP of NetFlow Collector
transport udp 9995

flow monitor MY-MONITOR
exporter MY-EXPORTER
record netflow ipv4

! Apply the monitor to the interface
interface GigabitEthernet0/1
ip flow monitor MY-MONITOR input
ip flow monitor MY-MONITOR output
Step-by-step guide:
1. `ip flow ingress/egress` enables NetFlow data collection on the interface for both directions of traffic.
2. The `flow exporter` command defines where the collected flow data (to a collector at 10.1.1.50 on UDP port 9995) will be sent.
3. The `flow monitor` is configured with the exporter and the type of data to record (standard IPv4 NetFlow).
4. Finally, the flow monitor is applied to the same interface for both input and output. On the collector, you can create reports to view traffic by DSCP value, identifying if certain applications are incorrectly marked or if a class is being saturated.
What Undercode Say:
- QoS is a proactive security control, not just a performance tool. It allows for the containment of breach impact and DDoS fallout.
- Misconfigured QoS can create a self-inflicted Denial-of-Service. Over-allocating priority classes can starve essential but lower-priority services like patching or database replication.
The analysis from a security perspective reveals that QoS provides a nuanced defense mechanism. In the event of a breach or attack, a properly configured QoS policy can compartmentalize the damage. For instance, if a malware outbreak on the corporate LAN generates massive amounts of scanning traffic, QoS policies that relegate unknown or “default” traffic to a throttled best-effort queue can prevent the attack from consuming the bandwidth needed for critical server communications and security system reporting. This creates a resilient network architecture where the “important” systems can continue to operate and be managed even under adverse conditions. It is a form of network micro-segmentation based on application criticality rather than just IP subnets.
Prediction:
The convergence of AI-driven network management and QoS will lead to the rise of “Adaptive Security QoS.” Future systems will use behavioral analytics to dynamically re-prioritize or throttle traffic in real-time. For example, an AI could detect a new DDoS vector and instantly create a policing policy to drop that specific traffic pattern at the edge, while simultaneously guaranteeing bandwidth for incident response teams, fundamentally blurring the line between network performance and active cyber defense.
🎯Let’s Practice For Free:
IT/Security Reporter URL:
Reported By: Ahmed Bawkar – Hackers Feeds
Extra Hub: Undercode MoN
Basic Verification: Pass ✅


