Listen to this Post
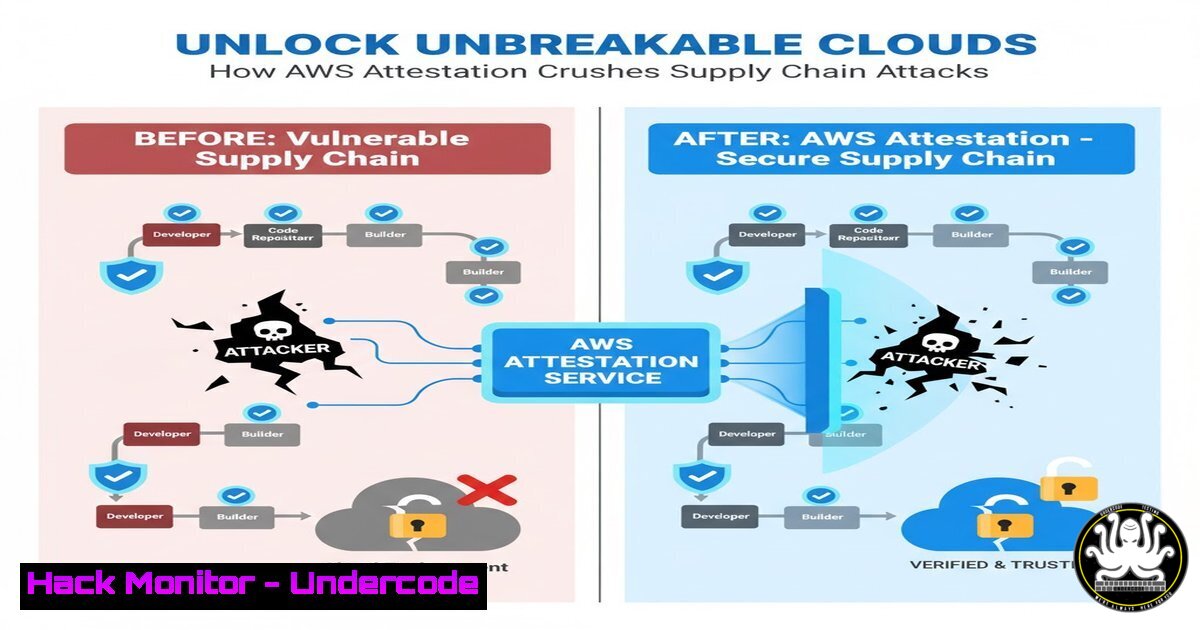
Introduction:
AWS’s new EC2 Instance Attestation is a paradigm shift in cloud security, moving the needle from reactive defense to proactive, cryptographic verification of software integrity. Powered by the Nitro Trusted Platform Module (NitroTPM), this feature allows organizations to cryptographically prove their instances are running trusted, unaltered software from boot, directly combating firmware and software supply chain threats.
Learning Objectives:
- Understand the core components of EC2 Instance Attestation: NitroTPM, Attestation Reports, and Attestable AMIs.
- Learn how to generate, retrieve, and validate an attestation report for an EC2 instance.
- Integrate attestation checks into automated deployment pipelines and security monitoring workflows.
You Should Know:
1. The Foundation: NitroTPM and Its Critical Role
The Nitro Trusted Platform Module is a virtual TPM compliant with the TPM 2.0 standard, providing a secure, hardware-rooted vault for cryptographic keys and measurements. It’s the bedrock upon which attestation is built.
Verified Command:
 Check if an EC2 instance has a TPM enabled (run on the instance itself)
sudo dmesg | grep -i tpm
Step-by-step guide:
This command searches the kernel ring buffer for messages related to the TPM. A successful output showing `tpm_tis` or similar indicates the TPM is detected by the OS. For NitroTPM, you should see a message confirming a virtual TPM is present. This is the first step in verifying the foundational hardware security feature is active and available to the operating system.
2. Generating Your First Attestation Report
An attestation report is a cryptographically signed JSON document containing the measurements of the instance’s critical state, including the PCRs (Platform Configuration Registers) from the NitroTPM.
Verified AWS CLI Command:
 Generate and save the attestation report (run on the EC2 instance)
sudo nitro-cli describe-enclaves | jq .[bash].AttestationDocument > attestation_report.json
Step-by-step guide:
The `nitro-cli` is the command-line interface for interacting with Nitro Enclaves and the NitroTPM. This command requests the attestation document from the underlying Nitro Hypervisor. The `jq` tool is used to parse the JSON output and extract the base64-encoded `AttestationDocument` into a file. This document is signed by AWS, providing a trustworthy record of the instance’s state at the time of generation.
3. Decoding and Validating the Attestation Document
The attestation document is a CBOR-encoded object signed by the Nitro Hypervisor’s Certificate Authority. You must decode it to inspect its contents, which include the TPM PCRs and other nonce data.
Verified Commands:
 Decode the base64 and then the CBOR structure (requires python3 and cbor2)
base64 -d attestation_report.json > attestation_document.cbor

Use a Python script to decode the CBOR and print the PCR values
python3 -c "
import cbor2
import json
with open('attestation_document.cbor', 'rb') as f:
doc = cbor2.load(f)
print('PCR0 (Firmware):', doc['pcrs'][bash].hex())
print('PCR1 (AMI/Configuration):', doc['pcrs'][bash].hex())
"
Step-by-step guide:
After saving the base64 document, this two-step process decodes it. The first command converts the base64 back to its raw CBOR binary format. The Python script then loads this binary file and uses the `cbor2` library to parse it into a Python dictionary. Printing the PCR values, especially PCR0 (for firmware) and PCR1 (for the AMI and instance configuration), allows you to see the unique hashes that represent the measured state of your system.
- Verifying the Attestation Signature with the AWS Certificate Bundle
To trust the attestation document, you must verify its cryptographic signature against the AWS Nitro Attestation Root Certificates.
Verified Commands:
 Download the AWS Nitro Attestation Root Certificates
wget -O root_certs.zip https://aws-nitro-enclaves.amazonaws.com/AWS_NitroEnclaves_Root-G1.zip && unzip root_certs.zip

Use openssl to verify the signature (conceptual step, integrated in SDKs)
openssl smime -verify -in attestation_document.cbor -inform DER -CAfile AWS_NitroEnclaves_Root-G1.pem -nosigs
Step-by-step guide:
This process establishes the chain of trust. First, you fetch the official AWS root certificates. The `openssl smime -verify` command demonstrates the principle of signature verification. In practice, this complex verification is best handled by the AWS SDKs or the `nitro-cli` itself, which automatically performs these checks when you use its `–verify` flag or when the document is processed by a service like AWS Key Management Service (KMS).
5. Leveraging Attestation for Secure Secret Unlocking
A primary use case is using the attestation document to decrypt data or unlock secrets only if the instance is in a known-good state. AWS KMS supports this natively.
Verified AWS KMS API Call (via CLI):
 Use the attestation document to decrypt a ciphertext with KMS
 This assumes you have a ciphertext blob encrypted under a KMS key with a policy that requires attestation.
aws kms decrypt \
--ciphertext-blob fileb://encrypted_data.bin \
--key-id alias/my-attestation-key \
--encryption-algorithm RSAES_OAEP_SHA_256 \
--attestation-document fileb://attestation_document.cbor \
--output text \
--query Plaintext | base64 -d > decrypted_secret.txt
Step-by-step guide:
This powerful command sends the attestation document to AWS KMS along with the request to decrypt data. KMS will first validate the document’s signature and then inspect the PCR values inside. If the PCRs match the expected values defined in the KMS key policy (e.g., the hash of a known-good AMI), the decryption proceeds. If the instance has been tampered with, the PCRs will be different, and KMS will deny the request, protecting the secret.
6. Automating Checks in CI/CD with Instance Metadata
You can fetch the instance identity document, which is related to the attestation context, directly from the instance metadata service to automate health checks.
Verified Command:
 Retrieve the instance identity document
curl -s http://169.254.169.254/latest/dynamic/instance-identity/document | jq .
Step-by-step guide:
This command queries the Instance Metadata Service (IMDS) for a JSON document containing verifiable details about the instance’s identity. While not the attestation document itself, it provides context like the instance ID, AMI ID, and region. In a CI/CD pipeline, a script can fetch this and the attestation report, cross-reference the AMI ID against an approved list, and validate the attestation before allowing the deployment to proceed to more sensitive tasks.
7. Building a PCR Measurement Allow List
The ultimate goal is to create a policy that only allows actions from instances with specific, known-good PCR measurements.
Verified Code Snippet for Policy Logic (Python):
 Example: Validate PCR1 (AMI measurement) against an allow list
allowed_ami_pcr1 = "a1b2c3...known_good_hash...d4e5f6"

with open('attestation_document.cbor', 'rb') as f:
doc = cbor2.load(f)

current_pcr1 = doc['pcrs'][bash].hex()

if current_pcr1 == allowed_ami_pcr1:
print("SUCCESS: AMI is attested and approved.")
 Proceed with secure operation
else:
print("ALERT: AMI measurement mismatch! Instance may be compromised.")
 Halt deployment or trigger alert
Step-by-step guide:
This Python script demonstrates the core logic of attestation. After decoding the attestation document, it extracts the PCR1 value, which represents the measurement of the AMI and instance configuration. It then compares this value against a pre-approved, hardcoded hash in the `allowed_ami_pcr1` variable. In a production system, this allow list would be stored in a secure, centralized database. A match grants authorization, while a mismatch triggers a security incident.
What Undercode Say:
- Zero-Trust Becomes Actionable: Attestation transforms zero-trust from a networking concept into a provable, cryptographic state for compute. You no longer need to just trust your VPC; you can now verify the integrity of the workloads inside it.
- The Death of Blind Trust in AMIs: This feature fundamentally challenges the existing model of using community or even internal AMIs without verifiable proof of their contents. The supply chain attack surface for malicious base images is significantly reduced.
The introduction of EC2 Instance Attestation marks a pivotal moment where cloud security controls are catching up with on-premise hardware-based root-of-trust capabilities. It directly addresses the “black box” concern of not knowing what’s truly running inside a rented virtual machine. While the initial setup and policy management require a sophisticated security posture, the payoff is a verifiable, hardened environment resilient to many common and advanced attack vectors. This isn’t just a new feature; it’s a new foundational layer for secure cloud architecture.
Prediction:
EC2 Instance Attestation will become the default security requirement for regulated industries and sensitive workloads within two years, forcing a ripple effect across the cloud ecosystem. Competitors like Microsoft Azure and Google Cloud Platform will be compelled to release equivalent, easily accessible features. We will see the emergence of “Attestation-as-a-Service” third-party tools that simplify policy management across hybrid environments, and attestation will become a standard checkbox in enterprise security compliance frameworks like SOC 2 and FedRAMP, fundamentally raising the baseline for cloud security.
🎯Let’s Practice For Free:
IT/Security Reporter URL:
Reported By: Rlosio Aws – Hackers Feeds
Extra Hub: Undercode MoN
Basic Verification: Pass ✅


