Listen to this Post
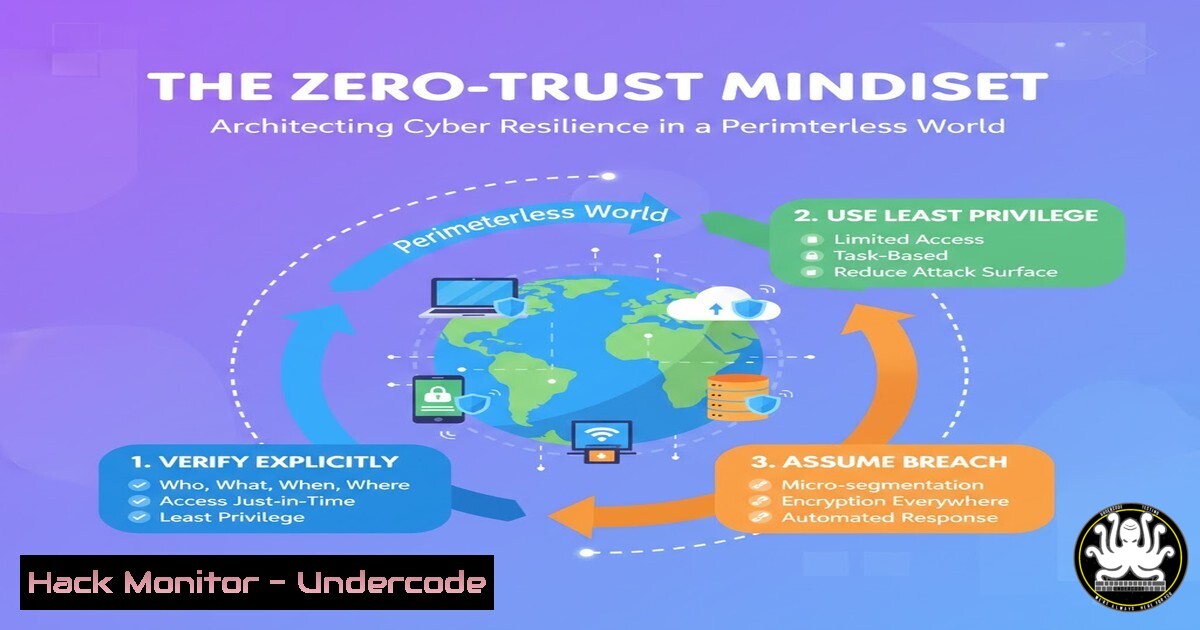
Introduction:
The traditional security model of a hardened external perimeter and a trusted internal network is obsolete in the era of cloud computing, remote work, and sophisticated supply-chain attacks. The Zero-Trust architecture operates on the principle of “never trust, always verify,” requiring strict identity verification for every person and device attempting to access resources on a private network, regardless of their location. This paradigm shift is essential for defending against modern threats that bypass conventional defenses.
Learning Objectives:
- Understand the core principles of a Zero-Trust architecture and how they differ from traditional perimeter-based security.
- Learn to implement critical technical controls for identity, device, and network segmentation.
- Gain practical skills through verified commands and configurations for Windows, Linux, and cloud environments to enforce Zero-Trust policies.
You Should Know:
- Enforcing Least Privilege with Linux User and File Permissions
A foundational pillar of Zero-Trust is the principle of least privilege. This ensures users and applications only have the absolute minimum permissions necessary to perform their function.
Verified Commands & Snippets:
– `sudo adduser –system –no-create-home appuser` (Creates a new system user without a home directory for running an application).
– `sudo chown -R appuser:appuser /opt/myapp/` (Changes ownership of the application directory to the dedicated ‘appuser’).
– `sudo chmod 750 /opt/myapp/` (Sets permissions so the owner can read/write/execute, the group can read/execute, and others have no access).
– `sudo setfacl -m u:adminuser:rx /opt/myapp/conf/` (Uses Access Control Lists to grant a specific admin user only read and execute access to a configuration directory).
– `sudo find /opt/myapp/ -type f -exec chmod 640 {} \;` (Finds all files in the directory and sets them to be readable/writable by the owner and readable by the group).
Step-by-step guide:
First, create a dedicated, non-privileged user for your application. This isolates the application’s runtime identity. Next, change the ownership of all application files to this user. Then, use `chmod` to remove write access for the group and all permissions for “others.” For more granular control, use `setfacl` to define specific permissions for different users or groups without changing the primary ownership, effectively implementing fine-grained access control as mandated by Zero-Trust.
2. Implementing Application Whitelisting with Windows AppLocker
Preventing the execution of unauthorized software is a critical Zero-Trust control to stop malware and ransomware.
Verified Commands & Snippets:
– `Get-AppLockerPolicy -Local | Test-AppLockerPolicy -UserName “DOMAIN\user” -Path “C:\Path\To\unknown.exe”` (Tests if a specific executable would be allowed for a user under the current policy).
– `New-AppLockerPolicy -RuleType Publisher -User Everyone -FilePath “C:\Program Files\VerifiedApp\app.exe” -Action Allow` (Creates a new rule allowing an application based on its digital publisher signature).
– `Get-ChildItem “C:\Program Files\” -Recurse -Include .exe | New-AppLockerPolicy -RuleType Path -User Everyone -Action Allow -Format XML` (Generates an AppLocker policy XML that allows all executables in a specific path).
– `Set-AppLockerPolicy -LDAP “LDAP://CN=AppLocker,CN=System,DC=undercode,DC=com” -Merge` (Deploys an AppLocker policy to a domain).
Step-by-step guide:
Begin by auditing what software is running in your environment using the `Get-AppLockerPolicy` and `Test-AppLockerPolicy` PowerShell cmdlets. Develop your whitelisting rules, starting with the most secure “Publisher” rules for digitally signed applications, then “Path” or “Hash” rules for others. Deploy the policy in “Audit Only” mode first to monitor for false positives before enforcing it. This ensures only approved applications can execute, drastically reducing the attack surface.
3. Micro-Segmentation of Network Traffic with Linux iptables
Micro-segmentation limits east-west traffic, preventing an attacker who compromises one system from moving laterally across the network.
Verified Commands & Snippets:
– `sudo iptables -A INPUT -p tcp –dport 22 -s 10.0.1.0/24 -j ACCEPT` (Allows SSH access only from the specific management subnet 10.0.1.0/24).
– `sudo iptables -A INPUT -p tcp –dport 443 -j ACCEPT` (Allows HTTPS traffic from any source).
– `sudo iptables -A INPUT -m state –state RELATED,ESTABLISHED -j ACCEPT` (Allows return traffic for established connections).
– `sudo iptables -P INPUT DROP` (Sets the default policy for the INPUT chain to DROP, denying all traffic not explicitly allowed).
– `sudo iptables -L -v -n` (Lists all current rules with verbose output and without DNS resolution).
Step-by-step guide:
First, define the necessary services a server provides (e.g., web on 443) and the required management access (e.g., SSH from a jump box subnet). Configure your `iptables` rules to explicitly allow only this traffic. The critical step is setting the default policy to DROP. This “deny-by-default” approach is a core tenet of Zero-Trust. Always ensure the rule for `ESTABLISHED,RELATED` connections is present to not break active sessions.
- Hardening Cloud Storage (AWS S3) Against Public Exposure
Misconfigured cloud storage is a leading cause of data breaches. Zero-Trust requires explicit verification of resource accessibility.
Verified Commands & Snippets:
– `aws s3api put-bucket-policy –bucket my-secure-bucket –policy file://bucket-policy.json` (Applies a bucket policy defined in a local JSON file).
– `aws s3api put-public-access-block –bucket my-secure-bucket –public-access-block-configuration BlockPublicAcls=true,IgnorePublicAcls=true,BlockPublicPolicy=true,RestrictPublicBuckets=true` (Enforces a full public access block on the S3 bucket).
– `aws s3 ls s3://my-secure-bucket –recursive` (Lists all objects in the bucket to audit contents).
Example bucket-policy.json snippet:
{
"Version": "2012-10-17",
"Statement": [
{
"Effect": "Deny",
"Principal": "",
"Action": "s3:",
"Resource": [
"arn:aws:s3:::my-secure-bucket/",
"arn:aws:s3:::my-secure-bucket"
],
"Condition": {"Bool": {"aws:SecureTransport": "false"}}
}
]
}
Step-by-step guide:
The first and most crucial command is to enable the S3 “Block Public Access” feature, which overrides any per-object ACLs that might accidentally make data public. Next, craft a strict bucket policy. The example policy above uses a “Deny” effect to block all access that does not use SSL/TLS ("aws:SecureTransport": "false"), ensuring data is encrypted in transit. Regularly use the `ls` command to audit what data is stored, adhering to the principle of data awareness.
5. Exploiting and Mitigating SQL Injection Vulnerabilities
Understanding common attack vectors is key to building robust defenses. SQL Injection remains a top threat due to a failure to validate and sanitize user input.
Verified Commands & Snippets:
- Exploitation (for educational purposes): `’ OR ‘1’=’1′ –` (Classic tautology to bypass authentication).
- Exploitation: `’; DROP TABLE users; –` (Example of a union-based extraction of all data from another table).
- Mitigation (Python/Psycopg2): `cursor.execute(“SELECT FROM users WHERE email = %s AND password = %s”, (user_email, user_password))` (Uses parameterized queries to safely separate SQL code from data).
- Mitigation (Node.js): `db.query(“SELECT FROM users WHERE email = ?”, [bash], callback)` (Uses placeholders for parameterized queries).
Step-by-step guide:
An attacker exploits a vulnerable login form by inputting `’ OR ‘1’=’1′–` into the password field. This manipulates the underlying SQL query to always return true, potentially granting access. The definitive mitigation is using parameterized queries (or prepared statements). As shown in the code snippets, this technique ensures user input is treated strictly as data, not executable SQL code, making injection attacks impossible.
- Implementing Multi-Factor Authentication (MFA) on Linux via SSH
Verifying identity with more than one factor is a non-negotiable requirement for Zero-Trust. This secures remote access points like SSH.
Verified Commands & Snippets:
– `sudo apt install libpam-google-authenticator` (Installs the Google Authenticator PAM module on Debian/Ubuntu).
– `google-authenticator -t -d -f -r 3 -R 30 -W` (Runs the configuration tool with flags for time-based, disallowing reuse, forcing confirmation, and generating emergency scratch codes).
– Edit /etc/pam.d/sshd: Add `auth required pam_google_authenticator.so` (Configures PAM to use the authenticator).
– Edit /etc/ssh/sshd_config: Set `ChallengeResponseAuthentication yes` and `AuthenticationMethods publickey,password publickey,keyboard-interactive` (Requires both a public key and MFA).
Step-by-step guide:
After installing the necessary package, each user must run `google-authenticator` to generate a unique secret key and QR code. The server’s SSH and PAM configuration files must then be modified. The `sshd_config` change is critical: `AuthenticationMethods publickey,keyboard-interactive` mandates that a user must first present a valid SSH key (first factor) and then pass the TOTP challenge (second factor). This layered defense significantly hardens remote access.
7. Container Security Hardening with Docker
Containers are fundamental to modern IT, but their security defaults often violate Zero-Trust. Hardening involves minimizing privileges and capabilities.
Verified Commands & Snippets:
– `docker run –user 1000:1000 –read-only -v /tmp/appdata:/var/lib/app/data:rw myapp:latest` (Runs a container as a non-root user, with a read-only filesystem except for one mounted data volume).
– `docker run –cap-drop=ALL –cap-add=NET_BIND_SERVICE myapp:latest` (Drops all Linux capabilities and only adds the specific one needed to bind to a privileged port).
– `docker run –security-opt=no-new-privileges:true myapp:latest` (Prevents the container process from gaining new privileges).
– `docker scan myapp:latest` (Scans the container image for known vulnerabilities using Docker Scout).
Step-by-step guide:
Never run a container as root unless absolutely necessary. Use the `–user` flag to specify a non-privileged user ID. The `–read-only` flag prevents malicious code from writing to the container’s filesystem. Use `–cap-drop=ALL` and then selectively add back only the required capabilities, drastically reducing the power of a compromised container. Finally, integrate `docker scan` into your CI/CD pipeline to catch vulnerabilities before deployment.
What Undercode Say:
- Identity is the New Perimeter: The network location can no longer be trusted. Every access request must be authenticated, authorized, and encrypted based on identity and context.
- Explicit Verification is Non-Negotiable: Assumptions are a vulnerability. Systems must be designed to explicitly validate every access attempt, from every source, for every resource.
The shift to Zero-Trust is not merely a technological upgrade but a fundamental cultural and architectural transformation. It moves security from a static, perimeter-based defense to a dynamic, identity-centric model that is resilient in the face of an ever-evolving threat landscape. Organizations that fail to adopt this mindset are building their digital fortresses on a foundation of sand, vulnerable to the next wave of attacks that simply bypass their crumbling walls. The commands and configurations detailed here provide the concrete building blocks to start this essential journey.
Prediction:
The failure to universally adopt a Zero-Trust architecture will be the root cause of the next wave of major cyber incidents, particularly as AI-driven attacks become more prevalent. AI will be used to automate the discovery of implicit trust relationships within networks and cloud environments, allowing for hyper-efficient lateral movement and data exfiltration. Organizations relying on traditional perimeter security will be systematically dismantled by these AI-powered threats, making Zero-Trust not a best practice, but a baseline requirement for survival in the digital age.
🎯Let’s Practice For Free:
IT/Security Reporter URL:
Reported By: Alain Bauer – Hackers Feeds
Extra Hub: Undercode MoN
Basic Verification: Pass ✅


