Listen to this Post
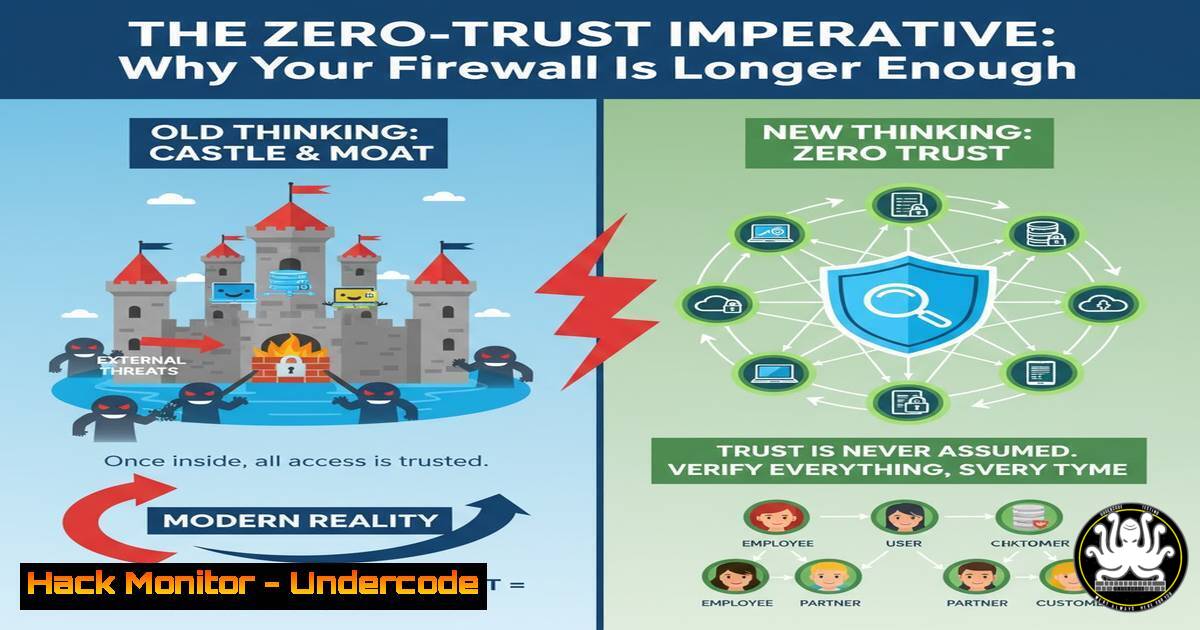
Introduction:
The traditional perimeter-based security model, long symbolized by the corporate firewall, is crumbling in the face of modern cyber threats. As cloud adoption, remote work, and sophisticated social engineering attacks become the norm, a new paradigm is essential. This article delves into the practical implementation of a Zero-Trust Architecture, providing the technical commands and configurations to move from concept to reality.
Learning Objectives:
- Understand the core principles of a Zero-Trust security model and how it differs from perimeter-based defense.
- Learn to implement critical Zero-Trust controls across identity, endpoints, and network segmentation.
- Gain hands-on experience with commands for identity governance, system hardening, and network micro-segmentation.
You Should Know:
1. Enforcing Multi-Factor Authentication (MFA) with Conditional Access
The foundation of Zero-Trust is “never trust, always verify.” Enforcing MFA is the first and most critical step.
Microsoft Azure AD PowerShell:
 Install the Azure AD module if not already present
Install-Module AzureAD

Connect to Azure AD
Connect-AzureAD

Create a new Conditional Access policy to require MFA for all users
$conditions = New-Object -TypeName Microsoft.Open.MSGraph.Model.ConditionalAccessConditionSet
$conditions.Applications = New-Object -TypeName Microsoft.Open.MSGraph.Model.ConditionalAccessApplicationCondition
$conditions.Applications.IncludeApplications = "All"
$conditions.Users = New-Object -TypeName Microsoft.Open.MSGraph.Model.ConditionalAccessUserCondition
$conditions.Users.IncludeUsers = "All"

$grantcontrols = New-Object -TypeName Microsoft.Open.MSGraph.Model.ConditionalAccessGrantControls
$grantcontrols._Operator = "OR"
$grantcontrols.BuiltInControls = "mfa"

New-AzureADMSConditionalAccessPolicy -DisplayName "Require MFA for All Users" -State "enabled" -Conditions $conditions -GrantControls $grantcontrols
Step-by-step guide: This PowerShell script connects to your Azure Active Directory tenant and creates a new Conditional Access policy. The policy is configured to apply to all users and all cloud applications. The grant control is set to require Multi-Factor Authentication. Once enabled, any user signing in from any location will be challenged for a second form of verification, drastically reducing the risk of account compromise via stolen passwords.
- Implementing the Principle of Least Privilege on Linux
Zero-Trust mandates granting only the permissions necessary to perform a task. The `sudo` system is central to this on Linux.
Linux Bash Commands:
 Create a new user account without a home directory (for a service account)
sudo useradd -M -s /bin/false service_account

Create a new group for administrators
sudo groupadd secadmins

Add a user to the admin group
sudo usermod -a -G secadmins jdoe

Give the 'secadmins' group permission to run the 'apt update' and 'apt upgrade' commands as root without a password
echo "%secadmins ALL=(ALL) NOPASSWD: /usr/bin/apt update, /usr/bin/apt upgrade" | sudo tee /etc/sudoers.d/secadmins

Verify the permissions of a sensitive file (e.g., /etc/shadow)
ls -l /etc/shadow

Change the owner of a web directory to the specific service account running the web server
sudo chown -R www-data:www-data /var/www/html
Step-by-step guide: These commands demonstrate user and group management for least privilege. Instead of giving users full root access, we create a specific group (secadmins) and grant that group permission to run only specific, necessary commands (apt update/upgrade) without a password. The `chown` command ensures that service accounts like `www-data` only own the files they need to function, limiting the damage if they are compromised.
3. Hardening Windows Endpoints with PowerShell
Every endpoint is a potential entry point and must be hardened. PowerShell is the key tool for configuring Windows security settings.
Windows PowerShell Commands:
 Enable Windows Defender Antivirus real-time protection
Set-MpPreference -DisableRealtimeMonitoring $false

Enable controlled folder access to protect against ransomware
Set-MpPreference -EnableControlledFolderAccess Enabled

Disable SMBv1, an outdated and vulnerable protocol
Disable-WindowsOptionalFeature -Online -FeatureName SMB1Protocol

Set the Windows Defender firewall to block inbound connections by default
Set-NetFirewallProfile -Profile Domain,Public,Private -DefaultInboundAction Block

Audit successful and failed logon events
auditpol /set /category:"Logon/Logoff" /success:enable /failure:enable
Step-by-step guide: This series of PowerShell commands locks down a Windows endpoint. It ensures the built-in antivirus is active and has ransomware protection enabled. It removes the legacy SMBv1 protocol, which was exploited by attacks like WannaCry. The firewall is set to a default-deny stance for inbound traffic, and logon auditing is enabled to monitor for suspicious authentication attempts.
4. Network Micro-Segmentation with Windows Firewall
Zero-Trust requires segmenting the network to prevent lateral movement. The built-in Windows Firewall can create these micro-perimeters.
Windows Command Prompt (Admin):
 Create a new inbound rule to allow SSH only from a specific management subnet (e.g., 10.0.1.0/24)
netsh advfirewall firewall add rule name="Allow SSH from Management" dir=in action=allow protocol=TCP localport=22 remoteip=10.0.1.0/24

Block outbound RDP traffic to prevent lateral movement via RDP
netsh advfirewall firewall add rule name="Block All Outbound RDP" dir=out action=block protocol=TCP localport=3389

Create a rule to allow a specific application (e.g., payroll.exe) to talk only to its designated server
netsh advfirewall firewall add rule name="Payroll App to Server" dir=out action=allow program="C:\Program Files\Payroll\payroll.exe" remoteip=192.168.10.50
Step-by-step guide: These `netsh` commands move beyond simple port blocking. The first rule allows SSH traffic but only from a specific, trusted IP range. The second rule proactively blocks all outbound RDP, a common vector for lateral movement inside a network. The third rule is application-aware, allowing the `payroll.exe` application to communicate only with its specific server, effectively creating a micro-segment for that application.
5. Scanning for Vulnerabilities with Nmap and OpenVAS
Continuous verification is key. You must actively scan your environment for misconfigurations and known vulnerabilities.
Linux Bash Commands:
 Perform a basic TCP SYN scan on a target network range
nmap -sS 192.168.1.0/24

Scan for specific vulnerabilities associated with SMB (e.g., EternalBlue)
nmap --script smb-vuln-ms17-010 -p 445 192.168.1.100

Perform a comprehensive version detection scan
nmap -sV -sC -O target.com

Install and setup OpenVAS for a full vulnerability management suite
sudo apt update && sudo apt install openvas
sudo gvm-setup
sudo gvm-start

Authenticate to the OpenVAS API and start a task (example with curl)
curl -k -u admin:password -X POST https://localhost:9392/api/tasks -d '{"target": "192.168.1.100", "config": "Full and fast"}'
Step-by-step guide: Nmap is used for network discovery and security auditing. The `-sS` flag performs a stealthy SYN scan. The `–script` option runs specific vulnerability detection scripts. For a deeper, managed solution, OpenVAS (now Greenbone Vulnerability Management) provides a full-featured platform. The commands show its installation and how to initiate a scan via its API, integrating vulnerability checking into automated workflows.
6. Securing Cloud Storage (AWS S3) from Misconfiguration
In the cloud, the “network perimeter” is virtually nonexistent, making resource-level security critical.
AWS CLI Commands:
 Create an S3 bucket with versioning enabled for data recovery
aws s3api create-bucket --bucket my-secure-bucket-xyz --region us-east-1

Block ALL public access to the bucket and its objects
aws s3api put-public-access-block --bucket my-secure-bucket-xyz --public-access-block-configuration BlockPublicAcls=true,IgnorePublicAcls=true,BlockPublicPolicy=true,RestrictPublicBuckets=true

Enable default server-side encryption for all objects uploaded
aws s3api put-bucket-encryption --bucket my-secure-bucket-xyz --server-side-encryption-configuration '{"Rules": [{"ApplyServerSideEncryptionByDefault": {"SSEAlgorithm": "AES256"}}]}'

Configure logging to track access requests
aws s3api put-bucket-logging --bucket my-secure-bucket-xyz --bucket-logging-status '{"LoggingEnabled": {"TargetBucket": "my-log-bucket", "TargetPrefix": "s3-logs/"}}'
Step-by-step guide: These AWS CLI commands demonstrate a secure-by-default S3 bucket configuration. The most critical command is put-public-access-block, which explicitly disables all forms of public read/write access, preventing the common data leak scenario. Enforcing encryption at rest and enabling access logging complete the picture, ensuring data is protected and all access is auditable.
What Undercode Say:
- Identity is the New Perimeter: The most robust firewall is useless if an attacker has valid credentials. MFA and strict identity governance are non-negotiable.
- Assume a Breach, Segment Accordingly: Every configuration should be made with the assumption that a device or user account is already compromised. Micro-segmentation is the primary control to contain an incident.
The shift to Zero-Trust is not merely a technological upgrade but a fundamental philosophical change in security posture. It moves the focus from building impenetrable walls to creating a resilient environment where trust is continuously earned and validated. The commands and configurations provided are the building blocks for this new reality. Relying on a defined perimeter is a legacy mindset that modern attackers exploit with ease. The future belongs to organizations that verify explicitly, grant access minimally, and are prepared to operate within a compromised state.
Prediction:
The failure to adopt a Zero-Trust model will be the single greatest predictor of catastrophic breaches in the next three to five years. As AI-powered social engineering makes phishing and credential theft more sophisticated and personalized, compromised identities will bypass traditional defenses at an unprecedented scale. Organizations that have implemented granular segmentation and identity-centric controls will be able to contain these incidents to isolated systems, while those relying on perimeter-based security will face full-network compromises, leading to massive operational and reputational damage.
🎯Let’s Practice For Free:
IT/Security Reporter URL:
Reported By: Nasmiya Beevi – Hackers Feeds
Extra Hub: Undercode MoN
Basic Verification: Pass ✅


