Listen to this Post
Introduction:
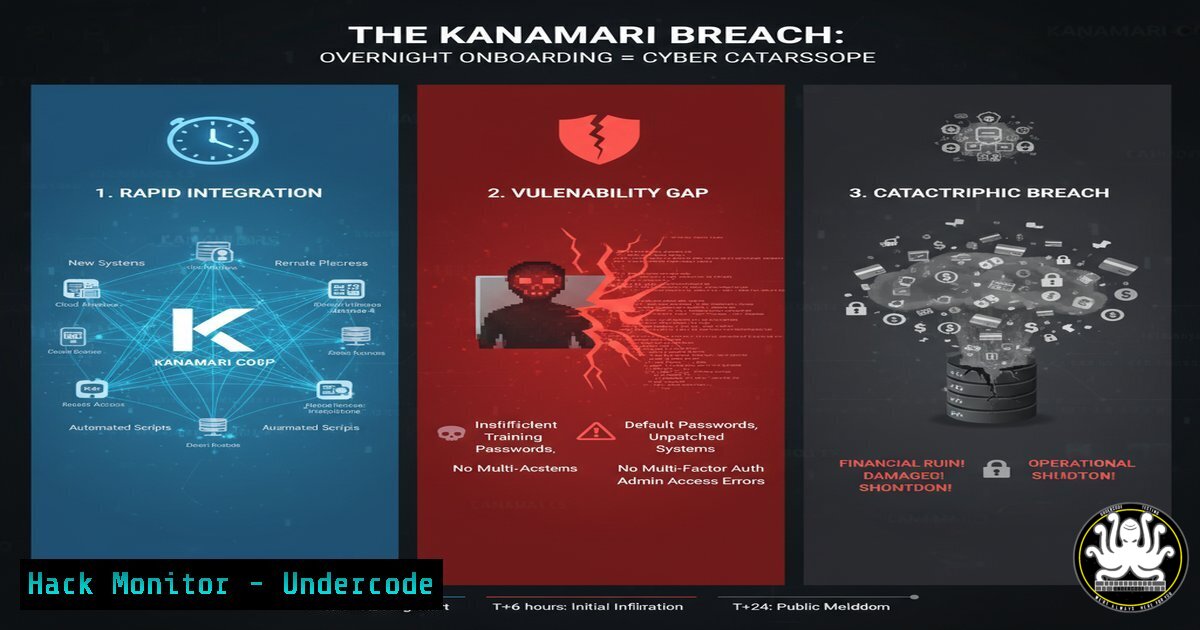
The rapid, unplanned adoption of new technology presents a critical threat vector, as starkly illustrated by the Kanamari incident. When advanced systems are deployed without parallel security integration, organizations instantly inherit a sprawling and vulnerable attack surface. This scenario, often termed “overnight tech,” transforms potential into peril, leaving security teams scrambling to defend assets they don’t fully understand or control.
Learning Objectives:
- Identify the critical security gaps created by rapid, unvetted technology adoption.
- Implement immediate hardening commands for Linux and Windows environments post-deployment.
- Develop a proactive framework for continuous vulnerability assessment and API security in new tech stacks.
You Should Know:
1. Immediate System Discovery and Inventory
After a new system is integrated, the first step is to discover what exactly has been connected to your network. Using powerful network scanning tools is non-negotiable.
Verified Command:
sudo nmap -sS -A -O -p- 192.168.1.0/24
Step‑by‑step guide:
sudo: Runs the command with administrative privileges.nmap: The network mapper tool.-sS: Performs a SYN scan, a stealthy and common method to discover open ports.-A: Enables OS and version detection, script scanning, and traceroute.-O: Attempts to identify the remote operating system.-p-: Scans all 65,535 ports on the target, not just the common ones.192.168.1.0/24: The target IP range. Replace this with your network’s subnet.
This command provides a comprehensive map of all live hosts, their open ports, running services, and operating systems, revealing any unauthorized or unexpected systems that may have been introduced.
2. Hardening New Linux Deployments
A new Linux server deployed without a baseline configuration is a prime target. These commands establish fundamental security.
Verified Commands:
 1. Disable root SSH login
sudo sed -i 's/PermitRootLogin yes/PermitRootLogin no/' /etc/ssh/sshd_config

<ol>
<li>Enforce key-based authentication and disable passwords
sudo sed -i 's/PasswordAuthentication yes/PasswordAuthentication no/' /etc/ssh/sshd_config</p></li>
<li><p>Configure the firewall to allow only essential ports (e.g., SSH 22, HTTP 80, HTTPS 443)
sudo ufw enable
sudo ufw allow 22/tcp
sudo ufw allow 80/tcp
sudo ufw allow 443/tcp
sudo ufw deny from 0.0.0.0/0 to any port 21  Explicitly deny FTP</p></li>
<li><p>Check for and remove unnecessary services
sudo systemctl list-units --type=service --state=running
sudo systemctl stop <unnecessary-service>
sudo systemctl disable <unnecessary-service></p></li>
<li><p>Restart SSH to apply changes
sudo systemctl restart sshd
Step‑by‑step guide:
This sequence first modifies the SSH configuration file to prevent direct root access and enforce the more secure key-based authentication. It then enables the Uncomplicated Firewall (UFW), defining a strict allow-list for network traffic. Finally, it audits and disables any non-essential services that could be exploited. Always restart the SSH service to apply the new security settings.
3. Securing Windows Endpoints Post-Integration
New Windows machines must be locked down immediately to prevent lateral movement.
Verified PowerShell Commands:
 1. Enable and Configure Windows Defender Firewall with specific rules
Set-NetFirewallProfile -Profile Domain,Public,Private -Enabled True
New-NetFirewallRule -DisplayName "Block SMBv1" -Direction Inbound -Protocol TCP -LocalPort 445 -Action Block

<ol>
<li>Disable the vulnerable SMBv1 protocol
Disable-WindowsOptionalFeature -Online -FeatureName SMB1Protocol -NoRestart</p></li>
<li><p>Force a Group Policy update to apply any new security policies
gpupdate /force</p></li>
<li><p>Audit local administrator accounts
Get-LocalUser | Where-Object {$<em>.Enabled -eq $true -and $</em>.Name -like "Admin"}</p></li>
<li><p>Check for critical Windows events (e.g., failed logins)
Get-EventLog -LogName Security -InstanceId 4625 -Newest 10
Step‑by‑step guide:
These PowerShell commands activate the host-based firewall across all profiles and create a custom rule to block a known vulnerable protocol (SMBv1). They then force a policy refresh and perform a basic audit of user accounts and security logs. This is a critical first response to secure a Windows system that was deployed with default, often insecure, settings.
4. API Endpoint Discovery and Security Testing
Modern “overnight tech” heavily relies on APIs, which are frequently left unsecured. Discovering and testing these endpoints is crucial.
Verified Commands (using `curl` and `jq`):
 1. Discover API endpoints from a base URL (requires common.txt wordlist)
ffuf -w /usr/share/wordlists/common.txt -u https://api.target.com/FUZZ -H "Authorization: Bearer <token>"

<ol>
<li>Test for broken object level authorization (BOLA) by manipulating an ID
curl -H "Authorization: Bearer <user_token>" https://api.target.com/users/12345
Then try with a different user ID to see if you can access another user's data
curl -H "Authorization: Bearer <user_token>" https://api.target.com/users/67890</p></li>
<li><p>Check for missing rate limiting on a login endpoint
for i in {1..10}; do curl -X POST https://api.target.com/login -d '{"user":"test","pass":"test"}' & done</p></li>
<li><p>Validate SSL/TLS configuration
nmap --script ssl-enum-ciphers -p 443 api.target.com
Step‑by‑step guide:
Use a fuzzing tool like `ffuf` to discover hidden API endpoints. Once discovered, test for common vulnerabilities like BOLA by changing object identifiers in API requests. Use a simple loop to test for rate limiting, which can prevent brute-force attacks. Finally, use Nmap’s scripting engine to audit the strength of the SSL/TLS ciphers being used.
5. Cloud Storage Misconfiguration Mitigation
The Kanamari-like scenario often involves cloud services (AWS S3, Azure Blobs) configured for ease-of-use, not security.
Verified AWS CLI Commands:
 1. Discover and list all S3 buckets in an account
aws s3 ls

<ol>
<li>Check the ACL (Access Control List) of a specific bucket
aws s3api get-bucket-acl --bucket my-bucket-name</p></li>
<li><p>Check the Bucket Policy
aws s3api get-bucket-policy --bucket my-bucket-name</p></li>
<li><p>Apply a block public access setting at the bucket level
aws s3api put-public-access-block --bucket my-bucket-name --public-access-block-configuration BlockPublicAcls=true,IgnorePublicAcls=true,BlockPublicPolicy=true,RestrictPublicBuckets=true</p></li>
<li><p>Set a default encryption rule on the bucket
aws s3api put-bucket-encryption --bucket my-bucket-name --server-side-encryption-configuration '{"Rules": [{"ApplyServerSideEncryptionByDefault": {"SSEAlgorithm": "AES256"}}]}'
Step‑by‑step guide:
This process starts with an inventory of all S3 buckets. For each bucket, you must audit its Access Control List and Policy to ensure it is not publicly readable or writable. The critical step is applying the public access block, which is a safeguard that overrides any other permissive policies. Finally, enforce default encryption to protect data at rest.
6. Container Security Hardening
If the new technology stack involves containerized applications (Docker, Kubernetes), immediate hardening is required.
Verified Docker Commands:
 1. Scan a local Docker image for vulnerabilities using Docker Scout (or Trivy)
docker scout cve my-app:latest

<ol>
<li>Run a container without root privileges
docker run --user 1000:1000 -d my-app:latest</p></li>
<li><p>Run a container with read-only filesystem to prevent persistence
docker run --read-only -d my-app:latest</p></li>
<li><p>Limit memory and CPU usage to prevent resource exhaustion attacks
docker run -m 512m --cpus 1.0 -d my-app:latest</p></li>
<li><p>Inspect a running container's security configuration
docker inspect <container_id>
Step‑by‑step guide:
Before running a container, scan its image for known vulnerabilities. When launching the container, adopt the principle of least privilege by specifying a non-root user and using a read-only filesystem where possible. Apply resource limits to mitigate denial-of-service scenarios. The `inspect` command allows you to verify these security settings are active.
7. Continuous Vulnerability Assessment with Automation
Security is not a one-time task. Automate the discovery and assessment of vulnerabilities.
Verified Bash Script Snippet:
!/bin/bash
 Basic automated scan and report script
TARGET_FILE="targets.txt"
REPORT_DIR="/opt/security_scans/$(date +%Y%m%d)"

mkdir -p $REPORT_DIR

while IFS= read -r target
do
 Run an nmap scan and output to a file
echo "Scanning $target..."
nmap -sV -O $target > "$REPORT_DIR/nmap_$target.txt" &

Check for HTTP/HTTPS services and run a Nikto scan
if nc -z $target 80 2>/dev/null; then
nikto -h $target -o "$REPORT_DIR/nikto_$target.html" &
fi

done < "$TARGET_FILE"

wait
echo "All scans completed. Reports saved to $REPORT_DIR."
Step‑by‑step guide:
This bash script automates the scanning process. It reads a list of targets from a file, performs an Nmap service version and OS detection scan on each, and if web ports are open, launches a Nikto web vulnerability scanner. The `&` runs these scans in parallel for efficiency, and the `wait` command ensures the script completes only after all background jobs are finished. This can be scheduled as a cron job for continuous monitoring.
What Undercode Say:
- The Integration Gap is the New Attack Surface: The most critical vulnerability is no longer a single software flaw, but the ungoverned space between newly integrated systems and the existing security perimeter. This gap, created by speed and convenience, is where attackers will establish a foothold.
- Assumed Trust Leads to Catastrophic Failure: The Kanamari model demonstrates that when new tech is assumed to be secure by default, it creates a chain of implicit trust that attackers can exploit to move laterally from a single weak system to the core of the network.
The analysis of the Kanamari breach pattern reveals a fundamental shift in attacker strategy. They are no longer just hunting for technical bugs; they are hunting for procedural and integration failures. The “overnight” deployment of complex systems, from IoT to SaaS platforms, creates a shadow IT environment that is invisible to traditional security controls. Defenders must now assume that any new technology is a potential Trojan horse until it has been rigorously vetted, segmented, and hardened. The commands and methodologies outlined above are not merely best practices; they are emergency response procedures for a constantly evolving threat landscape where the biggest risk is the tech you wanted yesterday.
Prediction:
The “Kanamari model” of attack will become the dominant cyber threat strategy over the next 3-5 years. As AI-driven and IoT technologies are adopted at an accelerating pace, the window for secure integration will shrink to zero. We will see the rise of fully automated exploitation frameworks capable of actively scanning for and exploiting these “integration gaps” within hours of a new device or service appearing online. This will lead to a new class of “zero-day integration vulnerabilities,” forcing a paradigm shift in cybersecurity from patching known software flaws to autonomously managing and securing dynamic, self-assembling digital ecosystems. The organizations that survive will be those that build security validation and “zero-trust” segmentation directly into their technology adoption lifecycle.
🎯Let’s Practice For Free:
IT/Security Reporter URL:
Reported By: Faisalhoque When – Hackers Feeds
Extra Hub: Undercode MoN
Basic Verification: Pass ✅


