Listen to this Post
Introduction:
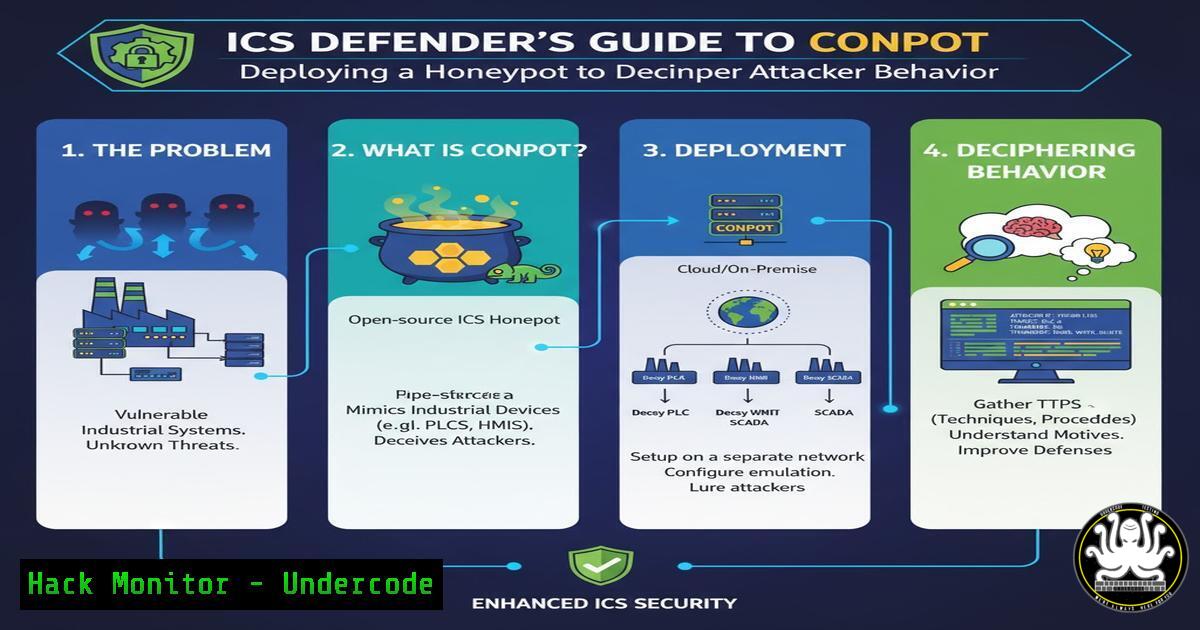
In the opaque world of Operational Technology (OT) security, visibility is the cornerstone of a robust defense. Industrial control systems (ICS) are increasingly targeted, yet many organizations lack the intelligence to understand how attackers probe and interact with their networks. Deploying a honeypot like Conpot provides a controlled, safe environment to observe these tactics, transforming chaotic network noise into actionable, analyzable data.
Learning Objectives:
- Master the installation and configuration of the Conpot ICS honeypot on a Linux system.
- Learn to validate your honeypot’s deployment using common network scanning and interaction tools.
- Understand the critical security practices required to safely operate a honeypot without introducing new risks to your environment.
You Should Know:
1. Initial System Hardening
Before deploying any service, especially a honeypot, the underlying system must be secured.
Commands:
 Update the package list and upgrade all packages
sudo apt update && sudo apt upgrade -y

Enable the Uncomplicated Firewall (UFW)
sudo ufw enable

Allow SSH traffic to ensure you don't lock yourself out
sudo ufw allow ssh

Create a dedicated, non-root user for running Conpot
sudo adduser --system --group conpot-user
Step-by-step guide:
This initial setup is critical for minimizing the attack surface of your honeypot server. The `apt update && upgrade` command ensures all system software has the latest security patches. Enabling UFW provides a host-based firewall to control inbound and outbound traffic. Crucially, creating a non-privileged user (conpot-user) follows the principle of least privilege, ensuring that if the honeypot is compromised, the attacker has limited system access.
2. Instating Conpot and Its Dependencies
Conpot is a Python-based application and requires a specific environment to function correctly.
Commands:
 Install Python3 and the package manager pip, along with virtual environment tool
sudo apt install python3 python3-pip python3-venv -y

Create a directory for Conpot and navigate into it
sudo mkdir /opt/conpot
sudo chown conpot-user:conpot-user /opt/conpot

Switch to the non-root user
sudo su - conpot-user

Create a Python virtual environment
python3 -m venv conpot-venv

Activate the virtual environment
source conpot-venv/bin/activate

Install Conpot using pip
pip install conpot
Step-by-step guide:
Using a virtual environment (python3 -m venv) isolates Conpot’s Python libraries from the system’s global Python environment, preventing potential dependency conflicts and adding a layer of containment. Installing Conpot within this activated environment ensures all its dependencies are contained within the `/opt/conpot/conpot-venv` directory. Running these steps as the `conpot-user` continues to enforce the principle of least privilege.
3. Basic Conpot Configuration and Deployment
With Conpot installed, you must generate a base configuration and start the service.
Commands:
 Ensure you are still the 'conpot-user' and in the virtual environment
whoami
 Should return: conpot-user

Generate default Conpot templates and configuration files
conpot --template default -g

Start Conpot, binding it to all interfaces (0.0.0.0) for external visibility
conpot -f --template default
Step-by-step guide:
The `conpot –template default -g` command creates a set of default configuration files and templates that emulate various ICS protocols like Modbus and S7comm. The `-f` flag runs Conpot in the foreground, which is ideal for initial testing as it streams logs directly to your terminal. By default, Conpot will listen on several ports, including port 80 for its web interface and port 502 for the Modbus protocol, making it appear as a real ICS device to scanners.
4. Validating Deployment with Network Scanning
Once running, you must verify that your honeypot is visible on the network.
Commands:
 Using Nmap from a separate machine to scan the honeypot's IP address
nmap -sV -p 80,502,102 <HONEYPOT_IP_ADDRESS>

A more aggressive scan to simulate an attacker's reconnaissance
nmap -A -T4 -p- <HONEYPOT_IP_ADDRESS>
Step-by-step guide:
The first `nmap` command performs a service version detection scan (-sV) on the key ports Conpot emulates. You should see that port 502 is identified as `modbus` and port 80 as an `http` service. The second, more comprehensive scan (-A for aggressive, `-T4` for speed, `-p-` for all ports) mimics a determined attacker, helping you understand the full profile your honeypot presents. Observing these results confirms your deceptive service is active and listening.
5. Interacting with the Modbus Honeypot
To truly test the emulation, you need to interact with the protocols directly.
Commands:
 Use a tool like modbus-cli to read a holding register from the honeypot
mbread -t 4 -a 1 <HONEYPOT_IP_ADDRESS> 502

Explanation of the command:
 mbread: The modbus-cli read command.
 -t 4: Specifies the function code (4 = Read Input Registers).
 -a 1: The address of the register to read.
 <HONEYPOT_IP_ADDRESS> 502: The target IP and Modbus port.
Step-by-step guide:
This command simulates a legitimate or malicious query to the Modbus interface. A real PLC would return actual process data; your Conpot honeypot will return simulated values defined in its template. This interaction is logged by Conpot, providing a record of the “attack.” Analyzing these logs allows you to see the exact requests made, the source IP, and the timing, which is invaluable for understanding attacker techniques.
6. Advanced Configuration: Customizing the Deception
The default template is a good start, but customization makes the honeypot more convincing.
File Snippet: `/opt/conpot/conpot.config`
<!-- Example snippet showing how to change the device vendor -->
<device_info>
<vendor>Siemens</vendor>
<name>SIMATIC S7-300</name>
<version>V3.0</version>
</device_info>

<!-- Example of modifying a Modbus register map -->
<modbus map_file="custom_modbus.xml"/>
Step-by-step guide:
Editing the `conpot.config` file and associated map files (like custom_modbus.xml) allows you to tailor the honeypot’s responses. You can change the device vendor, product name, and the data within its simulated registers to mimic specific PLC models found in your real environment. A scanner that sees “Siemens S7-300” is far more likely to proceed with targeted attacks than one that sees a generic device, increasing the intelligence value of your honeypot.
7. Critical Security: Isolating and Containing the Honeypot
A honeypot is a lure for attackers and must be treated as a toxic asset.
Commands:
 Using UFW to DENY all outbound traffic by default, preventing pivot attacks
sudo ufw default deny outgoing
sudo ufw default allow incoming

A specific rule to allow the honeypot user to send logs to a remote SIEM (e.g., on port 514)
sudo ufw allow out from any to <SIEM_IP> port 514

Running Conpot in a Docker container for isolation
docker run -d -p 80:8800 -p 502:502 --name conpot honeynet/conpot
Step-by-step guide:
The most critical step is network containment. Denying all outbound traffic with UFW ensures that if an attacker compromises the honeypot, they cannot use it as a launching point for attacks against your internal network. The only exception should be for outbound logging to a secure, external SIEM. Alternatively, running Conpot inside a Docker container provides filesystem and process isolation, making it much harder for an attacker to break out and affect the host system.
What Undercode Say:
- A honeypot is not a “set and forget” tool; it is an active intelligence-gathering asset that requires continuous monitoring and logging analysis.
- The primary risk of any honeypot is misconfiguration leading to its compromise and use as a pivot point into trusted networks. Isolation is non-negotiable.
The strategic value of Conpot lies in its ability to make the abstract concept of “threat intelligence” tangible. By observing scan patterns, interaction attempts, and exploit payloads firsthand, security teams move from a reactive to a proactive posture. The analogy of an “NP problem made P” is apt; it reduces the infinite, chaotic possibilities of network traffic into a finite, observable system whose inputs (attacks) can be logged, classified, and understood. However, this powerful tool demands rigorous operational discipline. The configuration and deployment must be perfect, as any flaw turns a source of intelligence into a source of compromise.
Prediction:
The future of ICS honeypots like Conpot will converge with AI-driven deception networks. Static honeypots will become less effective as attackers get better at fingerprinting them. The next generation will employ adaptive learning to dynamically alter their device profiles, network behaviors, and response patterns in real-time, creating a constantly shifting deception landscape that is indistinguishable from a real, complex industrial network. This will not only detect attacks but actively waste attacker resources and generate high-fidelity data for predictive threat models.
🎯Let’s Practice For Free:
IT/Security Reporter URL:
Reported By: Alhasawi Icscybersecurity – Hackers Feeds
Extra Hub: Undercode MoN
Basic Verification: Pass ✅


