
Listen to this Post
Introduction:
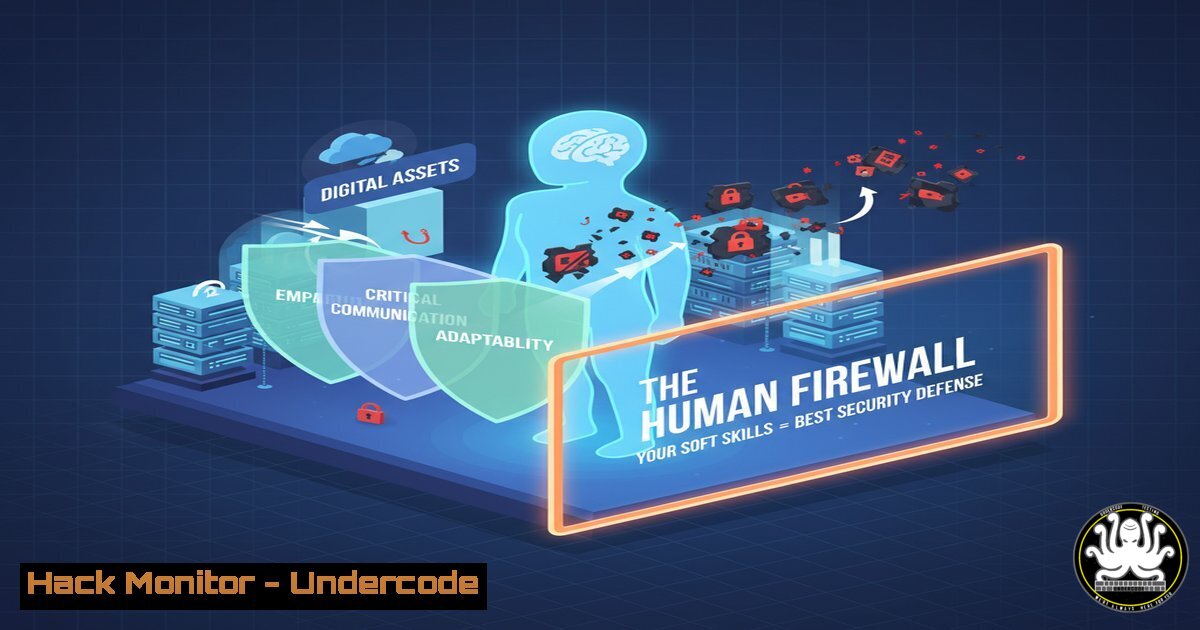
In an era of sophisticated AI-powered cyber threats, the human element remains both the greatest vulnerability and the most powerful defense. While organizations invest heavily in technical controls, the cultivation of critical human skills—curiosity, communication, and critical thinking—is emerging as the cornerstone of a resilient security posture, creating what is known as the “human firewall.”
Learning Objectives:
- Understand the concept of the human firewall and its critical role in cybersecurity.
- Learn practical technical commands and procedures to empower user-led security.
- Develop a strategy for integrating human skills training with technical enforcement.
You Should Know:
- The Psychology of Social Engineering: Recognizing the Hook
Social engineering preys on human psychology, not system vulnerabilities. The first line of defense is awareness.
Verified Command/Tactic: Phishing Email Header Analysis
 In a Linux terminal or email client with header view enabled
grep -E '(Received:|From:|Return-Path:|Message-ID:)' email_headers.txt
Step-by-step guide:
- Locate Headers: In your email client (e.g., Gmail, Outlook), open the suspicious email and find the “Show original” or “View message details” option to see the full headers. Copy this text into a file named
email_headers.txt. - Analyze the “Received” Path: The `grep` command filters for key fields. Examine the `Received:` fields from bottom to top. This shows the email’s journey. Look for mismatches between the `From:` address and the originating mail servers.
- Check the Return-Path: The `Return-Path:` should typically align with the `From:` address. A discrepancy is a major red flag for spoofing.
- Verify DKIM & SPF: While not shown in the simple grep, look for `Authentication-Results:` headers. `pass` for DKIM and SPF indicates the email was legitimately sent from the claimed domain. `fail` or `softfail` confirms a phishing attempt.
2. Endpoint Vigilance: The Power of User Context
Empowered users can perform basic endpoint checks, providing crucial early warnings of compromise.
Verified Commands: Windows & Linux Process Inspection
 Windows PowerShell (Run as Administrator)
Get-Process | Sort-Object CPU -Descending | Select-Object -First 10 Name, CPU, Id

Linux Terminal
ps aux --sort=-%cpu | head -n 10
Step-by-step guide:
- Open Terminal: Launch PowerShell (Windows) or a terminal (Linux).
- Execute Command: Run the appropriate command for your OS.
- Analyze Output: This lists the top 10 processes by CPU usage. Look for unfamiliar process names, misspellings of legitimate processes (e.g., “scvhost.exe” instead of “svchost.exe”), or unknown applications consuming high resources, which could indicate malware.
- Investigate: If you find a suspicious process, note its Process ID (PID). You can then search for that PID and process name online to determine its legitimacy.
3. Network Awareness: Spotting Unauthorized Connections
Users can identify rogue network listeners and connections originating from their machines.
Verified Commands: Network Connection Enumeration
 Windows - List listening ports and associated processes
netstat -ano | findstr "LISTENING"

Linux - List listening ports and associated processes
sudo netstat -tulnp
 OR using the more modern ss command:
sudo ss -tulnp
Step-by-step guide:
- Run with Privileges: On Linux, use
sudo. On Windows, run PowerShell as Admin. - Interpret the Output: Look for the `Local Address` column, which shows
IP:Port. Identify services listening on non-standard, high-numbered ports (e.g., a port like 55555 when you aren’t running a known service). The `PID/Program Name` column helps identify the responsible application. - Correlate: Cross-reference any suspicious ports and PIDs with your process list from the previous section. An unknown process listening on a network port is a high-severity indicator.
-
Cloud Security Hygiene: The Principle of Least Privilege
Human judgment is required to implement and audit the core security principle of least privilege in cloud environments.
Verified Commands: AWS IAM Policy Simulation
 AWS CLI - Simulate a policy to check for excessive permissions
aws iam simulate-principal-policy \
--policy-source-arn arn:aws:iam::ACCOUNT-NUMBER:user/EXAMPLE-USERNAME \
--action-names "s3:DeleteBucket" "iam:CreateUser" "ec2:TerminateInstances"
Step-by-step guide:
- Prerequisites: Ensure the AWS CLI is installed and configured with appropriate read-only permissions.
- Customize the Command: Replace `ACCOUNT-NUMBER` and `EXAMPLE-USERNAME` with the specific ARN of the user/role you are auditing.
- Specify Actions: The `–action-names` list contains powerful, high-risk API actions you want to test for. Modify this list based on the user’s intended role.
- Analyze Results: The command output will show an `EvalDecision` for each action (
allowedorexplicitDeny). If a user who should not be able to delete S3 buckets or create IAM users has an `allowed` decision, their permissions are overly broad and need to be reduced.
5. Proactive Defense: Querying Threat Intelligence
Curious users can leverage public threat intelligence feeds directly from the command line to investigate suspicious indicators.
Verified Command: Querying VirusTotal via CLI
 Using curl to query the VirusTotal API for a file hash (e.g., MD5, SHA256)
curl --request GET \
--url 'https://www.virustotal.com/vtapi/v2/file/report' \
--d 'apikey=YOUR_API_KEY&resource=HASH_TO_CHECK'
Step-by-step guide:
- Get an API Key: Sign up for a free account on VirusTotal to obtain an API key.
- Prepare the Hash: Obtain the MD5 or SHA256 hash of a suspicious file on your system. On Linux, use `md5sum file.exe` or
sha256sum file.exe. On Windows PowerShell, useGet-FileHash -Algorithm SHA256 C:\Path\To\file.exe. - Execute the Query: Replace `YOUR_API_KEY` and `HASH_TO_CHECK` in the command. The JSON response will show you how many antivirus engines detected the file as malicious, providing crowd-sourced threat context.
6. API Security: Auditing for Hard-Coded Secrets
Critical thinking drives the search for sloppy security practices, such as secrets checked into code repositories.
Verified Command: Scanning for Hard-Coded Secrets with TruffleHog
 Using TruffleHog (install via pip) to scan a git repo history
trufflehog git https://github.com/example/repo.git --only-verified
Step-by-step guide:
1. Install TruffleHog: `pip install trufflehog`
- Run the Scan: Point the command at a target Git repository URL or file path (
file:///path/to/repo). - Use
--only-verified: This crucial flag ensures the tool only reports secrets it has independently verified are real and active by checking against the relevant service’s API, drastically reducing false positives. - Remediate: Any findings must be treated as a critical security incident. The exposed secret must be revoked immediately, and the history must be purged from the repository using tools like `git filter-branch` or
BFG Repo-Cleaner.
7. Container Hardening: Limiting the Attack Surface
Communication between development and security teams is key to building secure containers from the start.
Verified Snippet: Non-Root User in Dockerfile
 Example Dockerfile snippet
FROM node:18-alpine
WORKDIR /app
COPY package.json ./
RUN npm ci --only=production
 Add a non-root user and switch to it
RUN addgroup -g 1001 -S nodejs && adduser -S nextjs -u 1001
USER nextjs
COPY --chown=nextjs:nodejs . .
EXPOSE 3000
CMD ["node", "server.js"]
Step-by-step guide:
- Base Image: Start from a minimal base image like
alpine. - Install Dependencies: Copy and install dependencies separately from your application code to leverage Docker’s build cache.
- Create a Non-Root User: Use commands like `adduser` and `addgroup` (Alpine) or `useradd` (Debian-based) to create a specific user and group.
- Set the User: The `USER` instruction is critical. It directs all subsequent commands (and the container runtime) to execute as the unprivileged `nextjs` user, not root. This significantly limits the impact of a container breakout vulnerability.
- Fix Permissions: Use `COPY –chown` to ensure the application files are owned by the non-root user.
What Undercode Say:
- The Human Firewall is a Strategic Asset, Not a Liability. Investing in cross-disciplinary training that blends threat psychology with practical CLI commands transforms the workforce from a target into a distributed sensor network.
- Curiosity Must Be Cultivated and Rewarded. Security culture should encourage employees to run a `netstat` or check a hash, not punish them for “wasting time.” The cost of a few minutes of investigation is negligible compared to the cost of a breach.
The paradigm is shifting from purely technical defense-in-depth to a holistic model where human intuition and technical skill are interwoven. The most secure organizations of the future will not be the ones with the most expensive tools, but the ones that most effectively unlock the security potential of every individual. This requires leadership to champion security as a human endeavor, creating channels for communication and providing the foundational training that empowers employees to act as vigilant, capable defenders of the digital realm.
Prediction:
The convergence of AI-driven social engineering and the expanding attack surface of the hybrid workplace will make the human firewall more critical than ever. We predict that within the next 3-5 years, “Security Empathy” training—combining technical drills with psychological principles of deception—will become a standard KPI for corporate HR and security teams. Organizations that fail to bridge the gap between human skills and technical controls will face an unsustainable volume of successful breaches, as AI-powered attacks efficiently exploit the soft underbelly of an unengaged and unprepared workforce.
🎯Let’s Practice For Free:
IT/Security Reporter URL:
Reported By: Dev Raj – Hackers Feeds
Extra Hub: Undercode MoN
Basic Verification: Pass ✅


