Listen to this Post
Introduction:
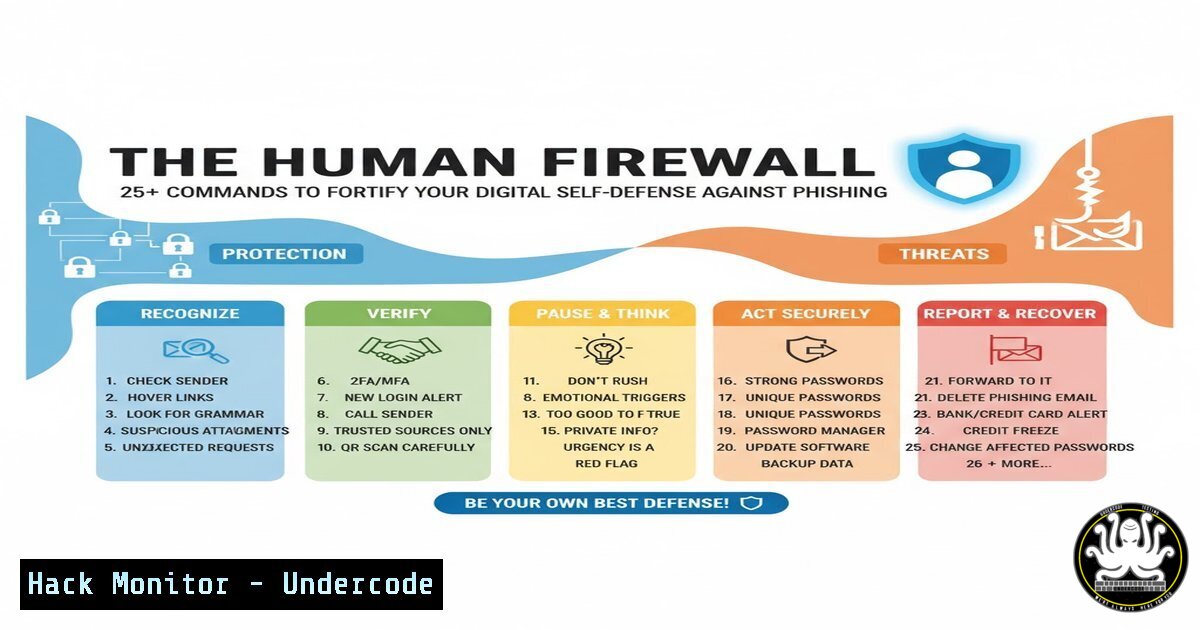
Phishing remains one of the most pervasive and effective cyber threats, exploiting human psychology rather than technological vulnerabilities. This guide moves beyond awareness to provide the technical commands and practical steps necessary to build a resilient human firewall, enabling IT professionals and security-conscious users to proactively verify, detect, and respond to phishing campaigns.
Learning Objectives:
- Understand and utilize command-line tools to analyze suspicious emails and URLs.
- Implement system-level hardening commands to mitigate the impact of a successful phishing attack.
- Develop proactive network and endpoint monitoring techniques to identify phishing-related activity.
You Should Know:
1. Analyzing Suspicious Links and Headers
Before clicking a link, it’s crucial to analyze it without exposing your machine to risk. Command-line tools can dissect URLs and email headers to reveal hidden threats.
`whois malicious-domain.com` – Queries the WHOIS database to retrieve domain registration details. A recently created domain is a major red flag.
`nslookup -type=MX suspicious.net` – Looks up the mail exchange (MX) records for a domain. Inconsistent or free email service MX records can indicate a fraudulent site.
`dig suspicious.net ANY` – A more powerful DNS lookup tool that can retrieve all record types associated with a domain, often revealing underlying infrastructure.
`curl -I “https://suspicious-url.com”` – Fetches only the HTTP headers of a web server response. Check for missing security headers like Strict-Transport-Security.
`host suspicious-domain.com` – A simple utility for performing DNS lookups to confirm a domain’s IP address.
Step-by-step guide:
To investigate a link received in an email, first copy the full URL. Open your terminal and use `nslookup` to find its IP address. Cross-reference this IP with the purported sender’s known infrastructure using whois. Finally, use `curl -I` to check if the server enforces HTTPS and other security best practices, all without ever loading the page in your browser.
2. Email Header Forensics
A phishing email’s header contains a treasure trove of authentication data. Analyzing these headers can confirm an email’s legitimacy.
Look for SPF, DKIM, and DMARC results. In headers, search for Authentication-Results.
`Received:` headers – Trace the path the email took from sender to inbox. Look for inconsistencies in the originating IP or server names.
`Return-Path:` header – Should align with the sender’s domain.
`Message-ID:` header – Analyze the domain part of the Message-ID; it should match the sender’s domain.
Step-by-step guide:
In your email client (e.g., Gmail or Outlook), open the suspicious email and find the “Show original” or “View message source” option. Scan the raw headers for the `Authentication-Results` field. A `pass` for SPF, DKIM, and DMARC is a strong positive indicator. Then, trace the `Received:` headers from the bottom (your mail server) to the top (originator), checking for any suspicious relays or IP addresses from unexpected geographic locations.
3. Windows PowerShell for Incident Triage
If a user suspects they’ve clicked a phishing link, these PowerShell commands can help triage the system for immediate signs of compromise.
`Get-NetTCPConnection | Where-Object {$_.State -eq “Established”}` – Shows all currently active network connections, highlighting potential command-and-control channels.
`Get-Process | Where-Object {$_.Path -like “AppData”}` – Lists running processes that were executed from the user’s AppData folder, a common persistence location for malware.
`Get-WinEvent -FilterHashtable @{LogName=’Security’; ID=4624,4625} -MaxEvents 10` – Retrieves the last 10 successful and failed logon events, useful for detecting lateral movement or brute-force attacks.
`Get-Service | Where-Object {$_.Status -eq “Running”}` – Lists all running services; look for unknown or suspicious service names.
Step-by-step guide:
Open Windows PowerShell as Administrator. Run `Get-NetTCPConnection` to review established connections. Note any connections to unknown IPs on unusual ports. Follow up with `Get-Process` to correlate these connections with running processes. Terminate any suspicious processes and use the `Get-WinEvent` command to audit for any unauthorized logon activity that may have occurred.
4. Linux System Hardening Commands
Harden a Linux endpoint to reduce the attack surface, making it more resilient even if a user is tricked by a phishing attempt.
`sudo iptables -A OUTPUT -p tcp –dport 25 -j DROP` – Blocks outbound SMTP traffic to prevent malware from sending spam or exfiltrating data via email from the compromised host.
`sudo chmod 700 /home/$USER/.ssh` – Restricts permissions on the SSH directory to prevent unauthorized access to private keys.
`sudo fail2ban-client status sshd` – Checks the status of Fail2ban for SSH brute-force protection.
`sudo grep “PasswordAuthentication” /etc/ssh/sshd_config` – Verifies that password authentication is disabled for SSH, enforcing key-based logins.
`sudo apt-get install –no-install-recommends [bash]` – Installs a package without recommended dependencies, minimizing the installed software footprint.
Step-by-step guide:
To prevent data exfiltration, implement the `iptables` rule to block outbound SMTP. Ensure SSH is secure by verifying its configuration file (/etc/ssh/sshd_config) for `PasswordAuthentication no` and PermitRootLogin no. Use `fail2ban` to monitor and block repeated failed access attempts. Regularly audit installed packages and remove any that are unnecessary.
5. Cloud Security Posture Checks
Phishing often targets cloud credentials. Use these commands to audit your AWS environment for common misconfigurations that phishers exploit.
`aws iam get-account-authorization-details` – Retrieves all IAM roles, users, and policies in the account. Audit for overly permissive policies.
`aws iam list-access-keys` – Lists access keys for the current user; rotate any keys that are old or exposed.
`aws iam get-user` – Confirms the identity of the currently authenticated IAM user.
`aws s3api list-buckets –query “Buckets[].Name”` – Lists all S3 buckets; follow up with `aws s3api get-bucket-acl` to check for publicly accessible buckets.
`aws cloudtrail lookup-events –lookup-attributes AttributeKey=Username,AttributeValue=suspicious_user` – Queries CloudTrail logs for API activity from a specific user.
Step-by-step guide:
Using the AWS CLI with appropriate permissions, run `aws iam get-account-authorization-details` and pipe the output to a file for analysis. Search for policies containing `”Effect”: “Allow”` and `”Action”: “”` or "Resource": "", which are dangerously broad. Use the S3 commands to list all buckets and verify that none have public read or write permissions set in their ACLs or bucket policies.
6. API Security Testing with `curl`
APIs are a prime target. Test your own endpoints for common security misconfigurations that could be exploited by a phisher who has obtained valid tokens.
`curl -H “Authorization: Bearer
`curl -X PUT https://api.example.com/v1/users/1 -d ‘{“email”:”[email protected]”}’` – Tests for insecure direct object references (IDOR) by attempting to modify another user’s data.
`curl -H “Content-Type: application/xml” -d ‘@payload.xml’ https://api.example.com/v1/endpoint` – Tests for XXE (XML External Entity) injection vulnerabilities.
`curl -k https://api.example.com/v1/health` – The `-k` flag ignores SSL certificate errors, which can help identify misconfigured certificates during internal testing.
Step-by-step guide:
To test for IDOR, use a valid JWT token for User A. Then, using curl, send a `PUT` request to an endpoint like `/api/v1/users/5` (where 5 is User B’s ID) and attempt to change the email address. A successful request indicates a critical broken access control vulnerability that must be fixed immediately.
What Undercode Say:
- Technology is an Enabler, Not a Savior. The most sophisticated security stack can be undone by a single click. Continuous, engaging security awareness training that moves beyond annual quizzes is non-negotiable.
- Verification is the New Perimeter. The modern security perimeter is the moment a user pauses to verify a sender, a link, or a request. Empowering users with simple, accessible verification techniques is more valuable than another layer of heuristic-based detection.
The core insight from the original post—that awareness equals resilience—is profoundly correct but often poorly executed. The industry’s focus has been on technological “silver bullets,” while the human element is treated as a liability to be patched with training. This is a flawed paradigm. The human brain, when properly equipped, is the most adaptive and sophisticated detection system available. The commands and techniques outlined here are not just for IT staff; they are the foundational skills for a digitally literate workforce. By providing tangible tools for verification, we transform users from the “weakest link” into active participants in the security ecosystem. The future of cybersecurity is not less human involvement, but more empowered human judgment.
Prediction:
The next evolution of phishing will leverage generative AI to create hyper-personalized, low-volume campaigns that are virtually indistinguishable from legitimate communication. These “deep-phish” attacks will use real-time data scraping and AI-synthesized voices to bypass traditional technical filters and MFA. The defense will shift even more decisively to behavioral analytics and digital provenance, where systems will not just analyze the content of a message, but the meta-patterns of its delivery and the user’s historical interaction with the sender. The ability to cryptographically verify the origin and integrity of every digital communication will transition from a niche capability to a standard enterprise requirement.
🎯Let’s Practice For Free:
IT/Security Reporter URL:
Reported By: Valerie Mills – Hackers Feeds
Extra Hub: Undercode MoN
Basic Verification: Pass ✅


