
Listen to this Post
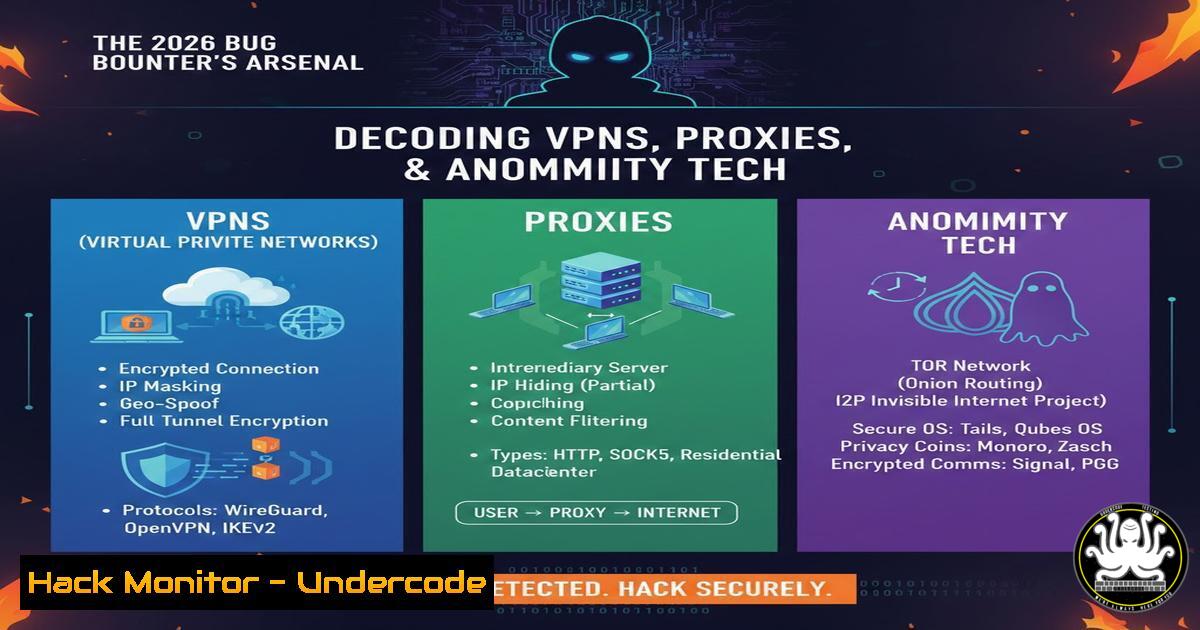
Introduction:
In the high-stakes realm of bug bounty hunting and ethical security testing, anonymity and access are non-negotiable. As programs expand globally, hunters frequently encounter geo-restrictions and the constant threat of IP-based blocking. This makes the strategic choice between Virtual Private Networks (VPNs) and proxy servers a critical technical decision that directly impacts a researcher’s effectiveness and operational security.
Learning Objectives:
- Understand the core technical and operational differences between VPNs and proxy servers for security testing.
- Learn to configure and harden both VPN and proxy setups on Linux and Windows systems for optimal performance and stealth.
- Implement advanced techniques to avoid detection, prevent IP leaks, and securely route traffic during bug bounty engagements and vulnerability assessments.
You Should Know:
- The Foundational Tech: VPN Tunneling vs. Proxy Gateways
A VPN operates at the operating system’s network layer, creating an encrypted tunnel that routes all traffic from your machine. In contrast, a proxy (like Burp Suite or a SOCKS5 proxy) typically functions as an application-level gateway, often for specific apps or browser traffic, and may not encrypt data by default. For bug bounty hunters, a VPN is essential for general system-wide anonymity against target defenses, while a local proxy is indispensable for intercepting, inspecting, and manipulating HTTP/S traffic during manual testing.
Step-by-Step Guide:
Linux (Using `openvpn`):
 Install OpenVPN client
sudo apt update && sudo apt install openvpn -y  Debian/Ubuntu
 Download your VPN provider's configuration file (e.g., <code>us-california.ovpn</code>)
 Connect using the config file and credentials
sudo openvpn --config /path/to/your/config.ovpn --auth-user-pass /path/to/auth.txt
 Verify your new public IP
curl https://ipinfo.io/ip
Windows (PowerShell – Using built-in VPN client):
 Add a VPN connection (IKEv2 example)
Add-VpnConnection -Name "BugBountyVPN" -ServerAddress "vpn.server.com" -TunnelType IKEv2 -EncryptionLevel Required -AuthenticationMethod EAP -RememberCredential
 Connect to the VPN
Connect-VpnConnection -Name "BugBountyVPN"
 Verify connection and IP
(Invoke-RestMethod -Uri "https://ipinfo.io/ip").Trim()
- Configuring a Local Testing Proxy with Burp Suite
A local proxy is your man-in-the-middle for web traffic analysis. Burp Suite is the industry standard, allowing you to capture, repeat, and fuzz requests.
Step-by-Step Guide:
- Launch & Configure Burp: Open Burp Suite. Navigate to the Proxy > Options tab. Ensure the proxy listener is active (e.g., on
127.0.0.1:8080).
2. Configure Browser/System Proxy:
Browser (Firefox Recommended): Go to Settings > Network Settings > Settings. Select “Manual proxy configuration”. Set HTTP Proxy to `127.0.0.1` and Port to 8080. Check “Also use this proxy for FTP and HTTPS”.
System-wide on Linux: You can set environment variables.
export http_proxy="http://127.0.0.1:8080"
export https_proxy="http://127.0.0.1:8080"
3. Install Burp’s CA Certificate: Navigate to `http://burp` in your configured browser, download the `cacert.der` certificate, import it into your browser’s certificate authority store (and system trust store for CLI tools). This prevents SSL/TLS warnings.
4. Intercept Traffic: With interception “On” in the Proxy > Intercept tab, all browser traffic will pause in Burp for your inspection.
3. Hardening Your VPN Connection Against Leaks
A VPN is only as strong as its configuration. DNS leaks and WebRTC leaks can betray your real IP.
Step-by-Step Guide:
Force DNS Through VPN (Linux with `systemd-resolved`):
 Edit the VPN config file (e.g., .ovpn)
sudo nano /etc/openvpn/client/config.ovpn
 Add these lines to the configuration:
script-security 2
up /etc/openvpn/update-resolv-conf
down /etc/openvpn/update-resolv-conf
 This script ensures DNS queries use the VPN's DNS servers.
Disable IPv6 & Test for Leaks: IPv6 traffic might bypass your VPN.
 Temporarily disable IPv6
sudo sysctl -w net.ipv6.conf.all.disable_ipv6=1
sudo sysctl -w net.ipv6.conf.default.disable_ipv6=1
 Run a comprehensive leak test
curl https://ipleak.net/json/
 Check specifically for WebRTC leaks (use browser-based tests)
Windows (Network Adapter Settings): Disable IPv6 on your primary physical network adapter through Control Panel > Network and Sharing Center > Change adapter settings. Right-click your Ethernet/Wi-Fi adapter > Properties > Uncheck “Internet Protocol Version 6 (TCP/IPv6)”.
- Advanced Routing: Chaining VPN and Proxy for Layered Anonymity
For high-value targets, chain your tools: System Traffic `->` VPN `->` Local Proxy `->` Target. This adds a layer of obfuscation, making your proxy traffic originate from the VPN endpoint.
Step-by-Step Guide:
- First, establish your VPN connection as shown in Section 1.
- Configure your browser or tool to use a SOCKS5 proxy provided by your VPN client (if supported) or your local Burp instance. Some VPNs offer split-tunneling; ensure the proxy application is forced through the VPN tunnel.
- Verify the Chain: With both active, visit a site like
ipleak.net. Your visible IP should be your VPN’s exit IP, and the “DNS Addresses” shown should belong to your VPN provider, not your ISP.
5. Cloud-Based Reconnaissance with Secure Proxies
When performing large-scale scans or using tools from a cloud VPS (e.g., on AWS, DigitalOcean), you must not expose your VPS’s IP. Use a proxy for the tool’s outbound traffic.
Step-by-Step Guide (Using `proxychains` on Linux VPS):
 Install proxychains-ng (more feature-rich)
sudo apt install proxychains4 -y
 Edit the configuration
sudo nano /etc/proxychains4.conf
 At the bottom, add your proxy (e.g., a paid rotating proxy service or your own jump server)
 syntax: socks5 <proxy_ip> <proxy_port>
socks5 192.168.1.100 1080
 Run your scanning tool through proxychains
sudo proxychains4 nmap -sS -Pn -p 80,443 --open target.com
 All network calls from nmap will be routed through the defined proxy.
6. API Security Testing Through a Proxy
Testing APIs requires seeing raw JSON/XML traffic. Configure your API testing tool (like curl, Postman, or httpx) to use your local Burp proxy to log and tamper with requests.
Step-by-Step Guide:
Using `curl` with a Proxy:
 Route a curl request through Burp for inspection
curl -x http://127.0.0.1:8080 -k -H "Authorization: Bearer <token>" https://api.target.com/v1/users
 The `-k` flag allows insecure SSL if you have Burp's CA cert trusted only in the browser.
In Postman: Go to File > Settings > Proxy. Enable “Add a custom proxy configuration” for both HTTP and HTTPS, pointing to `localhost` and port 8080.
7. Mitigating the “Human Element”: OpSec for Hunters
Technology can be perfect, but user error can dox you. Use separate, dedicated virtual machines or containers for testing. Never log into personal accounts (Google, LinkedIn) from your testing browser. Use browser profiles with no extensions that can leak identity. Consider a “double-hop” VPN if your threat model requires it (connecting to one VPN server that then connects to another).
What Undercode Say:
Tool Choice is Contextual: A premium, no-logs VPN is your baseline cloak for system-wide activity and avoiding simplistic IP bans. A configurable local proxy is your mandatory surgical tool for interactive web/API testing. They are complementary, not interchangeable.
Verification is Mandatory: Assuming your tools work is a critical failure. Regular leak tests (ipleak.net, dnsleaktest.com) and verifying routing tables (netstat -rn / route print) are as essential as the tools themselves.
Analysis:
The LinkedIn post from security creator Insha J. highlights a persistent and growing pain point in the offensive security community. As organizations implement more aggressive, geography-based access controls and rate-limiting, hunters are forced to become adept network engineers. The discussion isn’t merely about “unblocking” content; it’s about maintaining a persistent, secure, and undetectable presence to conduct thorough security assessments. The choice between VPN and proxy is foundational, but the real skill lies in the layered, secure, and verified integration of both, along with robust operational security practices to separate the hunter’s identity from their tools. Failure to master this significantly reduces a researcher’s scope and effectiveness.
Prediction:
The cat-and-mouse game of detection will intensify. We will see a rise in target sites employing advanced fingerprinting techniques (browser, canvas, audio context) to identify and block traffic from commercial VPN IP ranges and data centers. This will push bug bounty hunters toward more sophisticated methods: the use of residential proxy networks, deeper customization of browser and tool fingerprints, and potentially the increased use of benign, compromised “proxies” (botnets) for anonymity. Simultaneously, VPN and proxy providers will respond with more stealth protocols and obfuscation technology, mirroring tools developed in censorship circumvention. The core skillset will evolve from simple configuration to continuous adversarial adaptation.
▶️ Related Video (76% Match):
🎯Let’s Practice For Free:
IT/Security Reporter URL:
Reported By: Insha J – Hackers Feeds
Extra Hub: Undercode MoN
Basic Verification: Pass ✅


