Listen to this Post
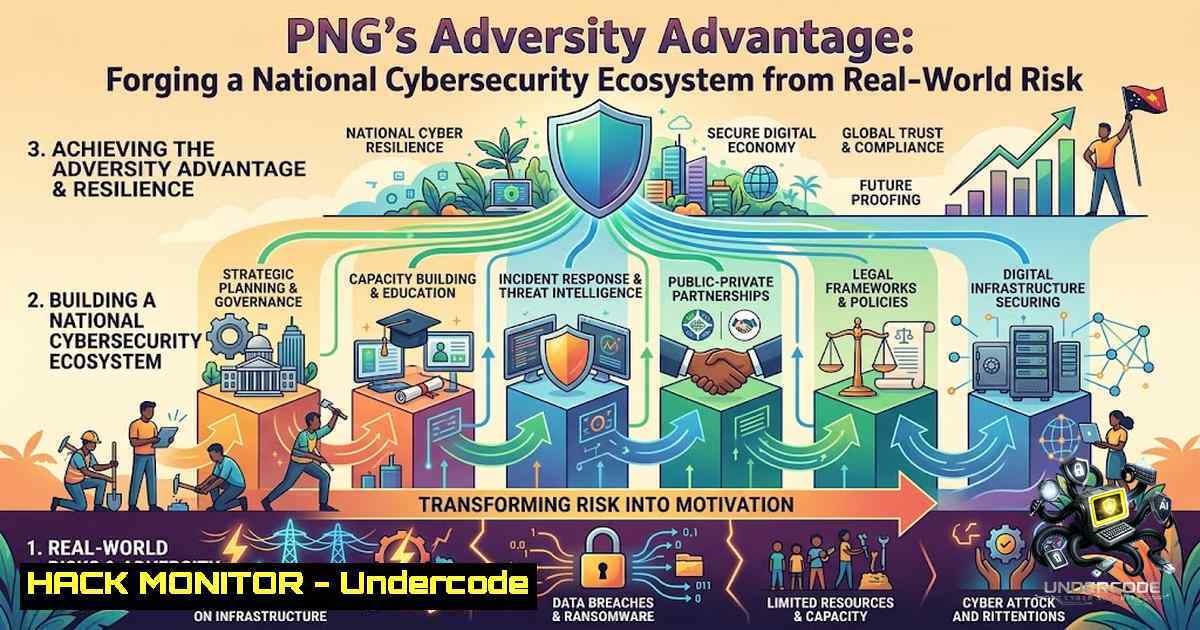
Introduction:
Papua New Guinea’s pervasive challenges with crime, corruption, and governance are often viewed through a lens of socio-economic fragility. However, from a cybersecurity perspective, this high-risk environment inadvertently cultivates a population with an acute, ingrained awareness of security and defensive thinking. The strategic opportunity lies in translating this innate “security mindset” from physical survival into a formalized, technical, and economic powerhouse, transforming a national vulnerability into a sovereign capability and exportable industry.
Learning Objectives:
- Understand how socio-economic pressures can be leveraged to build a resilient cybersecurity workforce and industry.
- Identify the key technical pillars (SOC, Forensics, Cloud Security, AI) required for a national cybersecurity ecosystem.
- Acquire foundational command-line and configuration skills essential for establishing security operations and training environments.
You Should Know:
- Building the Foundation: Cyber Ranges and Practical Laboratories
A national cybersecurity ecosystem cannot thrive on theory alone; it requires immersive, practical environments. Cyber ranges simulate real-world network infrastructures, allowing students and professionals to practice offensive and defensive techniques legally and safely. For PNG, establishing these labs is the first step toward translating awareness into actionable skill. This involves setting up isolated virtual environments where ethical hacking, incident response, and digital forensics can be practiced without risking production systems.
Step‑by‑step guide for setting up a basic virtual lab using VirtualBox and Kali Linux:
- Install Virtualization: Download and install Oracle VirtualBox or VMware Workstation Player on a powerful host machine (Windows/Linux).
- Download Target Images: Obtain vulnerable virtual machines such as Metasploitable 2 or OWASP WebGoat to serve as practice targets.
- Configure Networking: Set the network adapter for all VMs to “Host-Only” or “NAT Network” to isolate them from the internet while allowing communication between the attacker and target.
- Deploy Attacker Machine: Install Kali Linux, which comes pre-loaded with penetration testing tools.
– Linux Command: `sudo apt update && sudo apt upgrade -y` (Update Kali repositories).
5. Verify Connectivity: Ping the target machine from Kali to ensure network connectivity.
– Linux Command: `ping -c 4 192.168.1.X` (Replace X with the target’s IP).
6. Initial Scan: Run an Nmap scan to discover open ports and services on the target.
– Linux Command: nmap -sV -O 192.168.1.X.
- Establishing a Security Operations Center (SOC) and Incident Response
Building a SOC is critical for monitoring, detecting, and responding to threats. In a resource-constrained environment, starting with open-source tools is a pragmatic approach. The Elastic Stack (Elasticsearch, Logstash, Kibana) offers a powerful, free tier for log aggregation and visualization. Incident response requires a documented plan and a “jump bag” of portable tools ready for deployment.
Step‑by‑step guide to deploy a basic SIEM (Security Information and Event Management) lab:
- Install Elastic Stack: On a dedicated Linux server (Ubuntu 22.04), install Elasticsearch, Kibana, and Fleet Server.
– Linux Command: `wget -qO – https://artifacts.elastic.co/GPG-KEY-elasticsearch | sudo apt-key add -`
2. Configure Elasticsearch: Edit the `elasticsearch.yml` file to set the network host and cluster name.
– Linux Command: `sudo nano /etc/elasticsearch/elasticsearch.yml`
– Set `network.host: 0.0.0.0` (for lab use only; use specific IPs in production).
3. Start Services: Enable and start the Elasticsearch and Kibana services.
– Linux Command: `sudo systemctl start elasticsearch && sudo systemctl enable elasticsearch`
4. Install Winlogbeat on Windows: On a Windows endpoint, download and install Winlogbeat to forward Windows Event Logs to Elasticsearch.
– Windows Command (PowerShell): `.\install-service-winlogbeat.ps1`
5. Configure Winlogbeat: Edit `winlogbeat.yml` to point to the Elasticsearch instance and set up authentication.
6. Visualize Data: Access Kibana via a web browser and create dashboards to monitor login failures, privilege escalations, and service stops.
3. Cloud and Critical-Infrastructure Security Hardening
As PNG digitizes, cloud adoption will accelerate. Misconfigurations are the leading cause of cloud breaches. Hardening cloud environments involves strict identity and access management (IAM), network segmentation, and continuous compliance monitoring.
Step‑by‑step guide for hardening an AWS S3 bucket:
- Block Public Access: Ensure “Block all public access” is enabled at the account and bucket level.
– AWS CLI Command: `aws s3api put-public-access-block –bucket YOUR_BUCKET_NAME –public-access-block-configuration BlockPublicAcls=true,IgnorePublicAcls=true,BlockPublicPolicy=true,RestrictPublicBuckets=true`
2. Enable Bucket Versioning: Protect against ransomware and accidental deletion.
– AWS CLI Command: `aws s3api put-bucket-versioning –bucket YOUR_BUCKET_NAME –versioning-configuration Status=Enabled`
3. Encrypt Data at Rest: Enforce server-side encryption (SSE-S3 or KMS).
– AWS CLI Command: `aws s3api put-bucket-encryption –bucket YOUR_BUCKET_NAME –server-side-encryption-configuration ‘{“Rules”: [{“ApplyServerSideEncryptionByDefault”: {“SSEAlgorithm”: “AES256”}}]}’`
4. Apply Least Privilege Policy: Attach a bucket policy that denies access to non-privileged users.
– Policy Snippet:
{
"Version": "2012-10-17",
"Statement": [
{
"Effect": "Deny",
"Principal": "",
"Action": "s3:",
"Resource": "arn:aws:s3:::YOUR_BUCKET_NAME/",
"Condition": {"StringNotEquals": {"s3:x-amz-server-side-encryption": "AES256"}}
}
]
}
4. AI and Cybersecurity Integration
Artificial intelligence is a double-edged sword; it powers defense but also automates attacks. For PNG, AI can bridge the talent gap by augmenting human analysts. AI-driven threat intelligence can process vast amounts of data to identify patterns and predict attacks.
Step‑by‑step guide to implement a basic anomaly detection script using Python:
- Install Python Libraries: Ensure
pandas,numpy, and `scikit-learn` are installed.
– Linux Command: `pip3 install pandas numpy scikit-learn`
2. Create the Script (anomaly_detector.py): Use an Isolation Forest model to detect unusual network traffic patterns (e.g., sudden spikes in outbound data).
import pandas as pd
from sklearn.ensemble import IsolationForest

Sample data: features = [bytes_sent, bytes_received, connection_duration]
data = pd.read_csv('network_traffic.csv')
model = IsolationForest(contamination=0.1)
data['anomaly'] = model.fit_predict(data)
anomalies = data[data['anomaly'] == -1]
print(f"Potential anomalies detected: {len(anomalies)}")
3. Schedule the Script: Automate this scan to run every hour using a cron job (Linux) or Task Scheduler (Windows).
– Linux Cron: `0 /usr/bin/python3 /home/user/anomaly_detector.py`
5. Digital Forensics and Threat Intelligence
Digital forensics is about preserving evidence for legal proceedings or internal investigations. The “Order of Volatility” mandates capturing the most fragile data first (RAM, network connections) before turning off the system. Threat intelligence feeds (like MISP – Malware Information Sharing Platform) allow organizations to share indicators of compromise (IoCs).
Step‑by‑step guide for capturing volatile forensic data on Windows:
- Capture RAM Memory: Use a tool like `DumpIt.exe` or `FTK Imager` to capture the physical memory (RAM) to a file.
– Command: `DumpIt.exe` (Run as Administrator; output is a .mem file).
2. Capture Network State: Record active network connections before the system is disconnected.
– Windows Command: `netstat -anob > C:\forensics\network_connections.txt`
3. Capture Running Processes: Log all currently executing processes.
– Windows Command: `tasklist /v > C:\forensics\running_processes.txt`
4. Hash Acquisition: Generate cryptographic hashes (MD5, SHA-1, SHA-256) of the captured files to prove integrity.
– Windows Command: `certutil -hashfile C:\forensics\memory_dump.mem SHA256`
What Undercode Say:
- Cultural Alignment: PNG’s daily experience with security and risk creates a cultural predisposition that is perfect for cybersecurity, as the core tenet of “defensive thinking” is already ingrained in the population.
- Sovereign Capability: Building this ecosystem is not just about hiring globally; it is about creating a sovereign capability that protects national critical infrastructure, boosts the digital economy, and establishes PNG as a regional leader in the Pacific.
Prediction:
- +1 Within five years, PNG will host its first national Cyber Drill, attracting participants from Australia, New Zealand, and other Pacific Islands, establishing it as a regional hub for security training.
- -1 The initial stages of building this ecosystem will be hampered by a severe shortage of qualified instructors, necessitating heavy reliance on international expatriates or remote training models that may not fully localize the curriculum.
- +1 The unique socio-economic challenges will drive innovation in low-bandwidth, high-resilience security solutions, creating exportable intellectual property tailored for developing nations.
- +1 Government and private sector collaboration on cybersecurity will inadvertently improve overall governance, transparency, and anti-corruption efforts, creating a positive feedback loop for national development.
- -1 Without significant investment in securing the foundational IT infrastructure (power, internet, hardware), the cybersecurity ecosystem will remain an intellectual exercise rather than an operational reality, limiting its practical impact.
▶️ Related Video (86% Match):
🎯Let’s Practice For Free:
🎓 Live Courses & Certifications:
Join Undercode Academy for Verified Certifications
🚀 Request a Custom Project:
Secure, high-velocity infrastructure and disruptive technological engineering. Contact our engineering team for high-tier development and proprietary systems:
[email protected]
💎 Smart Architecture | 🛡️ Secure by Design | ⭐ Trusted by Thousands
IT/Security Reporter URL:
Reported By: https://lnkd.in/p/eY4WzZKe – Hackers Feeds
Extra Hub: Undercode MoN
Basic Verification: Pass ✅


