Listen to this Post
Introduction:
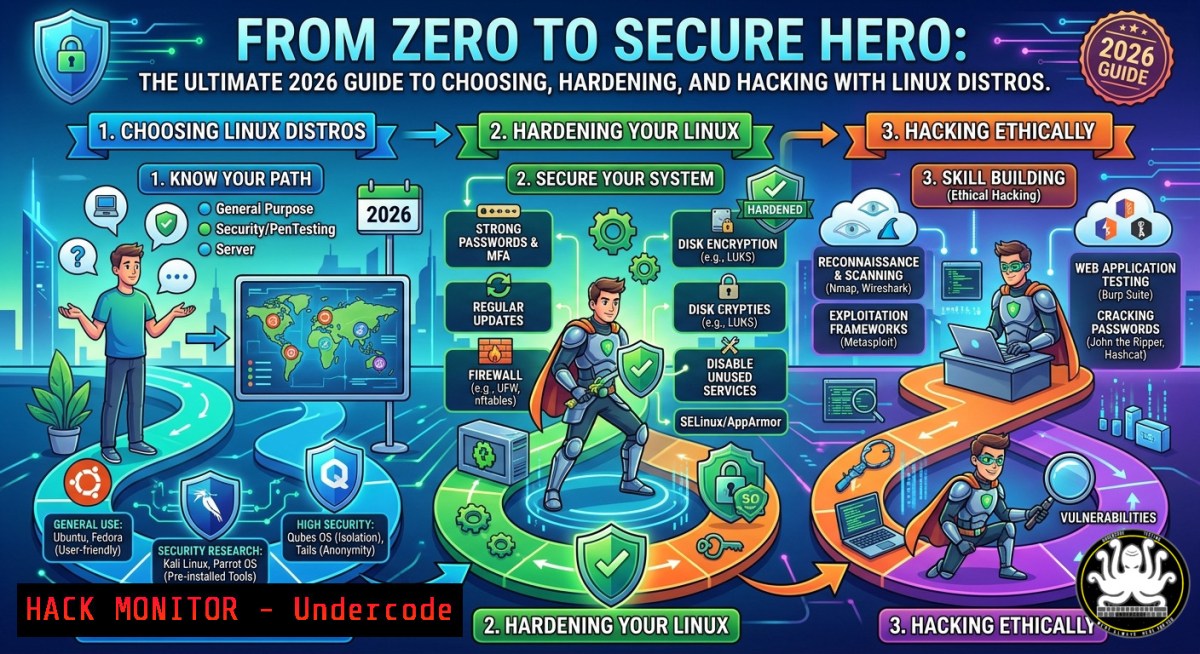
Choosing your first Linux distribution can be a daunting task, especially for those transitioning from Windows, but it is the first step toward mastering the open-source ecosystem that powers the modern internet. For cybersecurity professionals and IT enthusiasts, the choice of a Linux distribution is not just about usability—it is a foundational decision that impacts your ability to perform penetration testing, system administration, and security hardening. This guide provides a comprehensive roadmap for selecting the ideal distro, from beginner-friendly options like Ubuntu to security-focused powerhouses like Kali Linux, complete with verified commands and step-by-step tutorials for system hardening and live environment deployment.
Learning Objectives:
- Identify and evaluate different Linux distributions based on hardware constraints, user experience, and security requirements.
- Execute essential Linux commands and system hardening techniques to secure a Linux environment against common threats.
- Create and utilize a live Linux USB for penetration testing, system recovery, and dual-boot security configurations.
You Should Know:
- Navigating the Linux Ecosystem: From User-Friendly to Security-Focused Distros
The Linux landscape is vast, with distributions tailored for every possible use case. For a beginner stepping away from Windows, the choice can be overwhelming. Based on the insights from UbuntuTutor (www.ubuntutor.com) and industry standards, the key is to match the distribution to your hardware and your goals.
For Beginners and General Use: If you are just starting, distributions like Ubuntu, Linux Mint, and Zorin OS offer a polished, user-friendly experience similar to Windows or macOS. For older hardware with limited resources (2GB of RAM or less), lightweight options such as Lubuntu, Xubuntu, and Ubuntu MATE breathe new life into aging machines.
For Cybersecurity and Hacking: If your goal is ethical hacking, penetration testing, or digital forensics, you will need a distribution pre-loaded with the necessary toolkits. Kali Linux is the industry standard, maintained by Offensive Security, and comes with over 600 pre-installed tools like Metasploit, Nmap, and Burp Suite. While powerful, Kali is not intended as a daily driver and runs best in a virtual machine or as a live USB.
For Advanced Learning: For those who want to truly understand Linux from the ground up, rolling-release distributions like Arch Linux, Manjaro, or EndeavourOS provide a hands-on experience that forces you to configure the system yourself.
Practical Selection Command: Before committing, you can test drive a distribution online or via a live USB. Use the following command to check your system’s hardware compatibility from the live environment:
 Check CPU architecture and compatibility
lscpu

List all hardware devices detected by the kernel
lshw -short

Check available memory and swap
free -h

Identify your graphics card and drivers
lspci | grep -i vga
2. Essential Command Line Mastery for System Navigation
The terminal is the most powerful tool in a Linux system, and mastering a few core commands is essential for any administrator or security professional. These commands allow you to navigate the file system, manage processes, and inspect network configurations without relying on a graphical interface.
Step 1: Basic Navigation. Learn how to move through the directory structure.
 Print Working Directory - shows your current location
pwd

List files with detailed permissions and hidden files
ls -la

Change directory to /etc
cd /etc
Step 2: Process and Service Management. In a security context, you need to know what is running on your system. The `ps` and `systemctl` commands are invaluable.
 Display all running processes in a user-friendly tree
ps auxf

Filter for a specific process, e.g., SSH
ps aux | grep ssh

Check the status of a critical service
sudo systemctl status sshd

Stop a suspicious service immediately
sudo systemctl stop apache2
Step 3: Network Reconnaissance. Understanding network connections is crucial for identifying potential backdoors or unauthorized access.
 Display all listening ports and established connections
sudo netstat -tulpn

A modern alternative with more features
sudo ss -tulpn

Check the ARP table to see devices on the local network
arp -a
3. Hardening Your Ubuntu System: A Step-by-Step Guide
Once you have chosen your distribution, the first task is to secure it. A fresh Linux install is not inherently immune to threats; you must harden the system by reducing its attack surface. The following commands are derived from the Ubuntu 22.04 LTS Hardening Guide by ME0094 and focus on critical security configurations.
Step 1: System Updates and Patch Management. An unpatched system is a vulnerable system. Regularly update all packages to close known security holes.
 Update the package list
sudo apt update

Upgrade all installed packages to their latest versions
sudo apt upgrade -y

Perform a full distribution upgrade (includes kernel updates)
sudo apt full-upgrade -y

Remove unnecessary packages that were automatically installed
sudo apt autoremove -y
Step 2: Secure SSH Configuration. Secure Shell is a common entry point for attackers. Disable root login and enforce key-based authentication.
 Edit the SSH daemon configuration file
sudo nano /etc/ssh/sshd_config

Change the following lines to enhance security:
 PermitRootLogin no
 PasswordAuthentication no
 PubkeyAuthentication yes
 Port 2222 (Change from default 22 to avoid automated scans)

Restart the SSH service to apply changes
sudo systemctl restart sshd
Step 3: Configure the Firewall with UFW. A firewall is your first line of defense. Limit incoming connections to only those that are necessary.
 Reset UFW to default settings (deny incoming, allow outgoing)
sudo ufw default deny incoming
sudo ufw default allow outgoing

Allow SSH on the new port (e.g., 2222)
sudo ufw allow 2222/tcp

Enable the firewall
sudo ufw enable

Check the firewall status and rules
sudo ufw status verbose
Step 4: Install Fail2ban for Brute-Force Protection. This tool automatically blocks IP addresses that show malicious behavior, such as too many failed login attempts.
 Install fail2ban
sudo apt install fail2ban -y

Create a local configuration file for SSH
sudo cp /etc/fail2ban/jail.conf /etc/fail2ban/jail.local
sudo nano /etc/fail2ban/jail.local

Enable and start the service
sudo systemctl enable fail2ban
sudo systemctl start fail2ban

Check the status to see banned IPs
sudo fail2ban-client status sshd
- Creating a Secure Live Linux USB with Persistent Storage
A live USB is a portable operating system that runs entirely from a USB drive without touching the host machine’s hard disk. This is the preferred method for penetration testers, as it leaves no traces on the target computer and allows you to carry your entire toolkit in your pocket. However, modern UEFI systems with Secure Boot can present challenges.
Step 1: Download the ISO. First, download the official ISO image for your chosen distribution (e.g., Ubuntu or Kali Linux).
Step 2: Create the Bootable USB (Windows). Use Rufus, a trusted and free tool. Insert your USB drive and launch Rufus.
- Device: Select your USB drive.
- Boot selection: Choose the downloaded ISO file.
- Partition scheme: Select GPT for UEFI systems (modern computers) or MBR for legacy BIOS.
- File system: Ensure it is set to FAT32 for maximum compatibility.
- Click START to write the ISO to the USB drive.
Step 3: Bypass or Utilize Secure Boot. For many distributions, you may need to temporarily disable Secure Boot in your BIOS/UEFI settings to boot from the live USB. However, modern versions of Ubuntu and Kali are signed with Microsoft’s keys and should boot even with Secure Boot enabled.
- Reboot your computer and press F2, F10, F12, or DEL to enter the BIOS/UEFI.
- Navigate to the Security or Boot tab.
- Set Secure Boot to Disabled (or Enabled if the distribution supports it).
- Change the boot order to prioritize the USB drive.
- Save changes and exit.
Step 4: Enabling Persistent Storage (Kali Linux). To save your tools and files between reboots, you need to create persistent storage. Using Rufus, after selecting the ISO, you can specify a persistent partition size (e.g., 4GB). This space will act as your writable home directory, allowing you to install new tools and save configuration files.
5. Implementing Dual-Boot Security: Separating Windows and Linux
Many professionals choose to dual-boot Windows and Linux on the same machine, using Windows for gaming or specific software and Linux for work or security testing. From a cybersecurity perspective, this setup requires careful planning to prevent one OS from compromising the other.
Step 1: Partitioning. When installing Linux alongside Windows, you must create a separate partition for Linux. Windows cannot natively read Linux file systems (ext4), which acts as a natural barrier against malware crossing from one OS to another.
Step 2: Encryption. The most critical step is encrypting both operating systems. Use BitLocker for Windows and LUKS for Linux. This ensures that if your laptop is stolen, the data on both partitions remains inaccessible without the decryption key.
 On Linux, encrypt the partition during installation.
 For an existing system, encrypt a partition using cryptsetup:

Install cryptsetup utilities
sudo apt install cryptsetup -y

Encrypt a partition (e.g., /dev/sda4). WARNING: This destroys all data on the partition.
sudo cryptsetup luksFormat /dev/sda4

Open the encrypted partition
sudo cryptsetup open /dev/sda4 crypt_partition

Create a file system on the opened mapping
sudo mkfs.ext4 /dev/mapper/crypt_partition
Step 3: Secure Boot and GRUB. Secure Boot can be a nuisance for dual-booting, but it is a valuable security feature. Modern distributions like Fedora and Ubuntu work with Secure Boot out of the box, while Arch Linux can be manually configured to support it. Ensure you install the GRUB bootloader correctly so it can handle the chain-loading of both operating systems securely.
What Undercode Say:
- Choosing a Linux distribution is a strategic decision that balances usability against security requirements, with user-friendly distros for daily drivers and specialized distros for penetration testing.
- A live USB is not just a tool for installation; it is a critical component of a security professional’s arsenal for conducting forensics and penetration tests without leaving digital footprints.
Analysis: The post correctly identifies the core problem of choice paralysis for Windows users migrating to Linux. However, it underestimates the security implications of that choice. For a cybersecurity audience, we must emphasize that “beginner-friendly” often means “more exposed by default.” Distributions like Ubuntu prioritize ease of use over security, enabling unnecessary services and open ports. Therefore, the guide must progress beyond selection to immediate system hardening. The true value of Linux in IT and cybersecurity lies not in the distro itself, but in the administrator’s ability to lock it down using the command line. The steps outlined above—from UFW configuration to LUKS encryption—transform a basic installation into a resilient, security-focused workstation.
Expected Output:
By following this comprehensive guide, the user will have the knowledge to select an appropriate Linux distribution, the practical skills to secure it using essential command-line tools, and the ability to deploy a live penetration testing environment. This foundation transforms a curious beginner into a security-conscious power user.
Prediction:
As cyber threats become more sophisticated, the future of Linux in the enterprise will be defined by “hardened by default” distributions. We predict a rise in immutable and containerized desktop environments, where the core system is read-only and all applications run in isolated containers, drastically reducing the attack surface. Furthermore, the integration of AI-driven anomaly detection into the Linux kernel will become standard, allowing the OS to self-heal and adapt to zero-day exploits in real time within the next five years.
▶️ Related Video (74% Match):
🎯Let’s Practice For Free:
IT/Security Reporter URL:
Reported By: H%C3%A9ctor Joaqu%C3%ADn – Hackers Feeds
Extra Hub: Undercode MoN
Basic Verification: Pass ✅
🎓 Live Courses & Certifications:
Join Undercode Academy for Verified Certifications
🚀 Request a Custom Project:
Secure, high-velocity infrastructure and disruptive technological engineering. Contact our engineering team for high-tier development and proprietary systems:
[email protected]


