Listen to this Post
Introduction:
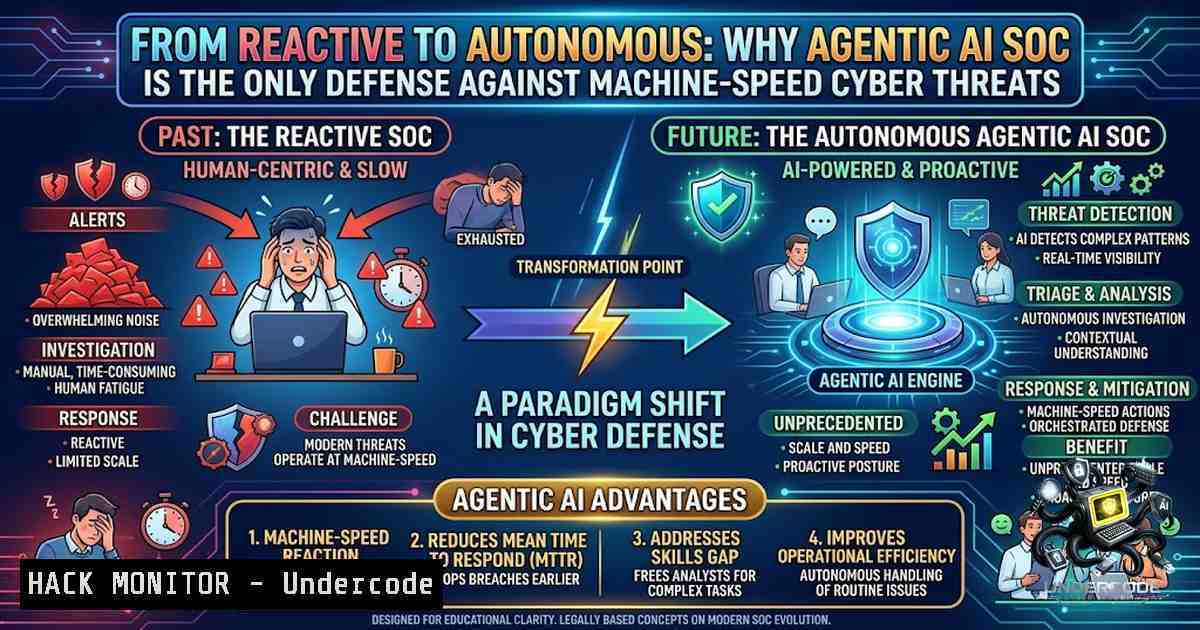
The traditional Security Operations Center (SOC) model is broken. Security teams are drowning in alert fatigue, facing a critical shortage of skilled talent, and watching adversaries leverage generative AI to launch attacks at machine speed. Progressive Techserve’s Agentic AI SOC represents a fundamental shift from reactive monitoring to intelligent, AI-driven remediation—where autonomous agents don’t just detect threats but actively investigate and contain them within seconds.
Learning Objectives:
- Understand the architecture and operational benefits of an Agentic AI-powered Security Operations Center.
- Master the implementation of AI-driven threat detection, automated investigation, and autonomous remediation workflows.
- Acquire practical command-line and configuration skills for integrating AI agents with existing SIEM, SOAR, and endpoint security tools.
You Should Know:
- Deploying an Agentic AI Pipeline for Autonomous Threat Remediation
The core of an Agentic SOC is a multi-agent framework that ingests security telemetry, correlates events, and executes remediation actions without human intervention. This goes beyond simple automation—agents possess reasoning capabilities to formulate mitigation strategies and generate executable scripts.
Step-by-Step Guide: Deploying a Local Agentic SOC Framework
This guide uses an open-source multi-agent SOC framework that ingests live CVE alerts from a Wazuh SIEM, formulates a mitigation strategy using an LLM-based Architect Agent, and writes executable bash scripts using a DevOps Worker Agent.
Step 1: Clone the Repository and Install Dependencies
git clone https://github.com/cheetoZ-007/wazuh-agentic-soc.git
cd wazuh-agentic-soc
pip install -r requirements.txt
Step 2: Configure the Wazuh SIEM Integration
Edit the `config.yaml` file to point to your Wazuh manager instance:
wazuh:
host: "192.168.1.100"
port: 55000
username: "wazuh-wui"
password: "your_password"
Step 3: Set Up the Local LLM (Qwen/Llama)
The framework uses local LLMs to avoid sending sensitive data to the cloud. Download and configure the model:
ollama pull qwen2.5:7b
Update the `llm_config.yaml` to use the Ollama endpoint:
llm:
provider: "ollama"
model: "qwen2.5:7b"
endpoint: "http://localhost:11434"
Step 4: Launch the Agent Orchestrator
python orchestrator.py --mode autonomous --guardrails strict
The `–guardrails strict` flag ensures that high-severity remediation actions (e.g., isolating a critical server) require human approval, while low-risk actions (e.g., blocking a malicious IP) execute autonomously.
Step 5: Verify Autonomous Remediation
Simulate a vulnerability alert using the Wazuh API:
curl -k -X POST "https://192.168.1.100:55000/agents" -H "Authorization: Bearer $TOKEN" -d '{"name": "test-agent"}'
Monitor the orchestrator logs to see the Architect Agent formulate a patch strategy and the DevOps Worker Agent generate and execute a bash script.
2. Hardening Endpoints with AI-Generated Remediation Scripts
Agentic AI doesn’t just detect vulnerabilities—it automatically generates and applies hardening scripts. This capability is critical for closing the window of opportunity for attackers.
Step-by-Step Guide: Using AI to Generate and Apply a Linux Hardening Script
When the Agentic SOC detects a misconfiguration (e.g., open SSH ports, weak password policies), the AI generates a remediation script.
Step 1: AI-Generated Bash Script for SSH Hardening
The DevOps Worker Agent might produce a script like this:
!/bin/bash
 AI-Generated Remediation: SSH Hardening
 Detected: PermitRootLogin yes, Port 22 default

Backup original sshd_config
cp /etc/ssh/sshd_config /etc/ssh/sshd_config.bak

Apply hardening
sed -i 's/^PermitRootLogin./PermitRootLogin no/' /etc/ssh/sshd_config
sed -i 's/^Port 22/Port 2222/' /etc/ssh/sshd_config
echo "MaxAuthTries 3" >> /etc/ssh/sshd_config
echo "ClientAliveInterval 300" >> /etc/ssh/sshd_config
echo "ClientAliveCountMax 0" >> /etc/ssh/sshd_config

Restart SSH service
systemctl restart sshd
Step 2: Automating Script Execution Across the Fleet
Use Ansible to push the AI-generated script to all endpoints:
ansible all -m copy -a "src=/tmp/harden_ssh.sh dest=/tmp/harden_ssh.sh mode=0755"
ansible all -m shell -a "/tmp/harden_ssh.sh"
Step 3: Windows Endpoint Hardening via Group Policy
For Windows environments, the AI generates PowerShell scripts to enforce GPOs:
 AI-Generated Remediation: Windows Account Lockout Policy
Set-ADDefaultDomainPasswordPolicy -LockoutDuration 00:30:00 -LockoutObservationWindow 00:30:00 -LockoutThreshold 5
Set-ADDefaultDomainPasswordPolicy -MaxPasswordAge 90.00:00:00 -MinPasswordAge 1.00:00:00 -MinPasswordLength 14
Apply via `secpol.msc` or `Set-MpPreference` for Windows Defender configurations.
3. Implementing Zero Trust Architecture with AI-Driven Micro-Segmentation
Agentic SOCs enforce Zero Trust principles by continuously verifying every access request and dynamically adjusting network segmentation. AI agents analyze user behavior and device posture to grant or revoke access in real-time.
Step-by-Step Guide: Deploying Zero Trust Micro-Segmentation
Step 1: Create a Dedicated Network for Segmentation
Using Docker to simulate a Zero Trust lab environment:
docker network create --subnet=172.20.0.0/16 zero-trust-1et
Step 2: Deploy an Identity-Aware Proxy (IAP)
For cloud environments, deploy an IAP to enforce conditional access:
gcloud compute backend-services create my-iap-backend --protocol=HTTPS --global
gcloud compute url-maps create my-url-map --default-service my-iap-backend
gcloud compute target-https-proxies create my-https-proxy --url-map=my-url-map --ssl-certificates=my-cert
Step 3: Implement Continuous Verification with eBPF
Use eBPF-based tools like Cilium to enforce network policies at the kernel level:
cilium policy apply -f zero-trust-policy.yaml
Example policy file (`zero-trust-policy.yaml`):
apiVersion: "cilium.io/v2"
kind: CiliumNetworkPolicy
metadata:
name: "zero-trust-app"
spec:
endpointSelector:
matchLabels:
app: frontend
ingress:
- fromEndpoints:
- matchLabels:
app: backend
toPorts:
- ports:
- port: "8080"
protocol: TCP
Step 4: AI-Powered Conditional Access
Integrate with Azure AD Conditional Access to block access from non-compliant devices:
New-AzureADMSConditionalAccessPolicy -1ame "Block Non-Compliant" -Conditions $conditions -GrantControls $grantControls
4. AI-Driven Threat Intelligence and Vulnerability Management (VAPT)
Agentic AI transforms Vulnerability Assessment and Penetration Testing (VAPT) from a periodic exercise into a continuous, automated process. Vulnerabilities discovered during VAPT automatically feed into SOC playbooks, enabling immediate remediation.
Step-by-Step Guide: Automating VAPT with AI
Step 1: Automated Vulnerability Scanning
Use Nmap and OpenVAS, orchestrated by an AI agent:
nmap -sV -p- -oA full_scan 192.168.1.0/24
Step 2: AI-Powered Log Analysis
Connect an LLM to your SIEM (e.g., Splunk) to analyze logs and classify threats:
 Example using MCP to connect Claude to Splunk
from mcp_splunk import SplunkClient
client = SplunkClient(host='splunk.example.com', token='your_token')
logs = client.search('search index=main sourcetype=linux_secure')
 Send logs to LLM for analysis
response = llm.analyze(logs, prompt="Classify threats and map to MITRE ATT&CK")
Step 3: Automated Remediation Playbooks
When a critical vulnerability (e.g., CVE-2026-XXXX) is detected, the AI triggers a SOAR workflow:
playbook:
- name: "Patch Critical CVE"
condition: "severity == 'critical'"
actions:
- type: "execute_script"
script: "patch_cve.sh"
- type: "notify"
channel: "slack"
message: "CVE patched on {{ asset }}"
- Integrating AI Agents with SIEM and SOAR for End-to-End Response
The Agentic SOC doesn’t replace existing SIEM and SOAR tools—it augments them with reasoning capabilities. AI agents analyze alerts, correlate events, and recommend or execute response actions.
Step-by-Step Guide: Connecting an AI Agent to Azure Sentinel
This example uses a modular AI-powered CLI for Azure Sentinel threat hunting and remediation.
Step 1: Install the AI SOC Agent
pip install ai-soc-agent
Step 2: Configure Azure Sentinel Credentials
export AZURE_TENANT_ID="your-tenant-id"
export AZURE_CLIENT_ID="your-client-id"
export AZURE_CLIENT_SECRET="your-secret"
Step 3: Run the AI Agent for Threat Hunting
ai-soc-agent hunt --query "SecurityAlert | where Severity == 'High'"
Step 4: Autonomous Remediation (VM Isolation)
ai-soc-agent remediate --alert-id "alert-12345" --action "isolate-vm"
This command triggers a SOAR workflow that isolates the compromised VM using Azure Automation.
Step 5: Monitor and Review
ai-soc-agent logs --alert-id "alert-12345"
- Building a Human Firewall: AI-Assisted Security Awareness Training
Technology alone isn’t enough. Progressive Techserve emphasizes building a “Human Firewall” through regular training and phishing simulations. Agentic AI can personalize training based on individual risk profiles and simulate sophisticated, AI-generated phishing attacks.
Step-by-Step Guide: Running an AI-Powered Phishing Simulation
Step 1: Generate AI-Crafted Phishing Emails
Use an LLM to create realistic, context-aware phishing templates:
prompt = "Generate a phishing email targeting finance employees, impersonating the CFO, requesting an urgent wire transfer."
phishing_email = llm.generate(prompt)
Step 2: Deploy the Simulation Using GoPhish
docker run -d -p 3333:3333 -p 80:80 --1ame gophish gophish/gophish
Upload the AI-generated template and configure the campaign.
Step 3: Analyze Results and Automate Remediation
Identify users who clicked the link and automatically enroll them in additional training:
clicked_users = get_clicked_users(campaign_id)
for user in clicked_users:
assign_training(user, module="Phishing Awareness 101")
Step 4: Integrate with SIEM for Continuous Monitoring
Forward GoPhish logs to your SIEM to correlate phishing susceptibility with other risk indicators.
- Securing the AI Supply Chain: Guardrails and Governance
As organizations deploy AI agents, they must implement strict guardrails to prevent autonomous actions from causing unintended damage. Governance frameworks, such as ISO 27001:2022 and SOC 2, are essential.
Step-by-Step Guide: Implementing AI Agent Guardrails
Step 1: Define Action Permissions
Create a policy file (guardrails.yaml) that defines which actions are autonomous and which require human approval:
actions:
- name: "block_ip"
approval: "none"  Fully autonomous
- name: "isolate_vm"
approval: "human"  Requires human review
- name: "delete_user"
approval: "human"
Step 2: Implement Audit Logging
Ensure all AI agent actions are logged for compliance and forensic analysis:
 Centralized logging with rsyslog
echo "authpriv. /var/log/ai-agent.log" >> /etc/rsyslog.conf
systemctl restart rsyslog
Step 3: Continuous Monitoring of AI Decisions
Set up alerts for anomalous AI behavior, such as repeated failed remediation attempts or unexpected access patterns.
What Undercode Say:
- Agentic AI is not about replacing humans; it’s about amplifying their capabilities. The future SOC will see AI agents handling Tier 1 and 2 tasks—alert triage, initial investigation, and low-risk remediation—while human analysts focus on complex, strategic decision-making. This reduces burnout and allows security teams to operate at machine speed.
- Autonomous remediation requires trust and verification. Organizations must start with a “human-on-the-loop” model, where AI recommends actions but requires approval for critical changes. As confidence grows, they can transition to “human-in-the-loop” and eventually “human-over-the-loop” for specific, well-understood workflows. The key is to implement strict guardrails and continuous monitoring to ensure AI actions align with organizational objectives.
Prediction:
- +1 Agentic AI SOCs will become the default security architecture for enterprises by 2028, reducing mean time to respond (MTTR) by over 80% and closing 95% of Tier 1 security cases autonomously. This will fundamentally reshape the cybersecurity workforce, shifting demand from alert analysts to AI engineers and threat hunters.
- -1 The proliferation of AI-driven autonomous agents will create new attack surfaces. Adversaries will target the AI models themselves through prompt injection, data poisoning, and model theft. Organizations that fail to implement robust AI security governance—including continuous model validation and adversarial testing—will face catastrophic breaches caused by their own autonomous systems.
▶️ Related Video (76% Match):
🎯Let’s Practice For Free:
🎓 Live Courses & Certifications:
Join Undercode Academy for Verified Certifications
🚀 Request a Custom Project:
Secure, high-velocity infrastructure and disruptive technological engineering. Contact our engineering team for high-tier development and proprietary systems:
[email protected]
💎 Smart Architecture | 🛡️ Secure by Design | ⭐ Trusted by Thousands
IT/Security Reporter URL:
Reported By: Cyber Threats – Hackers Feeds
Extra Hub: Undercode MoN
Basic Verification: Pass ✅


