Listen to this Post
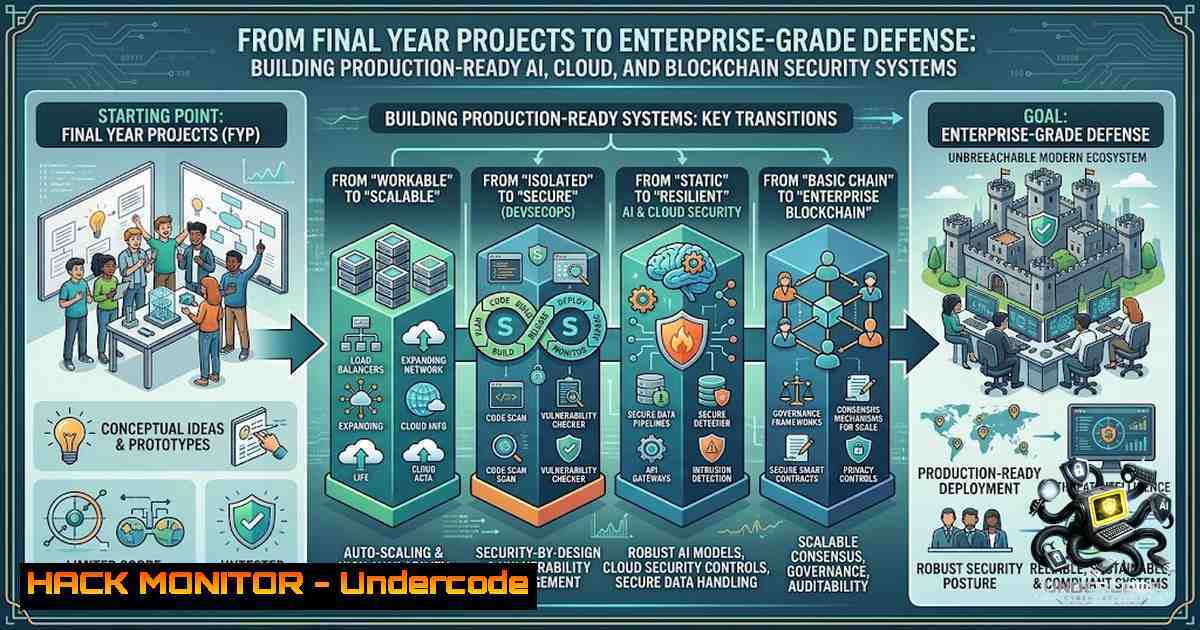
Introduction:
The gap between academic project work and enterprise-grade security implementation remains one of the most critical challenges facing new cybersecurity and IT professionals. ElysiumPro’s project portfolio—spanning AI-powered threat detection, cloud monitoring infrastructures, blockchain-based verification systems, and biometric authentication—provides a structured pathway from theoretical understanding to practical, deployable security solutions. This article deconstructs the technical architecture behind these domains, providing hands-on implementation guides, hardening commands, and production considerations that transform student projects into portfolio-ready security demonstrations.
Learning Objectives:
- Implement AI-based threat detection systems using Python, OpenCV, and machine learning frameworks for real-time anomaly identification
- Deploy cloud monitoring stacks with AWS CloudWatch, OpenTelemetry, and Terraform for comprehensive infrastructure observability
- Build blockchain-based verification systems from scratch using Python, Java, or Go with Proof-of-Work consensus
- Harden Linux and Windows server environments using CIS benchmarks, DISA STIGs, and automated PowerShell/Bash scripts
- Integrate multi-factor biometric authentication into applications using facial recognition and liveness detection
You Should Know:
1. AI-Powered Threat Detection and Biometric Authentication Systems
Building production-grade AI security systems requires understanding both the machine learning pipeline and the security considerations around model deployment. ElysiumPro’s cybersecurity and facial recognition projects typically involve Python-based implementations using libraries like OpenCV, Dlib, and DeepFace.
Step-by-Step Implementation Guide:
Step 1: Set Up the Facial Recognition Environment
 Linux/macOS
python3 -m venv face_auth_env
source face_auth_env/bin/activate
pip install opencv-python dlib face-recognition numpy flask

Windows (PowerShell)
python -m venv face_auth_env
.\face_auth_env\Scripts\activate
pip install opencv-python dlib face-recognition numpy flask
Step 2: Generate Facial Dataset
 generate_dataset.py
import cv2
import os

face_cascade = cv2.CascadeClassifier(cv2.data.haarcascades + 'haarcascade_frontalface_default.xml')
cap = cv2.VideoCapture(0)
count = 0

while True:
ret, frame = cap.read()
gray = cv2.cvtColor(frame, cv2.COLOR_BGR2GRAY)
faces = face_cascade.detectMultiScale(gray, 1.3, 5)

for (x, y, w, h) in faces:
count += 1
roi_gray = gray[y:y+h, x:x+w]
roi_color = frame[y:y+h, x:x+w]
cv2.imwrite(f"dataset/user_{count}.jpg", roi_gray)
cv2.rectangle(frame, (x, y), (x+w, y+h), (255, 0, 0), 2)

cv2.imshow('Face Capture', frame)
if cv2.waitKey(1) & 0xFF == ord('q') or count >= 100:
break

cap.release()
cv2.destroyAllWindows()
Step 3: Train the Recognition Model
 train_model.py
import face_recognition
import numpy as np
import os
import pickle

known_encodings = []
known_names = []

for file in os.listdir("dataset"):
image = face_recognition.load_image_file(f"dataset/{file}")
encoding = face_recognition.face_encodings(image)[bash]
known_encodings.append(encoding)
known_names.append(file.split('_')[bash])

data = {"encodings": known_encodings, "names": known_names}
with open("encodings.pickle", "wb") as f:
pickle.dump(data, f)
print("Model trained successfully!")
Step 4: Implement Real-Time Authentication
 auth_system.py
import face_recognition
import cv2
import pickle
import numpy as np

with open("encodings.pickle", "rb") as f:
data = pickle.load(f)

video_capture = cv2.VideoCapture(0)
while True:
ret, frame = video_capture.read()
rgb = cv2.cvtColor(frame, cv2.COLOR_BGR2RGB)
boxes = face_recognition.face_locations(rgb)
encodings = face_recognition.face_encodings(rgb, boxes)

for encoding in encodings:
matches = face_recognition.compare_faces(data["encodings"], encoding)
name = "Unknown"
if True in matches:
matched_idxs = [i for (i, b) in enumerate(matches) if b]
counts = {}
for i in matched_idxs:
name = data["names"][bash]
counts[bash] = counts.get(name, 0) + 1
name = max(counts, key=counts.get)
print(f"Authentication: {name}")

if cv2.waitKey(1) & 0xFF == ord('q'):
break
Critical Security Consideration: For production deployment, implement liveness detection using blink detection or 3D depth analysis to prevent spoofing attacks using photographs or videos.
2. Cloud Monitoring and Observability Infrastructure
Modern cloud security requires proactive monitoring across distributed microservices. ElysiumPro’s cloud monitoring projects typically simulate e-commerce or SaaS environments with integrated observability stacks.
Step-by-Step Implementation Guide:
Step 1: Deploy a Microservices-Based E-Commerce Application
 Clone the OpenTelemetry Astronomy Shop demo (distributed e-commerce reference app)
git clone https://github.com/open-telemetry/opentelemetry-demo.git
cd opentelemetry-demo

Start the application with Docker Compose
docker-compose up -d
Step 2: Configure AWS CloudWatch Monitoring
 Install AWS CLI and configure credentials
aws configure
 Set up CloudWatch agent
sudo wget https://s3.amazonaws.com/amazoncloudwatch-agent/ubuntu/amd64/latest/amazon-cloudwatch-agent.deb
sudo dpkg -i -E ./amazon-cloudwatch-agent.deb

Create CloudWatch configuration file
cat > /opt/aws/amazon-cloudwatch-agent/etc/config.json << EOF
{
"metrics": {
"namespace": "EcommerceApp",
"metrics_collected": {
"cpu": {"measurement": ["cpu_usage_idle"]},
"mem": {"measurement": ["mem_used_percent"]},
"disk": {"measurement": ["disk_used_percent"]}
}
},
"logs": {
"logs_collected": {
"files": {
"collect_list": [
{"file_path": "/var/log/application/.log", "log_group_name": "EcommerceLogs"}
]
}
}
}
}
EOF

Start the CloudWatch agent
sudo /opt/aws/amazon-cloudwatch-agent/bin/amazon-cloudwatch-agent-ctl -a fetch-config -m ec2 -c file:/opt/aws/amazon-cloudwatch-agent/etc/config.json -s
Step 3: Implement AI-Driven Incident Management (AIOps)
 aiops_incident_detector.py
import boto3
import json
from datetime import datetime, timedelta

cloudwatch = boto3.client('cloudwatch')
logs = boto3.client('logs')

def detect_anomalies():
response = cloudwatch.get_metric_statistics(
Namespace='EcommerceApp',
MetricName='CPUUtilization',
StartTime=datetime.utcnow() - timedelta(minutes=10),
EndTime=datetime.utcnow(),
Period=60,
Statistics=['Average']
)

datapoints = [dp['Average'] for dp in response['Datapoints']]
if datapoints and max(datapoints) > 85:
trigger_incident_response("High CPU detected - possible DDoS or resource exhaustion")
return datapoints

def trigger_incident_response(message):
 Log incident
logs.put_log_events(
logGroupName='EcommerceLogs',
logStreamName='incidents',
logEvents=[{
'timestamp': int(datetime.now().timestamp()  1000),
'message': json.dumps({'severity': 'HIGH', 'alert': message})
}]
)
print(f"INCIDENT: {message}")

if <strong>name</strong> == "<strong>main</strong>":
detect_anomalies()
Step 4: Implement Infrastructure as Code with Terraform
 main.tf - Cloud monitoring infrastructure
provider "aws" {
region = "us-east-1"
}

resource "aws_cloudwatch_metric_alarm" "high_cpu" {
alarm_name = "high-cpu-alarm"
comparison_operator = "GreaterThanThreshold"
evaluation_periods = "2"
metric_name = "CPUUtilization"
namespace = "EcommerceApp"
period = "120"
statistic = "Average"
threshold = "80"
alarm_description = "This metric monitors ec2 cpu utilization"
actions_enabled = true
alarm_actions = [aws_sns_topic.alerts.arn]
}

resource "aws_sns_topic" "alerts" {
name = "ecommerce-alerts"
}
Production Consideration: Implement log analysis with CloudWatch Logs Insights for real-time threat detection:
 CloudWatch Logs Insights query
fields @timestamp, @message
| filter @message like /(error|exception|unauthorized|failed login)/
| sort @timestamp desc
| limit 100
3. Blockchain-Based Verification and Decentralized Systems
Blockchain projects at ElysiumPro focus on building decentralized applications (DApps), smart contracts, and cryptocurrency systems with an emphasis on tamper-proof verification.
Step-by-Step Implementation Guide:
Step 1: Build a Basic Blockchain from Scratch (Python)
 blockchain.py
import hashlib
import json
import time
from typing import List, Dict

class Block:
def <strong>init</strong>(self, index: int, transactions: List[bash], timestamp: float, previous_hash: str):
self.index = index
self.transactions = transactions
self.timestamp = timestamp
self.previous_hash = previous_hash
self.nonce = 0
self.hash = self.calculate_hash()

def calculate_hash(self) -> str:
block_string = json.dumps({
"index": self.index,
"transactions": self.transactions,
"timestamp": self.timestamp,
"previous_hash": self.previous_hash,
"nonce": self.nonce
}, sort_keys=True)
return hashlib.sha256(block_string.encode()).hexdigest()

def mine_block(self, difficulty: int):
target = "0"  difficulty
while self.hash[:difficulty] != target:
self.nonce += 1
self.hash = self.calculate_hash()
print(f"Block mined: {self.hash}")

class Blockchain:
def <strong>init</strong>(self):
self.chain = [self.create_genesis_block()]
self.difficulty = 4
self.pending_transactions = []
self.mining_reward = 100

def create_genesis_block(self) -> Block:
return Block(0, [], time.time(), "0")

def get_latest_block(self) -> Block:
return self.chain[-1]

def add_transaction(self, transaction: Dict):
self.pending_transactions.append(transaction)

def mine_pending_transactions(self, mining_reward_address: str):
block = Block(len(self.chain), self.pending_transactions, time.time(), self.get_latest_block().hash)
block.mine_block(self.difficulty)
self.chain.append(block)
self.pending_transactions = [{
"from": None,
"to": mining_reward_address,
"amount": self.mining_reward
}]

def is_chain_valid(self) -> bool:
for i in range(1, len(self.chain)):
current = self.chain[bash]
previous = self.chain[i-1]
if current.hash != current.calculate_hash():
return False
if current.previous_hash != previous.hash:
return False
return True
Step 2: Implement Cryptographic Wallets and Transaction Signing
 wallet.py
import hashlib
import json
import time
from cryptography.hazmat.primitives import hashes
from cryptography.hazmat.primitives.asymmetric import rsa, padding
from cryptography.hazmat.primitives import serialization

class Wallet:
def <strong>init</strong>(self):
self.private_key = rsa.generate_private_key(public_exponent=65537, key_size=2048)
self.public_key = self.private_key.public_key()
self.address = self.generate_address()

def generate_address(self) -> str:
public_bytes = self.public_key.public_bytes(
encoding=serialization.Encoding.PEM,
format=serialization.PublicFormat.SubjectPublicKeyInfo
)
return hashlib.sha256(public_bytes).hexdigest()[:40]

def sign_transaction(self, transaction_data: Dict) -> bytes:
message = json.dumps(transaction_data, sort_keys=True).encode()
signature = self.private_key.sign(
message,
padding.PSS(mgf=padding.MGF1(hashes.SHA256()), salt_length=padding.PSS.MAX_LENGTH),
hashes.SHA256()
)
return signature

def verify_signature(self, transaction_data: Dict, signature: bytes, public_key) -> bool:
message = json.dumps(transaction_data, sort_keys=True).encode()
try:
public_key.verify(
signature,
message,
padding.PSS(mgf=padding.MGF1(hashes.SHA256()), salt_length=padding.PSS.MAX_LENGTH),
hashes.SHA256()
)
return True
except:
return False
Step 3: Run the Blockchain Node with Flask Dashboard
 app.py
from flask import Flask, jsonify, request
from blockchain import Blockchain
from wallet import Wallet
import json

app = Flask(<strong>name</strong>)
blockchain = Blockchain()
wallet = Wallet()

@app.route('/mine', methods=['GET'])
def mine():
blockchain.mine_pending_transactions(wallet.address)
return jsonify({"message": "Block mined successfully", "chain": [b.<strong>dict</strong> for b in blockchain.chain]})

@app.route('/transactions/new', methods=['POST'])
def new_transaction():
values = request.get_json()
required = ['from', 'to', 'amount']
if not all(k in values for k in required):
return jsonify({"error": "Missing values"}), 400
blockchain.add_transaction(values)
return jsonify({"message": "Transaction added"}), 201

@app.route('/chain', methods=['GET'])
def full_chain():
chain_data = [{
"index": b.index,
"transactions": b.transactions,
"timestamp": b.timestamp,
"hash": b.hash,
"previous_hash": b.previous_hash
} for b in blockchain.chain]
return jsonify({"chain": chain_data, "length": len(chain_data)})

if <strong>name</strong> == '<strong>main</strong>':
app.run(host='0.0.0.0', port=5000)
Step 4: Verify Chain Integrity (Tamper Detection)
 Test blockchain integrity
curl http://localhost:5000/chain
 Attempt to tamper with a block (demonstrates detection)
python -c "
import json
from blockchain import Blockchain
bc = Blockchain()
bc.chain[bash].transactions = [{'from': 'attacker', 'to': 'attacker', 'amount': 1000}]
print(f'Chain valid: {bc.is_chain_valid()}')
"
4. Linux Server Hardening and Security Compliance
Enterprise-grade security demands systematic server hardening. ElysiumPro’s cybersecurity projects incorporate CIS benchmarks and DISA STIG compliance.
Step-by-Step Implementation Guide:
Step 1: Establish Security Baseline
 Update system packages (Debian/Ubuntu)
sudo apt update && sudo apt upgrade -y

RHEL/CentOS/Alma/Rocky
sudo dnf update -y

Install essential security tools
sudo apt install fail2ban ufw audited aide rkhunter -y
Step 2: Configure SSH Hardening
 Backup SSH configuration
sudo cp /etc/ssh/sshd_config /etc/ssh/sshd_config.bak

Apply security hardening settings
sudo sed -i 's/PermitRootLogin yes/PermitRootLogin no/' /etc/ssh/sshd_config
sudo sed -i 's/PasswordAuthentication yes/PasswordAuthentication no/' /etc/ssh/sshd_config
sudo sed -i 's/PubkeyAuthentication yes/PubkeyAuthentication yes/' /etc/ssh/sshd_config
echo "AllowUsers your_username" | sudo tee -a /etc/ssh/sshd_config
echo "MaxAuthTries 3" | sudo tee -a /etc/ssh/sshd_config
echo "ClientAliveInterval 300" | sudo tee -a /etc/ssh/sshd_config
echo "ClientAliveCountMax 2" | sudo tee -a /etc/ssh/sshd_config

Restart SSH service
sudo systemctl restart sshd
Step 3: Configure Firewall with UFW or nftables
 UFW (Ubuntu/Debian)
sudo ufw default deny incoming
sudo ufw default allow outgoing
sudo ufw allow ssh
sudo ufw allow 80/tcp
sudo ufw allow 443/tcp
sudo ufw enable
sudo ufw status verbose

nftables (Advanced)
sudo nft add table inet filter
sudo nft add chain inet filter input { type filter hook input priority 0\; policy drop\; }
sudo nft add chain inet filter forward { type filter hook forward priority 0\; policy drop\; }
sudo nft add chain inet filter output { type filter hook output priority 0\; policy accept\; }
sudo nft add rule inet filter input ct state established,related accept
sudo nft add rule inet filter input iif lo accept
sudo nft add rule inet filter input tcp dport 22 accept
sudo nft list ruleset
Step 4: Implement Automated Hardening Script
!/bin/bash
 fortress_hardening.sh - Semi-automated security hardening

echo "Starting Linux Security Hardening..."

Disable unused network protocols
echo "net.ipv4.conf.all.rp_filter=1" >> /etc/sysctl.conf
echo "net.ipv4.conf.default.rp_filter=1" >> /etc/sysctl.conf
echo "net.ipv4.tcp_syncookies=1" >> /etc/sysctl.conf
echo "net.ipv4.tcp_timestamps=0" >> /etc/sysctl.conf
sysctl -p

Set secure permissions on critical files
sudo chmod 600 /etc/shadow
sudo chmod 600 /etc/gshadow
sudo chmod 644 /etc/passwd
sudo chmod 644 /etc/group

Install and configure AIDE (Advanced Intrusion Detection Environment)
sudo aideinit
sudo mv /var/lib/aide/aide.db.new /var/lib/aide/aide.db
sudo aide --check

Configure auditing (auditd)
sudo auditctl -e 1
sudo auditctl -w /etc/passwd -p wa -k identity
sudo auditctl -w /etc/shadow -p wa -k identity
sudo auditctl -w /etc/sudoers -p wa -k sudoers
sudo auditctl -w /var/log/auth.log -p wa -k authentication

echo "Hardening complete. Review logs at /var/log/syslog"
Step 5: Implement Fail2Ban for Brute Force Protection
 Configure Fail2Ban
sudo cp /etc/fail2ban/jail.conf /etc/fail2ban/jail.local
sudo systemctl enable fail2ban
sudo systemctl start fail2ban

Monitor banned IPs
sudo fail2ban-client status sshd
sudo tail -f /var/log/fail2ban.log
5. Windows Server Hardening and Security Automation
Windows environments require equivalent hardening through Group Policy, PowerShell automation, and CIS benchmark compliance.
Step-by-Step Implementation Guide:
Step 1: Audit Current Security State
 PowerShell script - validate_security_hardening.ps1
 Run as Administrator
$ErrorActionPreference = "Stop"

Write-Host "=== Windows Security Hardening Audit ===" -ForegroundColor Cyan

Check Windows Defender status
$defender = Get-MpComputerStatus
Write-Host "Windows Defender Real-Time Protection: $($defender.RealTimeProtectionEnabled)" -ForegroundColor Yellow

Check UAC settings
$uac = Get-ItemProperty "HKLM:\SOFTWARE\Microsoft\Windows\CurrentVersion\Policies\System"
Write-Host "UAC Enabled: $($uac.EnableLUA)" -ForegroundColor Yellow

Check firewall status
$firewall = Get-1etFirewallProfile -Profile Domain,Public,Private
foreach ($profile in $firewall) {
Write-Host "Firewall ($($profile.Name)): $($profile.Enabled)" -ForegroundColor Yellow
}

List disabled services
Get-Service | Where-Object {$_.StartType -eq 'Disabled'} | Select-Object Name, DisplayName
Step 2: Apply CIS Benchmark Settings via PowerShell
 CIS Hardening Script
 Disable SMBv1 (vulnerable to ransomware attacks)
Set-SmbServerConfiguration -EnableSMB1Protocol $false -Force
Remove-WindowsFeature FS-SMB1

Enable Windows Defender Credential Guard (requires reboot)
 Enable virtualization-based security
Set-ItemProperty -Path "HKLM:\SYSTEM\CurrentControlSet\Control\Lsa" -1ame "LsaCfgFlags" -Value 2 -Type DWord

Configure Windows Firewall rules
New-1etFirewallRule -DisplayName "Block RDP from public" -Direction Inbound -Protocol TCP -LocalPort 3389 -Action Block -Profile Public

Set audit policies
auditpol /set /subcategory:"Security Group Management" /success:enable /failure:enable
auditpol /set /subcategory:"Logon" /success:enable /failure:enable
auditpol /set /subcategory:"Account Lockout" /success:enable /failure:enable
Step 3: Implement PowerShell Security Automation Suite
 windows_security_hardening.ps1 - Complete hardening module

function Disable-UnnecessaryServices {
$services = @("RemoteRegistry", "Telnet", "SNMP", "SimpleTCP")
foreach ($svc in $services) {
Stop-Service $svc -Force -ErrorAction SilentlyContinue
Set-Service $svc -StartupType Disabled
Write-Host "Disabled service: $svc" -ForegroundColor Green
}
}

function Enforce-PasswordPolicies {
 Set minimum password length and complexity
Set-ItemProperty -Path "HKLM:\SECURITY\Policy\Accounts" -1ame "MinimumPasswordLength" -Value 12
Set-ItemProperty -Path "HKLM:\SECURITY\Policy\Accounts" -1ame "PasswordComplexity" -Value 1
Set-ItemProperty -Path "HKLM:\SECURITY\Policy\Accounts" -1ame "MaximumPasswordAge" -Value 90

Enable account lockout after 5 failed attempts
Set-ItemProperty -Path "HKLM:\SYSTEM\CurrentControlSet\Services\Netlogon\Parameters" -1ame "LockoutThreshold" -Value 5
Write-Host "Password policies enforced" -ForegroundColor Green
}

function Enable-AdvancedAuditing {
 Enable advanced audit policies via Group Policy
secedit /export /cfg C:\secpolicy.inf
Add-Content C:\secpolicy.inf "[System Access]"
Add-Content C:\secpolicy.inf "LockoutBadCount = 5"
Add-Content C:\secpolicy.inf "MinimumPasswordAge = 1"
secedit /configure /db C:\Windows\security\local.sdb /cfg C:\secpolicy.inf /areas SECURITYPOLICY
Remove-Item C:\secpolicy.inf -Force
Write-Host "Advanced auditing configured" -ForegroundColor Green
}

Execute hardening
Disable-UnnecessaryServices
Enforce-PasswordPolicies
Enable-AdvancedAuditing
Step 4: Monitor Security Event Logs
 Real-time security event monitoring
Get-WinEvent -LogName Security -MaxEvents 50 | Where-Object {
$_.Id -in @(4624, 4625, 4672, 4648)
} | Format-Table TimeCreated, Id, Message -AutoSize

Export security logs for SIEM integration
wevtutil epl Security C:\Logs\security_archive.evtx
What Undercode Say:
- ElysiumPro’s project ecosystem bridges the critical gap between academic learning and industry-ready security implementation—the integration of source code, comprehensive documentation, and live demo support provides an accelerated learning pathway that traditionally takes months of on-the-job experience to acquire.
-
The convergence of AI, cloud, and blockchain in a single project portfolio reflects the modern security landscape where perimeter-based defenses are obsolete, and security must be embedded into every layer of the technology stack—from biometric authentication to decentralized verification and continuous cloud monitoring.
Analysis: The projects offered by ElysiumPro represent more than academic exercises; they are miniature production environments that expose students to real-world security challenges. The AI chatbot with facial authentication demonstrates the critical balance between user experience and security—a tension that defines modern application development. The cloud monitoring projects introduce observability as a security control, teaching that you cannot protect what you cannot see. The blockchain implementations provide hands-on experience with cryptographic verification and tamper-proof systems, concepts increasingly relevant in supply chain security and digital identity. The hardening guides for both Linux and Windows environments address the operational reality that security is not a feature but a continuous process of configuration, monitoring, and response. What distinguishes these projects is their emphasis on deployable, demonstrable outcomes—the live demo support ensures that students can articulate not just what they built, but how it works under real conditions, a capability that significantly enhances employability in cybersecurity roles.
Prediction:
- +1 The increasing integration of AI with biometric security will accelerate adoption of behavioral biometrics and continuous authentication, moving beyond single-factor facial recognition to multi-modal systems that analyze voice, gait, and typing patterns simultaneously.
-
+1 Cloud-1ative security monitoring will evolve from reactive alerting to predictive AIOps, where machine learning models will autonomously detect and remediate security incidents before they impact production systems, reducing mean time to detection (MTTD) from hours to seconds.
-
-1 The proliferation of blockchain-based verification systems will create new attack vectors targeting smart contract vulnerabilities and consensus mechanism exploits, requiring security professionals to develop specialized skills in formal verification and cryptographic audit.
-
+1 The democratization of security hardening through automated scripts and Infrastructure as Code will shift the cybersecurity workforce from manual configuration to strategic security architecture, increasing demand for professionals who understand both automation and the underlying security principles.
-
-1 As biometric authentication becomes ubiquitous, the risk of biometric data breaches will escalate dramatically—unlike passwords, biometric identifiers cannot be changed, making their protection a critical challenge that will drive new regulations and encryption standards.
▶️ Related Video (78% Match):
https://www.youtube.com/watch?v=-aWnexbnVOw
🎯Let’s Practice For Free:
🎓 Live Courses & Certifications:
Join Undercode Academy for Verified Certifications
🚀 Request a Custom Project:
Secure, high-velocity infrastructure and disruptive technological engineering. Contact our engineering team for high-tier development and proprietary systems:
[email protected]
💎 Smart Architecture | 🛡️ Secure by Design | ⭐ Trusted by Thousands
IT/Security Reporter URL:
Reported By: Elysiumpro Toptechprojects – Hackers Feeds
Extra Hub: Undercode MoN
Basic Verification: Pass ✅


