Listen to this Post
Introduction:
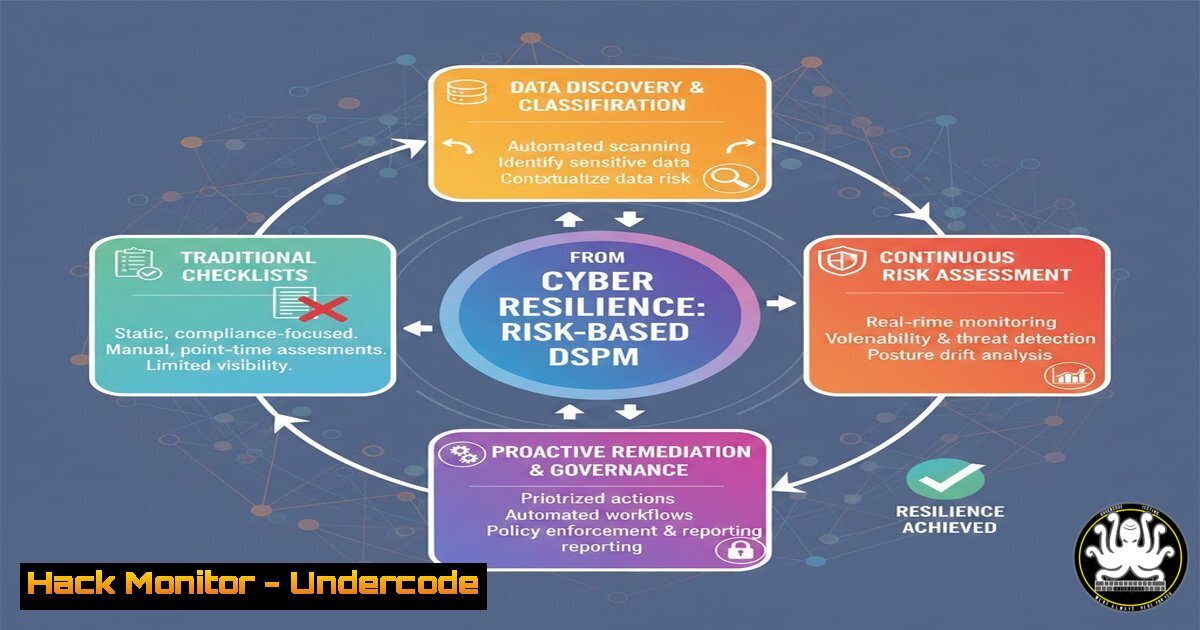
The era of treating data security as a compliance checkbox is over. In today’s landscape of pervasive cloud, SaaS, and AI, a fundamental shift is required towards a risk-based, data-centric approach. Data Security Posture Management (DSPM) emerges as the critical operational framework to gain visibility, prioritize real-world threats, and move from administrative cybersecurity to measurable risk reduction.
Learning Objectives:
- Understand the core principles and necessity of transitioning from compliance-based to risk-based data security.
- Learn the key technical capabilities of a DSPM framework: discovery, classification, access governance, and risk assessment.
- Gain practical, actionable steps to begin implementing DSPM controls using common command-line and cloud-native tools.
You Should Know:
1. Discovering and Classifying Your Sensitive Data
The foundational step of DSPM is answering “where are my data?” You must discover data across hybrid environments—cloud storage, databases, SaaS applications, and endpoints—and classify it by sensitivity.
Step‑by‑step guide:
Step 1: Cloud Inventory Scan. Use cloud provider tools to list all storage resources. For AWS, the CLI command `aws s3api list-buckets` provides a starting inventory. For broader resource discovery, `aws resourcegroupstaggingapi get-resources` can list tagged resources across services.
Step 2: Structured Data Discovery. Connect DSPM tools or database scanners to your data warehouses (Snowflake, BigQuery, Redshift) and SQL databases. Use targeted queries to locate sensitive schemas and tables. For example, in MySQL, you might scan for tables with common names: `SELECT TABLE_SCHEMA, TABLE_NAME FROM information_schema.TABLES WHERE TABLE_NAME LIKE ‘%credit%’ OR TABLE_NAME LIKE ‘%ssn%’ OR TABLE_NAME LIKE ‘%patient%’;`
Step 3: Classification & Labeling. Apply classification labels (e.g., “Public,” “Internal,” “Confidential,” “Restricted”) based on content scanning. Open-source tools like `grep` with regex patterns can perform basic scans for PII on Linux systems: grep -r -E "([0-9]{3}-[0-9]{2}-[0-9]{4})|[A-Za-z0-9._%+-]+@[A-Za-z0-9.-]+\.[A-Za-z]{2,}" /path/to/data/. Production environments require automated DSPM or Data Loss Prevention (DLP) tools for scalable classification.
2. Mapping Identities and Access Governance
After discovering “what” the data is, DSPM answers “who can access it and why?” This involves analyzing entangled identity and access management (IAM) policies across cloud platforms and applications.
Step‑by‑step guide:
Step 1: Analyze Cloud IAM Permissions. Audit over-permissive roles. In AWS, use the IAM policy simulator or CLI commands like `aws iam get-account-authorization-details` to export all policies for analysis. The goal is to identify roles with wildcards (“) or excessive data-access permissions like s3:GetObject, rds-db:connect, or bigquery.tables.getData.
Step 2: Analyze Data‑Specific Entitlements. Go beyond IAM to examine access controls at the data layer. For an AWS S3 bucket, check the bucket ACL and policy: `aws s3api get-bucket-acl –bucket BUCKET_NAME` and aws s3api get-bucket-policy --bucket BUCKET_NAME. In Google BigQuery, review dataset and table access controls via the console or `bq show` command.
Step 3: Establish a Least‑Privilege Model. Use findings to initiate access reviews. Implement Just‑In‑Time (JIT) access systems and remove standing, excessive privileges. Tools like `aws iam simulate-principal-policy` help test the effective permissions of a role before making changes.
3. Assessing Risk Scenarios and Exposure
DSPM quantifies risk by correlating data sensitivity, vulnerabilities, and access vectors. It shifts focus from theoretical threats to specific scenarios like an overexposed publicly readable cloud storage bucket containing PII.
Step‑by‑step guide:
Step 1: Identify Misconfigurations & Vulnerabilities. Continuously scan for infrastructure misconfigurations. Use CSPM (Cloud Security Posture Management) tools or frameworks like Prowler for AWS: prowler aws --check s3_bucket_public_read_access. This identifies buckets open to the internet.
Step 2: Correlate with Data Context. A DSPM platform overlays the findings from Step 1 with your data classification map. The critical risk is not just any public bucket, but the one containing “Restricted” data. Prioritize remediation based on this data context.
Step 3: Quantify Exposure Score. Calculate a risk score for each asset. A simple formula could be: Risk Score = Data Sensitivity Level × (Access Exposure Score + Vulnerability Severity Score). Automate this scoring to generate a prioritized remediation queue.
4. Implementing Remediation and Automated Guardrails
The operational goal of DSPM is to reduce measurable risk. This involves both tactical fixes for critical issues and strategic controls to prevent recurrence.
Step‑by‑step guide:
Step 1: Immediate Remediation. For a critical finding like a publicly exposed PII database, take immediate action. To block public access to an AWS S3 bucket: aws s3api put-public-access-block --bucket BUCKET_NAME --public-access-block-configuration "BlockPublicAcls=true, IgnorePublicAcls=true, BlockPublicPolicy=true, RestrictPublicBuckets=true".
Step 2: Deploy Preventive Guardrails. Implement automated policies (guardrails) in your cloud environment. Use AWS Service Control Policies (SCPs), Azure Policy, or GCP Organization Policies to enforce rules like “no storage buckets can be created with public read access.” This prevents misconfigurations at scale.
Step 3: Integrate with SIEM/SOAR. Streamline DSPM findings into your Security Information and Event Management (SIEM) system. Create alerts for high-risk events and automate playbooks in a Security Orchestration, Automation, and Response (SOAR) platform. For example, an alert can trigger an automated workflow to quarantine a compromised user account and revoke their active sessions.
- Measuring What Matters: From Compliance KPIs to Risk Metrics
The shift to operational, risk-based security demands new key performance indicators (KPIs) that reflect exposure and resilience, not just audit completion.
Step‑by‑step guide:
Step 1: Define New Metrics. Move beyond “% compliant with Standard X.” Implement metrics like:
Mean Time to Remediate (MTTR) Critical Data Risks: Track from discovery to closure.
Data Exposure Surface Area: The volume of sensitive data accessible from the public internet or by over-provisioned identities.
Incidents Prevented: Use DSPM log data to quantify alerts that led to pre‑incident mitigation.
Step 2: Instrument Your Environment. Use DSPM platform APIs or query logs to calculate these metrics. For instance, a SQL query on your DSPM alert database could calculate weekly MTTR: SELECT AVG(remediation_time - detection_time) FROM risks WHERE severity = 'CRITICAL' AND detected_at > DATE_SUB(NOW(), INTERVAL 7 DAY);.
Step 3: Report to Leadership. Translate technical metrics into business risk language. Visualize the reduction in “Data Exposure Surface Area” over time or present the “Top 5 Avoided Incidents” based on DSPM-driven interventions to demonstrate tangible ROI.
What Undercode Say:
Risk is the New Compliance: The primary goal of security is no longer to pass an audit but to continuously understand and reduce the probability and impact of specific, credible adverse events on business‑critical data. Compliance becomes a by‑product of effective risk management, not the end goal.
Data Context is Everything: A vulnerability or misconfiguration only becomes a high‑priority risk when it affects sensitive data. DSPM provides the essential context that allows security teams to focus effort where it truly matters, transforming overwhelming alert fatigue into a clear action plan.
The analysis reveals a maturation of the cybersecurity function. Florian DudaEV’s post correctly identifies that the complexity of modern environments (Cloud, SaaS, AI) has shattered the old perimeter‑based, checklist security model. DSPM is not merely a new tool category but a necessary evolution in strategy—it is the operationalization of the “risk‑based approach” that has been discussed theoretically for years. By forcing answers to the fundamental questions of “what data do I have, where is it, and who can access it?” DSPM grounds security in reality. The shift in metrics—from checking audit boxes to measuring exposure reduction and mean time to remediate—is the clearest indicator of this transformation. It aligns security efforts directly with business outcomes, moving the CISO from a cost center to a key enabler of resilience and trust.
Prediction:
In the next 2‑3 years, DSPM will converge with Cloud Native Application Protection Platforms (CNAPP) and Identity Threat Detection and Response (ITDR) to form integrated “Unified Data Security Platforms.” AI will be leveraged not just for anomaly detection, but to proactively simulate attacker lateral movement paths based on live data access maps and identity entitlements, enabling true predictive risk modeling. Organizations that fail to adopt this integrated, data‑context‑aware approach will face exponentially higher costs from breaches and regulatory penalties, as legacy compliance‑focused models prove inadequate against evolving, data‑hungry threats.
▶️ Related Video (84% Match):
🎯Let’s Practice For Free:
IT/Security Reporter URL:
Reported By: Cyberflood Quest – Hackers Feeds
Extra Hub: Undercode MoN
Basic Verification: Pass ✅


