Listen to this Post
Introduction:
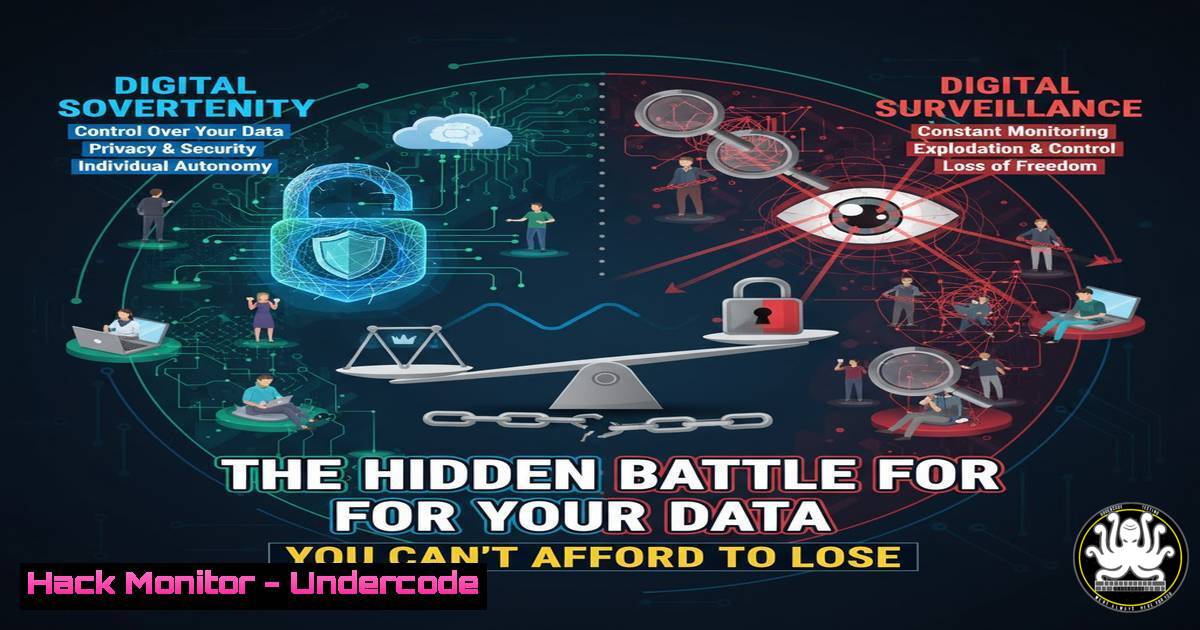
The concept of digital sovereignty has moved from a political buzzword to a critical cybersecurity imperative. In an era of pervasive data collection, understanding the distinction between content data and metadata is the first step toward securing organizational and personal autonomy. This article deconstructs the technical foundations of digital sovereignty, providing a actionable blueprint for achieving true data self-determination against the backdrop of evolving regulations like NIS2.
Learning Objectives:
- Differentiate between content data and metadata and understand the surveillance risks inherent in both.
- Implement technical controls to minimize data leakage and harden your IT infrastructure.
- Develop a compliance-first strategy that aligns with frameworks like NIS2 to foster digital sovereignty.
You Should Know:
- The Unavoidable Surveillance: Why Your Metadata is a Goldmine
The foundational principle of digital sovereignty is self-determination, which is fundamentally undermined by uncontrolled data collection. Data is categorized into two primary types: Content Data and Metadata. Content data is the intended information exchanged between a user and a service—the body of an email, a file transferred, or a message’s text. Metadata is the information about that data. This includes DNS query logs, IP addresses, timestamps, geolocation data, and file access logs.
For surveillance purposes, these are nearly equivalent. While content reveals what you are doing, metadata reveals who, when, where, and how you are doing it. This allows for perfect temporal, geographical, and behavioral tracking. The recent criticism of the Signal messaging app, as highlighted in the source post, underscores this: despite its end-to-end encryption for content, its reliance on third-party infrastructure for metadata (e.g., phone number registration, contact discovery) creates a significant privacy surface.
Step-by-Step Guide: Analyzing Your Metadata Footprint on Linux
What this does: These commands help you see the network connections your system is making, revealing what metadata (destination IPs, ports) is being transmitted to external services.
How to use it:
- Audit Active Network Connections: Use `ss` or `netstat` to list all active connections.
ss -tunlp
This shows TCP (
-t) and UDP (-u) connections, numeric addresses (-n), listening sockets (-l), and the process that owns them (-p). Scrutinize connections to unknown external IPs. - Monitor DNS Queries: DNS queries are a primary source of metadata. Use `tcpdump` to capture them in real-time.
sudo tcpdump -i any -n port 53
This command captures all DNS traffic (port 53), showing which domains your system is trying to resolve, painting a clear picture of your activity.
-
Building a Sovereign Foundation: Compiling Your Own Stack
A core tenet of achieving technical sovereignty, as proposed in the source post, is eliminating dependencies on third-party software that may exfiltrate data. The most robust method is compiling your operating system and critical applications from source code. This ensures no hidden binaries or telemetry are present.
Step-by-Step Guide: Installing Software from Source on Linux
What this does: This process bypasses pre-packaged binaries from repositories, which may contain modifications. You download the original source code, configure it for your needs, compile it, and install it.
How to use it:
- Install Build Dependencies: First, install the compiler tools and libraries needed.
sudo apt update && sudo apt install build-essential git autoconf automake
- Clone and Compile: For example, to compile the `nginx` web server from source.
git clone https://github.com/nginx/nginx.git
cd nginx
./auto/configure --prefix=/usr/local/nginx --with-http_ssl_module
make
sudo make install
- Verify Integrity: Always download source code from official, verified repositories and checksum the files against published hashes.
3. Architecting for Isolation: Network and Service Segmentation
Segmenting servers and services is a non-negotiable security control. It limits the lateral movement of an attacker who compromises one system, containing the breach. This involves creating isolated network zones (e.g., DMZ, application tier, database tier) and controlling traffic between them with strict firewall rules.
Step-by-Step Guide: Implementing Basic Network Segmentation with iptables
What this does: `iptables` is a Linux firewall that can filter traffic between internal network segments. This example creates a rule to isolate a database server.
How to use it:
- Create a Dedicated Chain: Create a new chain for inter-segment rules for better organization.
sudo iptables -N SEGMENT_DB
- Allow Specific Traffic Only: Only allow your application servers (e.g., on subnet
192.168.2.0/24) to connect to the database port (e.g., MySQL port 3306).sudo iptables -A SEGMENT_DB -s 192.168.2.0/24 -p tcp --dport 3306 -j ACCEPT
- Block All Other Traffic: Log and drop any other connection attempts to the database port.
sudo iptables -A SEGMENT_DB -p tcp --dport 3306 -j LOG --log-prefix "DB-BLOCK: "
sudo iptables -A SEGMENT_DB -p tcp --dport 3306 -j DROP
- Apply the Chain: Jump to your new chain from the INPUT chain.
sudo iptables -A INPUT -j SEGMENT_DB
-
Enforcing Least Privilege: Separating Applications from the OS
Applications should never run with root privileges. A breach of a web application must not equate to a full system compromise. This is achieved through rigorous user and permission management.
Step-by-Step Guide: Creating a Dedicated Service User on Linux/Windows
What this does: You create a low-privilege user account specifically for running an application, then assign ownership of only the required files and directories to that user.
How to use it:
Linux:
 Create a system user without a login shell
sudo useradd -r -s /bin/false myappuser

Change ownership of the application directory
sudo chown -R myappuser:myappuser /opt/myapplication

Run the service as the new user (e.g., via systemd unit file)
 Edit the service file: `User=myappuser`
Windows (PowerShell as Administrator):
 Create a new local user
New-LocalUser -Name "svc_myapp" -Description "Service account for MyApp" -NoPassword

Assign Logon as a Service right (requires Group Policy or SecPol.msc for a robust setup)
Add-LocalGroupMember -Group "Service" -Member "svc_myapp"
5. Navigating the Regulatory Landscape: Preparing for NIS2
The NIS2 Directive is a European Union legislation that significantly expands the scope of cybersecurity obligations across critical sectors. With oversight from bodies like Germany’s BSI, it mandates the implementation of robust risk management and security measures. Aligning your digital sovereignty strategy with NIS2 is not just about compliance; it’s a framework for building a resilient, self-determined IT operation.
Step-by-Step Guide: Initiating an NIS2 Gap Analysis
What this does: A gap analysis compares your current security posture against the requirements of the NIS2 Directive, identifying areas for improvement.
How to use it:
- Map Your Assets: Create a comprehensive inventory of all network assets, data, and services. Use tools like `nmap` for discovery.
nmap -sV -O 192.168.1.0/24
- Review Incident Response Plans: NIS2 requires effective incident handling. Ensure you have a documented plan and have conducted tabletop exercises.
- Assess Supply Chain Security: Evaluate the security practices of your key suppliers and Managed Service Providers (MSPs), ensuring they align with your sovereignty goals.
What Undercode Say:
- True digital sovereignty is a technical architecture, not a political slogan. It is achieved through granular controls over data, software supply chains, and network traffic.
- The NIS2 Directive should be viewed as a catalyst and validation for implementing the long-overdue technical measures that form the bedrock of a sovereign and secure IT environment.
The post correctly identifies that the debate around digital sovereignty often serves as a distraction from past failures. However, it also correctly pinpoints the technical path forward: a return to foundational security principles. Compiling from source, segmenting networks, and enforcing least privilege are not new concepts, but they are profoundly effective in countering the pervasive data collection performed by both state and corporate actors. The challenge for organizations is to move beyond checkbox compliance and embrace these architectural changes, often with the guidance of a specialized MSP, to turn the ideal of sovereignty into an operational reality.
Prediction:
The technical practices underpinning digital sovereignty will rapidly evolve from a niche, high-security concern to a mainstream corporate mandate, driven by NIS2 and similar global regulations. We will see a surge in “sovereignty-by-design” products and a new class of Managed Service Providers (MSPs) whose primary value proposition is verifiable, auditable, and transparent infrastructure free from unwanted data exfiltration. The failure to adopt these principles will not only result in regulatory fines but also in a critical loss of competitive advantage and customer trust in an increasingly data-conscious market.
🎯Let’s Practice For Free:
IT/Security Reporter URL:
Reported By: Bernhard Biedermann – Hackers Feeds
Extra Hub: Undercode MoN
Basic Verification: Pass ✅


