
Listen to this Post
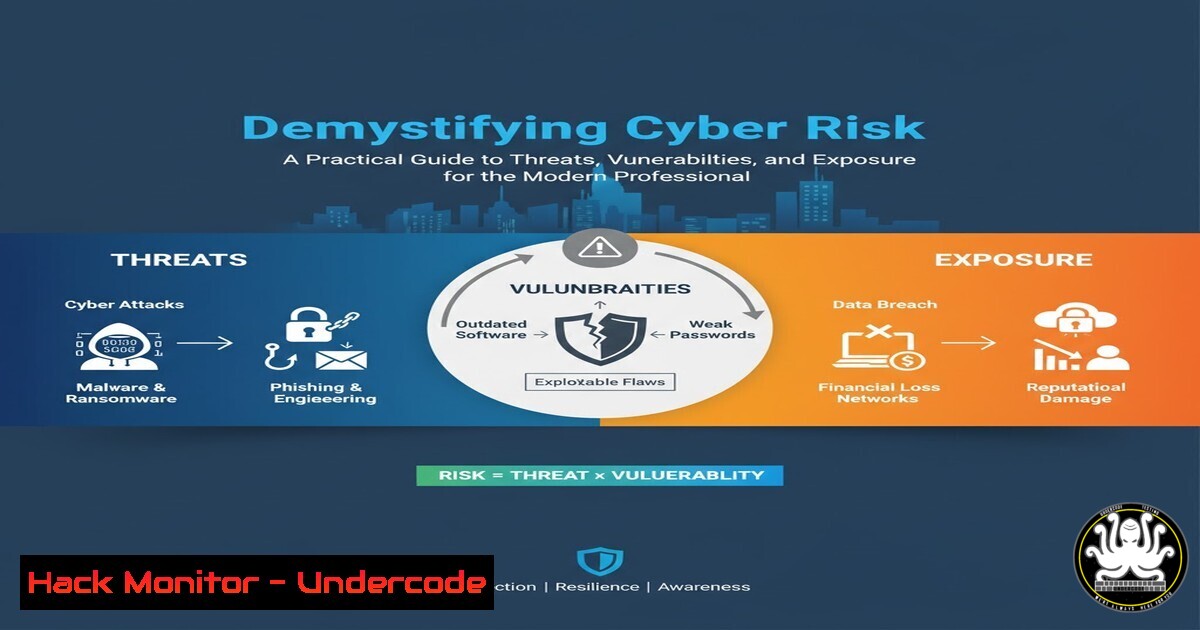
Introduction:
In cybersecurity, the terms threat, vulnerability, risk, and exposure are often used interchangeably, but they represent distinct concepts that form the bedrock of risk management. Understanding the precise relationship between them is critical for implementing effective security controls and communicating risk to business leaders. This article translates these theoretical concepts into actionable technical commands and procedures.
Learning Objectives:
- Differentiate between core risk concepts: Threat, Vulnerability, Risk, and Exposure.
- Apply command-line tools to identify vulnerabilities and assess exposure.
- Implement technical controls to mitigate risk across Linux and Windows environments.
You Should Know:
1. Identifying Network Exposure with Nmap
A system’s exposure is a key multiplier of risk. Using Nmap to discover what services are accessible is the first step in understanding your attack surface.
Command:
nmap -sS -sV -O <target_ip_or_subnet>
Step-by-step guide:
-sS: Initiates a TCP SYN scan. This is a stealthy method that completes a TCP handshake without establishing a full connection, making it less likely to be logged.-sV: Probes open ports to determine the service name and version. Knowing the exact version is crucial for identifying specific vulnerabilities.-O: Enables OS detection based on TCP/IP stack fingerprinting.- Analyze the output. Pay close attention to services running on unusual ports and outdated software versions, as these increase your exposure to known threats.
2. Vulnerability Scanning with Nessus
A vulnerability is a weakness that can be exploited. Automated scanners like Nessus systematically check systems against databases of known vulnerabilities.
Procedure:
1. Install and launch the Nessus scanner.
2. Create a new “Basic Network Scan” policy.
- Configure the scan by entering the target IP range or subnet.
- Run the scan and review the generated report.
- The report will categorize vulnerabilities by severity (Critical, High, Medium, Low). Focus remediation efforts on Critical and High vulnerabilities that have an associated public exploit, as these represent the highest risk.
3. Assessing Local Windows Vulnerabilities
Internal threats are just as dangerous. The Windows command line can be used to find misconfigurations that create vulnerabilities.
Commands:
wmic qfe list full | findstr /C:"Description"
systeminfo | findstr /B /C:"OS Name" /C:"OS Version"
net localgroup administrators
Step-by-step guide:
1. `wmic qfe list full` lists all installed Windows updates. Piping to `findstr` helps filter for specific KB articles. Missing patches are a primary source of vulnerabilities.
2. `systeminfo` provides detailed system configuration. Filtering for OS details helps determine if the system is running an end-of-life version.
3. `net localgroup administrators` displays all accounts with administrative privileges. An excessive number of admin accounts is a common vulnerability that increases the impact of a credential-based threat.
4. Linux Patch Management for Vulnerability Mitigation
A vulnerability without a patch is a persistent risk. Linux package managers are the primary tool for mitigation.
Commands (Ubuntu/Debian):
sudo apt update
sudo apt list --upgradable
sudo apt upgrade
Commands (RHEL/CentOS):
sudo yum check-update
sudo yum update
Step-by-step guide:
1. `apt update` or `yum check-update` refreshes the local package index from the repositories. This ensures you have the latest information on available patches.
2. `apt list –upgradable` shows which installed packages have updates available. This allows for a review before applying.
3. `apt upgrade` or `yum update` downloads and installs the available updates. Schedule regular maintenance windows for this operation, as it may require a reboot.
5. Configuring Windows Firewall to Reduce Exposure
Reducing exposure directly reduces risk. The Windows Firewall with Advanced Security is a critical control for limiting network access to services.
Commands (PowerShell):
Get-NetFirewallRule | Where-Object {$_.Enabled -eq 'True'}
New-NetFirewallRule -DisplayName "Block SMBv1" -Direction Inbound -Protocol TCP -LocalPort 445 -Action Block
Step-by-step guide:
1. `Get-NetFirewallRule` retrieves all firewall rules. Filtering for enabled rules (Where-Object) allows you to audit the current exposure.
2. `New-NetFirewallRule` creates a new rule. In this example, we create a rule to block inbound SMBv1 traffic on TCP port 445, which is a legacy and vulnerable protocol.
3. The `-DisplayName` provides a descriptive name, `-Direction` specifies inbound/outbound, `-Protocol` and `-LocalPort` define the traffic, and `-Action Block` denies it.
6. Implementing Log Monitoring for Threat Detection
A threat is a potential event. Logs provide the evidence of threat activity. Grep is an essential tool for parsing logs on Linux systems.
Command:
grep -i "failed" /var/log/auth.log
tail -f /var/log/apache2/access.log | grep -E "(\/etc\/passwd|..\/)"
Step-by-step guide:
1. `grep -i “failed” /var/log/auth.log` searches the authentication log for all failed login attempts, which could indicate a brute-force threat.
2. `tail -f` streams the end of the Apache access log in real-time.
3. Piping to `grep -E` with a regex pattern allows you to filter for common attack patterns, such as attempts to read the password file (/etc/passwd) or perform path traversal (../).
7. Leveraging PowerShell for Proactive Threat Hunting
PowerShell can be used to proactively hunt for indicators of compromise (IoCs) related to specific threats.
Commands (PowerShell):
Get-Process | Where-Object {$<em>.CPU -gt 90}
Get-WinEvent -FilterHashtable @{LogName='Security'; ID=4625}
Get-ChildItem C:\Users\ -Recurse -Include .exe | Get-AuthenticodeSignature | Where-Object {$</em>.Status -ne 'Valid'}
Step-by-step guide:
1. `Get-Process` lists running processes. Filtering for high CPU usage can identify malicious activity.
2. `Get-WinEvent` queries the Windows Event Log. Filtering for Security log event ID 4625 shows all failed logons, helping to identify brute-force attacks.
3. `Get-ChildItem` recursively searches all user directories for executable files. Piping to `Get-AuthenticodeSignature` checks their digital signature. Files without a valid signature ($_.Status -ne 'Valid') should be investigated as potential threats.
What Undercode Say:
- Risk is a Conditional Equation: A system can have vulnerabilities and still be low-risk if it is not exposed to a relevant threat. Conversely, a highly exposed system with no known vulnerabilities is not necessarily secure, only at lower known risk.
- Focus on Mitigation, Not Elimination: The goal is not to achieve zero risk, which is impossible, but to manage it to an acceptable level. Technical controls should be prioritized based on the Threat x Vulnerability x Exposure calculation.
Analysis: The core insight from the CISSP framework is that risk is not a single entity but a chain of dependencies. Technically, this means security efforts must be holistic. Patching (vulnerability mitigation) is useless if a backdoor is left open (exposure). Similarly, a hardened system (low vulnerability) can still be compromised by a novel threat (zero-day). The most robust security programs use layered defenses: reducing exposure with firewalls, mitigating vulnerabilities with patch management, and monitoring for threats with SIEM systems. This layered approach ensures that a failure in one control does not automatically lead to a catastrophic breach.
Prediction:
The manual process of mapping threats to vulnerabilities will become increasingly automated through AI and machine learning. Security platforms will evolve to consume real-time threat intelligence feeds, automatically correlate them with internal vulnerability scan data and asset exposure scores, and calculate a dynamic, contextual risk score for every asset. This will shift cybersecurity from a reactive to a predictive discipline, allowing teams to allocate resources to the areas of highest probable impact before an exploit occurs.
🎯Let’s Practice For Free:
IT/Security Reporter URL:
Reported By: Biren Bastien – Hackers Feeds
Extra Hub: Undercode MoN
Basic Verification: Pass ✅


