
Listen to this Post
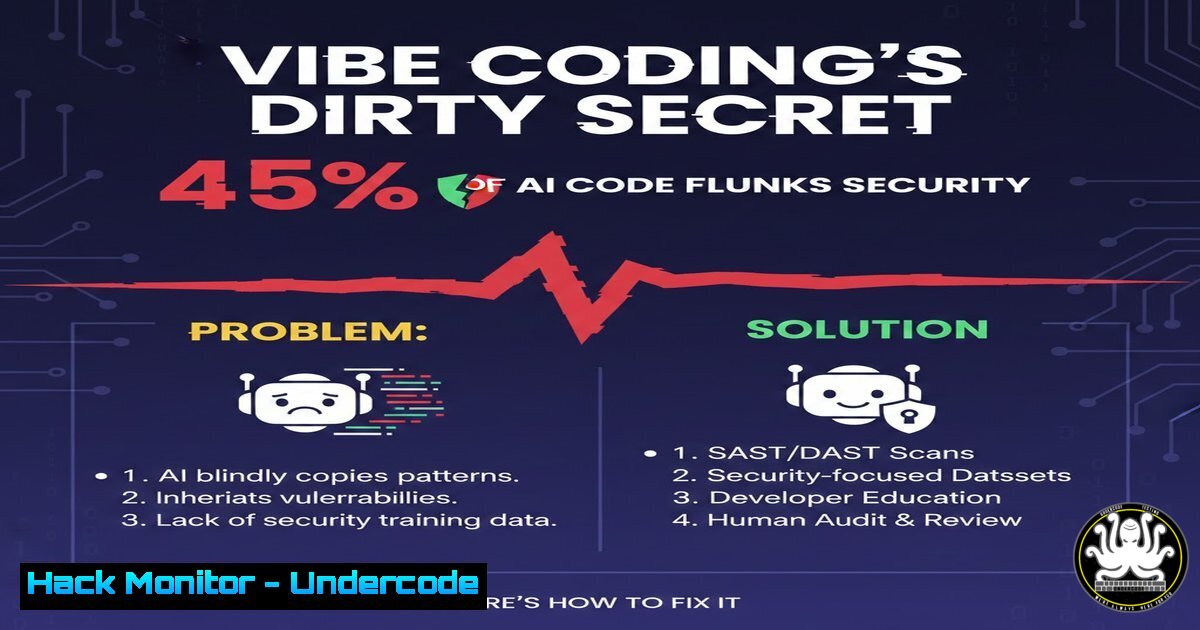
Introduction:
The rise of AI pair programmers like Cursor and Copilot has supercharged development velocity, but it has also introduced a new class of “vibe coding” risks. Developers are shipping functional code faster than ever, yet recent audits reveal that nearly half of all AI-generated code contains critical security flaws, including hardcoded credentials and missing authentication. This article explores the common vulnerabilities found in AI-assisted development and provides a practical, step-by-step guide to hardening your code—from scanning for exposed API keys to implementing server-side validation—using a combination of free browser-based tools and command-line utilities.
Learning Objectives:
- Identify the top five security vulnerabilities commonly introduced by AI coding assistants.
- Learn to use client-side scanning tools to detect secrets in source code without leaking data.
- Implement secure coding practices to remediate hardcoded keys, missing auth, and injection flaws.
You Should Know:
1. The Anatomy of AI-Generated Vulnerabilities
AI models are trained on public repositories, which historically contain a significant number of hardcoded secrets and insecure patterns. When a developer prompts the AI to “create a Supabase connection” or “build an Express API route,” the model often defaults to the most common—not the most secure—implementation. The result is a perfect storm of vulnerabilities: `service_role` keys ending up in client-side code, SQL queries built with string interpolation, and request bodies accepted without validation.
Step‑by‑step guide: Identifying secrets with grep and VibeScan
Before you ship, you must audit your code. While tools like VibeScan offer a quick browser-based check, you can also use native command-line tools for a deeper dive.
Linux/macOS (Search for common key patterns):
 Search for potential AWS keys in your source directory
grep -r -E "AKIA[0-9A-Z]{16}" ./src

Search for generic API key assignments
grep -r -E "api[_-]?key\s=\s['\"]\w+" ./src

Find Supabase service_role keys specifically
grep -r -E "service_role|anon.key|eyJhbGciOiJIUzI1NiIsInR5cCI6IkpXVCJ9" ./src
Windows PowerShell:
 Search for potential secrets recursively
Get-ChildItem -Path .\src -Recurse -File | Select-String -Pattern "AKIA[0-9A-Z]{16}"
Get-ChildItem -Path .\src -Recurse -File | Select-String -Pattern "--BEGIN RSA PRIVATE KEY--"
Once you have identified potential leaks, paste the relevant code block into a client-side scanner like VibeScan. Since the processing happens locally in your browser, you maintain data confidentiality while receiving plain-English remediation steps.
2. Remediating Hardcoded Supabase and OpenAI Keys
Hardcoding a Supabase `service_role` key in your frontend JavaScript is catastrophic. This key bypasses Row Level Security (RLS) and grants full database admin rights. Similarly, an OpenAI key in a client-side React app can be extracted by anyone using browser dev tools, leading to financial theft.
Step‑by‑step guide: Moving secrets to the backend
The rule is simple: Never trust the client. All secrets must reside on a server you control.
1. Identify the insecure code (AI-Generated Example):
// INSECURE: Service role key exposed in frontend
import { createClient } from '@supabase/supabase-js'
const supabaseUrl = 'https://xyzcompany.supabase.co'
const supabaseKey = 'eyJhbGciOiJIUzI1NiIsInR5cCI6IkpXVCJ9.eyJpc3MiOiJzdXBhYmFzZSIsInJlZiI6InhtdGZ0bWVsbHBjcGd2d3F3d3V1Iiwicm9sZSI6InNlcnZpY2Vfcm9sZSIsImlhdCI6MTY0MjEwMjAwMCwiZXhwIjoxOTU3Njc4MDAwfQ.2l4qk8cVs8KoOpvWxdBh48MkUjVv4jC8lLpA8HhN8jI'
export const supabase = createClient(supabaseUrl, supabaseKey)
2. Create a backend API endpoint (Node.js/Express example):
// SECURE: Backend API (server.js)
import express from 'express';
import { createClient } from '@supabase/supabase-js';
import dotenv from 'dotenv';

dotenv.config();
const app = express();
app.use(express.json());

// Supabase client initialized with env vars on the server
const supabase = createClient(process.env.SUPABASE_URL, process.env.SUPABASE_SERVICE_KEY);

app.get('/api/data', async (req, res) => {
// Server makes the privileged request
const { data, error } = await supabase.from('secure_table').select('');
if (error) return res.status(500).json({ error });
res.json(data);
});

app.listen(3000, () => console.log('Secure API running'));
3. Call the backend from your frontend:
// SECURE: Frontend fetch to your own API
async function getData() {
const response = await fetch('/api/data'); // No keys here
const data = await response.json();
console.log(data);
}
By doing this, the `service_role` key never touches the browser.
3. Fixing Express Routes with Zero Authentication
AI often generates functional endpoints but forgets to protect them. A route like `app.post(‘/api/delete-user’)` is frequently created without middleware to verify the user’s identity.
Step‑by‑step guide: Implementing JWT authentication middleware
1. Install required packages:
npm install express jsonwebtoken express-jwt
2. Create the authentication middleware:
// middleware/auth.js
import { expressjwt } from 'express-jwt';
import dotenv from 'dotenv';
dotenv.config();

// This middleware validates JWTs from the Authorization header
export const requireAuth = expressjwt({
secret: process.env.JWT_SECRET,
algorithms: ['HS256'],
}).unless({ path: ['/api/login', '/api/register'] }); // Public paths
3. Apply the middleware to your insecure routes:
// server.js
import { requireAuth } from './middleware/auth.js';

// This route is now protected
app.delete('/api/delete-user/:id', requireAuth, async (req, res) => {
// req.auth contains the decoded JWT payload (e.g., user ID)
const userId = req.params.id;

// Check if the authenticated user (req.auth.sub) is allowed to delete this user
if (req.auth.sub !== userId && !req.auth.isAdmin) {
return res.status(403).json({ error: 'Forbidden' });
}

// Proceed with deletion logic
res.json({ message: 'User deleted' });
});
4. Preventing SQL Injection from String Interpolation
AI models frequently generate SQL queries using template literals or string concatenation, which are prime vectors for SQL injection attacks.
Step‑by‑step guide: Using parameterized queries
Insecure AI-generated code:
// INSECURE: Vulnerable to SQL injection
const userId = req.params.id;
const query = <code>SELECT  FROM users WHERE id = '${userId}'</code>;
db.query(query, (err, results) => { ... });
Secure version using parameterized queries (PostgreSQL/pg library):
// SECURE: Use parameterized queries
const userId = req.params.id;
const query = 'SELECT  FROM users WHERE id = $1';
const values = [bash];

db.query(query, values, (err, results) => {
if (err) throw err;
res.json(results.rows);
});
Secure version using an ORM (Prisma example):
// SECURE: Prisma ORM prevents injection by default
import { PrismaClient } from '@prisma/client'
const prisma = new PrismaClient()

app.get('/api/users/:id', async (req, res) => {
const user = await prisma.user.findUnique({
where: { id: req.params.id }, // Automatically sanitized
});
res.json(user);
});
5. Validating Untrusted Request Bodies
AI-generated code often assumes that data sent to the API is correctly formatted. Without validation, your application is susceptible to type confusion, excessive data passing, and logic errors.
Step‑by‑step guide: Implementing request validation with Zod
1. Install Zod:
npm install zod
2. Define a schema and validate incoming data:
import { z } from 'zod';

// Define the expected shape of the request body
const UserSchema = z.object({
email: z.string().email(),
age: z.number().int().positive().optional(),
username: z.string().min(3).max(20),
});

app.post('/api/register', (req, res) => {
try {
// This will throw an error if validation fails
const validatedData = UserSchema.parse(req.body);

// Proceed with validatedData (safe to use)
db.query('INSERT INTO users (email, username) VALUES ($1, $2)',
[validatedData.email, validatedData.username]);

res.json({ success: true });
} catch (error) {
// Send a 400 error with validation details
res.status(400).json({ error: error.errors });
}
});
6. Hardening CI/CD Pipelines Against Secret Leaks
To prevent secrets from ever reaching your repository, you must integrate secret scanning into your pre-commit hooks and CI pipelines.
Step‑by‑step guide: Implementing pre-commit hooks with `truffleHog`
1. Install truffleHog (a tool for finding secrets):
 Using pip (Python)
pip install truffleHog

Or using Docker
docker pull trufflesecurity/trufflehog:latest
2. Create a Git pre-commit hook:
Create a file `.git/hooks/pre-commit` with the following content:
!/bin/sh
 Scan all staged files for high-entropy strings (potential secrets)
files=$(git diff --cached --name-only --diff-filter=ACM)

if [ -n "$files" ]; then
echo "Running secret scan on staged files..."
 Scan the files for secrets
trufflehog filesystem --json "$files" | grep -q "Found"
if [ $? -eq 0 ]; then
echo "ERROR: Potential secrets detected in staged files. Commit blocked."
exit 1
fi
fi
Make the hook executable: `chmod +x .git/hooks/pre-commit`.
3. Integrate into GitHub Actions (CI):
 .github/workflows/secret-scan.yml
name: Secret Scan

on: [push, pull_request]

jobs:
trufflehog:
runs-on: ubuntu-latest
steps:
- uses: actions/checkout@v3
with:
fetch-depth: 0
- name: TruffleHog Secret Scan
uses: trufflesecurity/trufflehog@main
with:
path: ./
base: ${{ github.event.repository.default_branch }}
head: HEAD
What Undercode Say:
- AI is a force multiplier for code, not security: The speed of AI generation necessitates an equal acceleration in security auditing. The “vibe coding” workflow must integrate “vibe scanning” as a non-negotiable step.
- Defense in depth is non-negotiable: Relying on a single tool (like a browser scanner) is insufficient. Combine client-side checks, pre-commit hooks, CI/CD scanning, and secure coding patterns to create a resilient shield against AI-induced vulnerabilities.
The core takeaway is that the developer remains the critical security control. AI can generate the syntax, but it cannot grasp the context of where the code will run. By adopting a mindset of “never trust the client” and automating secret detection early in the pipeline, developers can reclaim the security ownership that the speed of AI threatens to erode.
Prediction:
As AI-generated code becomes the majority of new code in production, we will see a resurgence of “classic” vulnerabilities (like injection and hardcoded secrets) at an unprecedented scale. The security industry will pivot from purely SAST/DAST tools to “AI Behavior Analysis” tools that monitor the prompts and patterns of developers to predict insecure code before it is written. The future of AppSec lies in securing the human-AI interaction layer, not just the final code artifact.
▶️ Related Video (80% Match):
🎯Let’s Practice For Free:
IT/Security Reporter URL:
Reported By: Hariprakash Db – Hackers Feeds
Extra Hub: Undercode MoN
Basic Verification: Pass ✅


