Listen to this Post
Introduction:
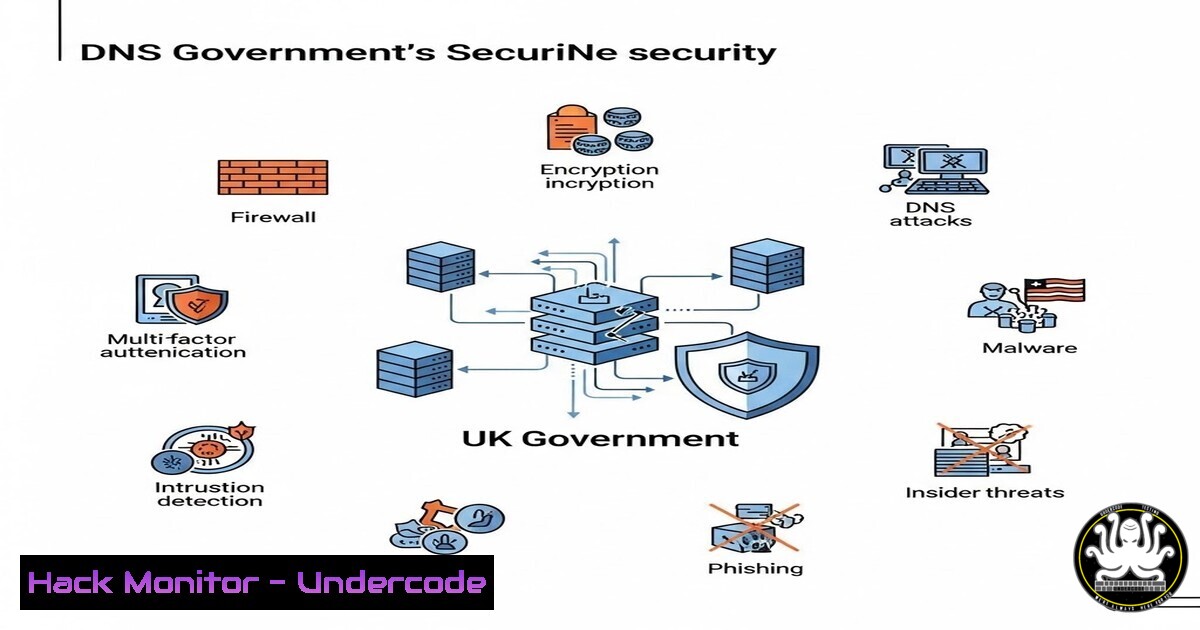
For decades, the Domain Name System (DNS) has been treated as the internet’s dial tone—assumed to be always available and inherently trustworthy. However, as highlighted by cybersecurity expert Andy Jenkinson, this foundational layer presents a massive, often overlooked attack surface. With the UK Government and major players like Microsoft now scrambling to address DNS vulnerabilities, organizations must move beyond basic configurations to understand the profound systemic risks posed by DNS exposure, manipulation, and abuse.
Learning Objectives:
- Understand the systemic risks associated with DNS infrastructure and why it is a prime target for state-sponsored attacks and cybercriminals.
- Learn how to audit DNS configurations for common vulnerabilities using native Linux and Windows command-line tools.
- Implement hardening techniques for DNS servers and clients to prevent cache poisoning, tunneling, and data exfiltration.
You Should Know:
- Auditing DNS Resolvers for Cache Poisoning and Spoofing
The recent emphasis by the UK National Cyber Security Centre (NCSC) on DNS resilience points directly to the risk of cache poisoning. This attack tricks a resolver into storing a fraudulent DNS record, redirecting users to malicious sites without their knowledge.
To check if your DNS resolver is vulnerable to basic spoofing, you can use `nslookup` and `dig` to analyze query behavior.
Step‑by‑step guide: Testing Resolver Security (Linux/Windows)
- Step 1: Check for Source Port Randomization
On Linux, use `dig` to query a test domain and view the source port used:dig +short testdomain.example @your-dns-server-ip dig +qr +reply txid-dnssec-tests.sidnlabs.nl | grep "txid"
If the source port or Transaction ID (TXID) is predictable or static, the server is vulnerable to poisoning.
-
Step 2: Verify DNSSEC Validation
Use `delv` (DNS lookup and validation utility) to check if DNSSEC is working:delv sigfail.verteiltesysteme.net @8.8.8.8 delv sigok.verteiltesysteme.net @8.8.8.8
The first query should fail; the second should succeed. If both succeed, DNSSEC validation is not properly enforced.
2. Identifying DNS Zone Transfer Vulnerabilities (AXFR)
A misconfigured DNS server allowing zone transfers (AXFR) to anyone is a goldmine for attackers performing reconnaissance. It reveals the entire blueprint of an organization’s internal network.
Step‑by‑step guide: Testing for Zone Transfer (Linux)
- Step 1: Find the Name Servers
nslookup -type=NS example.com
- Step 2: Attempt a Zone Transfer
Use `dig` to request the full zone from the identified name server:dig axfr @ns1.example.com example.com
If the command returns a list of all hosts (A, MX, TXT records), the server is critically misconfigured.
3. Detecting DNS Tunneling for Data Exfiltration
DNS tunneling encapsulates non-DNS traffic (like SSH or HTTP) over DNS queries. Attackers use this to bypass firewalls and exfiltrate data. Security teams can analyze packet captures to detect unusually long or malformed queries.
Step‑by‑step guide: Analyzing PCAPs for Tunneling (Linux/Windows with Wireshark/TShark)
– Step 1: Capture DNS Traffic
On Linux, use `tcpdump` to capture DNS packets:
sudo tcpdump -i eth0 -w dns_capture.pcap port 53
– Step 2: Analyze Query Lengths
Use `tshark` to extract query names and sort by length:
tshark -r dns_capture.pcap -Y "dns.qry.name" -T fields -e dns.qry.name | awk '{print length, $0}' | sort -nr | head -20
Queries with subdomains exceeding 50 characters (e.g., long-random-string.example.com) are highly suspicious.
- Hardening BIND9 on Linux Against DNS Amplification Attacks
DNS amplification attacks are a form of DDoS where attackers send small queries with a spoofed victim IP to open resolvers, which then flood the victim with large responses.
Step‑by‑step guide: Securing BIND9 Configuration
- Step 1: Restrict Recursion
Edit `/etc/bind/named.conf.options` to limit recursion to trusted internal networks only:options { directory "/var/cache/bind"; recursion yes; allow-query { trusted_networks; }; allow-recursion { trusted_networks; }; allow-query-cache { trusted_networks; }; }; - Step 2: Disable Zone Transfers
Prevent AXFR requests from unauthorized hosts:
options {
allow-transfer { none; }; // Or specify secondary DNS IPs
};
– Step 3: Rate-Limit Queries
Add a rate-limiting clause to mitigate DDoS:
options {
rate-limit {
responses-per-second 10;
log-only yes; // Set to 'no' after testing
};
};
5. Monitoring DNS Logs on Windows Server
Windows DNS Servers are common targets. Enabling and monitoring debug logs can reveal reconnaissance attempts.
Step‑by‑step guide: Configuring DNS Debug Logging (Windows Server)
- Step 1: Open DNS Manager.
- Step 2: Right-click the server and select “Properties”.
- Step 3: Go to the “Debug Logging” tab.
- Step 4: Check “Log packets for debugging”.
- Step 5: Select events to log (e.g., “Queries/Transfers”, “Update”).
- Step 6: Specify a log file path (e.g.,
C:\DNSLogs\dns.log). - Step 7: Use PowerShell to parse the logs for anomalies:
Get-Content C:\DNSLogs\dns.log | Select-String -Pattern "AXFR" | Get-Unique
- Securing DNS over HTTPS (DoH) Configuration on Clients
While encrypting DNS (DoH/DoT) prevents eavesdropping, it can also bypass corporate security controls if not managed properly.
Step‑by‑step guide: Enforcing Corporate DNS via Group Policy (Windows)
– Step 1: Open Group Policy Management Console.
– Step 2: Navigate to Computer Configuration -> Administrative Templates -> Network -> DNS Client.
– Step 3: Enable “Configure DNS over HTTPS (DoH)” name resolution.
– Step 4: Set the policy to “Disable DoH” or “Enable DoH” with a specific template (e.g., corporate DNS server).
– Step 5: Use PowerShell to verify the configuration:
Get-NetAdapter | Get-DnsClientServerAddress
What Undercode Say:
- Key Takeaway 1: The UK Government’s pivot toward DNS security validates years of warnings from the cybersecurity community. The foundational layer of the internet is now officially a front line of national defense. Organizations can no longer afford to “set and forget” their DNS configurations.
- Key Takeaway 2: DNS vulnerabilities are not just technical glitches; they are systemic risks that enable everything from phishing (via cache poisoning) to network reconnaissance (via zone transfers) and data theft (via tunneling). Proactive auditing using the command-line tools outlined above is essential for identifying these gaps before attackers do.
The recognition by entities like GCHQ and the NCSC signifies a paradigm shift. For years, DNS was the blind spot in many security strategies, overshadowed by flashier endpoint and application-layer threats. This “gradual alignment” with expert concerns, as Jenkinson puts it, forces security professionals to re-evaluate their priorities. It is no longer enough to simply have a DNS server; one must ensure it is hardened against reflection attacks, configured to validate DNSSEC, and monitored for exfiltration patterns. The silence from some organizations despite this shift is concerning, but the technical community must lead the charge by implementing the specific hardening measures and continuous monitoring required to protect this critical asset.
Prediction:
Within the next 12 to 18 months, we will see a sharp increase in regulatory mandates requiring specific DNS security standards (such as mandatory DNSSEC implementation for government domains and financial institutions). This will be followed by a wave of sophisticated attacks specifically targeting DNS over HTTPS (DoH) implementations to blindside corporate monitoring tools, forcing a cat-and-mouse game between network defenders and adversaries seeking to abuse the system’s newfound encryption.
▶️ Related Video (84% Match):
🎯Let’s Practice For Free:
IT/Security Reporter URL:
Reported By: Andy Jenkinson – Hackers Feeds
Extra Hub: Undercode MoN
Basic Verification: Pass ✅


