Listen to this Post
Introduction:
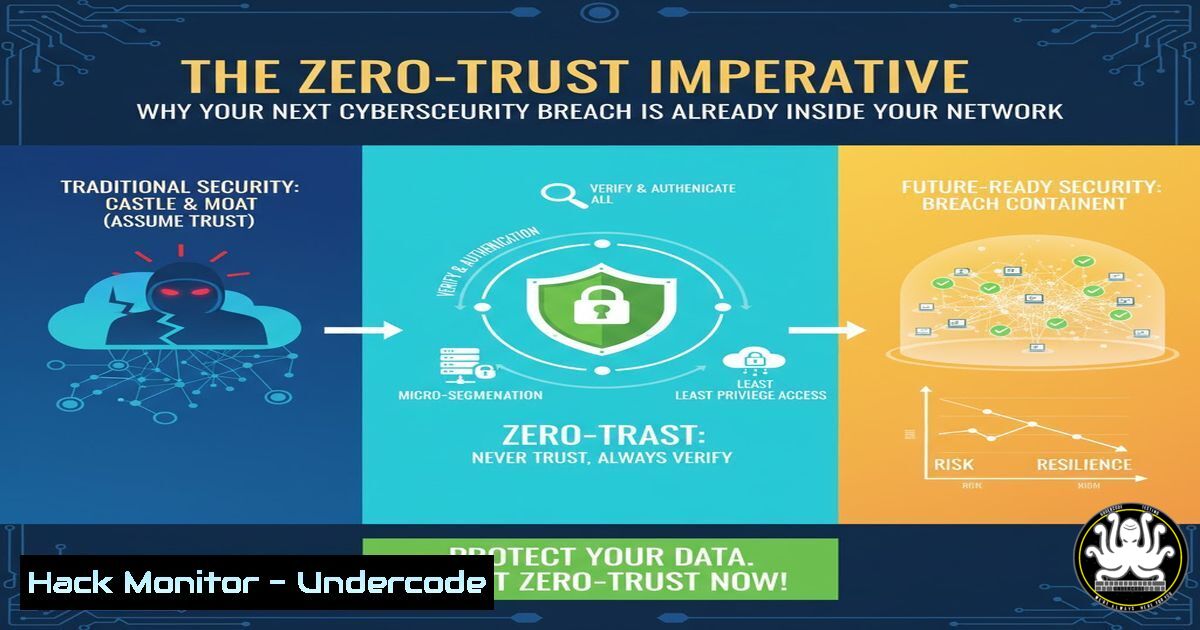
The traditional security model of a hardened perimeter and a trusted internal network is fundamentally broken. The Zero-Trust architecture operates on the principle of “never trust, always verify,” requiring strict identity verification for every person and device attempting to access resources on a private network, regardless of their location. This paradigm shift is critical for defending against modern threats where attackers often bypass perimeter defenses and move laterally within a trusted environment.
Learning Objectives:
- Understand the core principles and components of a Zero-Trust architecture.
- Learn to implement critical access controls and monitoring commands on both Linux and Windows systems.
- Develop a step-by-step strategy for migrating from a perimeter-based model to a Zero-Trust model.
You Should Know:
- Enforcing Least Privilege with Linux User and File Permissions
The principle of least privilege is a cornerstone of Zero-Trust. Users and applications should only have the minimum permissions necessary to perform their functions.
Verified Commands & Snippets:
– `sudo adduser –system –no-create-home –shell /bin/false appuser`
– `sudo chown -R appuser:appgroup /opt/myapp/`
– `sudo chmod 750 /opt/myapp/`
– `sudo setfacl -m u:user:rwx /path/to/directory/`
– `sudo find /opt/myapp/ -type f -exec chmod 640 {} \;`
Step-by-Step Guide:
First, create a dedicated, non-login system user for an application to run under, limiting its scope. Use `adduser` with the `–system` and `–no-create-home` flags. Next, change the ownership of the application directory to this user with chown. The `chmod 750` command sets the directory permissions so the owner (appuser) has read, write, and execute, the group has read and execute, and others have no access. For more granular control, use Access Control Lists (ACLs) with `setfacl` to grant specific users additional permissions without changing the base ownership. Finally, use the `find` command to recursively set file permissions to `640` (read/write for owner, read-only for group) within the application directory.
2. Implementing Network Micro-Segmentation with Windows Firewall
Micro-segmentation prevents lateral movement by creating isolated network segments. The Windows Firewall with Advanced Security is a powerful tool for this.
Verified Commands & Snippets:
– `New-NetFirewallRule -DisplayName “Block SMB Inbound” -Direction Inbound -Protocol TCP -LocalPort 445 -Action Block`
– `Get-NetFirewallRule -DisplayGroup “Remote Desktop” | Set-NetFirewallRule -Enabled True`
– `Test-NetConnection -ComputerName 192.168.1.100 -Port 3389`
– `netsh advfirewall firewall add rule name=”Allow SQL from App Server” dir=in action=allow protocol=TCP localport=1433 remoteip=192.168.1.50`
Step-by-Step Guide:
Using PowerShell, you can create a new rule to block inbound Server Message Block (SMB) traffic, a common vector for lateral movement, on port 445. The `New-NetFirewallRule` cmdlet is used with the `Block` action. To enable existing rules, such as those for Remote Desktop, use `Get-NetFirewallRule` to retrieve them and pipe them to `Set-NetFirewallRule` to enable them. Use `Test-NetConnection` to verify that a specific port (like RDP’s 3389) is reachable, helping to test your rules. For legacy command-line needs, `netsh` can create granular rules, such as allowing SQL Server traffic only from a specific application server IP address.
3. Auditing and Monitoring with Linux Auditd
Continuous monitoring and auditing are essential for verifying the “never trust” principle. The Linux Audit daemon (auditd) provides a comprehensive logging framework.
Verified Commands & Snippets:
– `sudo auditctl -w /etc/passwd -p wa -k identity_alteration`
– `sudo auditctl -a always,exit -F arch=b64 -S open -S openat -S execve -k process_execution`
– `sudo ausearch -k identity_alteration -i`
– `sudo aureport -f –summary`
Step-by-Step Guide:
To monitor the `/etc/passwd` file for any write or attribute change attempts (which could indicate user account tampering), use `auditctl -w` with the `-p wa` (write, attribute) permissions and a unique key (-k). To track process execution, add a rule that triggers on the execve, open, and `openat` system calls. After events are generated, use `ausearch` with the `-k` flag to search for logs related to your specific key, making investigation easier. For a broader view, `aureport` with the `-f` flag will generate a summary report of all file access events, helping to identify anomalous activity.
- Hardening API Security with JWT and Input Validation
APIs are a primary attack surface. Securing them involves strict input validation and secure token handling.
Verified Commands & Snippets (Python/Flask Example):
– `import jwt`
– `decoded = jwt.decode(encoded_jwt, options={“verify_signature”: False}) FOR DEBUGGING ONLY`
– `decoded = jwt.decode(encoded_jwt, ‘your-secret-key’, algorithms=[“HS256”])`
– `from werkzeug.security import generate_password_hash, check_password_hash`
– `password_hash = generate_password_hash(‘plaintext_password’)`
Step-by-Step Guide:
When working with JSON Web Tokens (JWT), never skip signature verification in production. The `PyJWT` library’s `decode` function must always be passed the secret key and algorithms to verify the token’s integrity. For debugging, you can use the `”verify_signature”: False` option, but this must be removed in production. For storing user credentials, always hash passwords using a strong, salted hash function. The `werkzeug.security` library’s `generate_password_hash` function creates a secure hash that should be stored in your database. Use `check_password_hash` to verify a user’s login attempt against this hash, never storing or comparing plaintext passwords.
5. Cloud Hardening: Securing S3 Buckets in AWS
Misconfigured cloud storage is a leading cause of data breaches. Enforcing Zero-Trust in the cloud means data is inaccessible by default.
Verified Commands & Snippets (AWS CLI):
– `aws s3api put-bucket-policy –bucket my-bucket –policy file://bucket-policy.json`
– `aws s3api put-public-access-block –bucket my-bucket –public-access-block-configuration BlockPublicAcls=true,IgnorePublicAcls=true,BlockPublicPolicy=true,RestrictPublicBuckets=true`
– `aws s3 ls s3://my-bucket –recursive`
Step-by-Step Guide:
First, create a strict bucket policy that denies all actions by default and only allows specific actions from specific principals (users/roles) under specific conditions. Apply this policy using the `put-bucket-policy` command. Next, and most critically, use the `put-public-access-block` command to enable all four settings that block public access. This is a safeguard against accidental misconfigurations. Finally, use the `aws s3 ls` command with the `–recursive` flag to regularly audit the contents of your buckets to ensure no sensitive data has been exposed.
6. Vulnerability Mitigation: Patch Management Scripting
Timely patching is a basic but critical control. Automating this process ensures consistency and speed.
Verified Commands & Snippets:
– `sudo apt update && sudo apt list –upgradable`
– `sudo apt upgrade -y`
– `Get-HotFix | Sort-Object InstalledOn -Descending | Select-Object -First 5`
– `(New-Object System.Net.WebClient).DownloadFile(“https://patchserver/mypatch.exe”, “C:\Temp\mypatch.exe”)`
Step-by-Step Guide:
On Debian/Ubuntu Linux systems, start by updating the package list with apt update. The `apt list –upgradable` command will show you which packages have updates available without applying them. This is a crucial audit step. To apply all security updates automatically, use apt upgrade -y. On Windows PowerShell, you can check the most recently installed patches using Get-HotFix, sorted by installation date. For offline patching or automating the installation of specific patches, you can use the `System.Net.WebClient` .NET class within PowerShell to download the patch executable directly from your internal distribution point before executing it.
7. Active Directory: Detecting Kerberoasting Attacks
Kerberoasting is a common technique for attackers to extract service account credentials within an Active Directory environment.
Verified Commands & Snippets (PowerShell):
– `Get-ADUser -Filter {ServicePrincipalName -like “”} -Properties ServicePrincipalName, LastLogonDate`
– `Get-WinEvent -FilterHashtable @{LogName=’Security’; ID=4769} | Where-Object { $_.Message -like “0x17” } | Select-Object -First 10`
Step-by-Step Guide:
To proactively audit for potential Kerberoasting targets, use the `Get-ADUser` cmdlet from the Active Directory module to find all user accounts with a Service Principal Name (SPN) set. Filtering by `LastLogonDate` can help identify old, stale accounts that are prime targets. To detect a Kerberoasting attack in progress, you need to monitor Windows Security Event Logs for Event ID 4769 (A Kerberos service ticket was requested). Crucially, you must filter these events for tickets that were encrypted with the weaker RC4 encryption type (which corresponds to the Ticket Encryption Type 0x17). A high volume of these requests for different SPNs is a strong indicator of an ongoing Kerberoasting attack.
What Undercode Say:
- Perimeter defense is obsolete; assume your internal network is already compromised.
- Identity is the new perimeter; every access request must be authenticated, authorized, and encrypted.
- The human element remains the weakest link; technical controls must be complemented with continuous security training.
The shift to Zero-Trust is not merely a technological upgrade but a complete philosophical overhaul of corporate security strategy. It acknowledges that the threat is not just “out there” but can originate from anywhere, including inside the network. While the initial implementation can be complex and requires careful planning to avoid disrupting business processes, the long-term benefit is a dramatically more resilient security posture. Organizations that cling to the castle-and-moat model are building digital Maginot Lines, offering a false sense of security that will be inevitably and catastrophically breached.
Prediction:
The failure to adopt a Zero-Trust model will be the root cause of the majority of significant data breaches over the next three to five years. As cloud adoption and remote work become permanent fixtures, the network perimeter will continue to dissolve, making implicit trust an unsustainable vulnerability. We will see a rise in regulatory frameworks that mandate Zero-Trust principles, and cybersecurity insurance premiums will become prohibitively expensive for organizations that cannot demonstrate its implementation. The future of cybersecurity is not about building higher walls, but about verifying every single entity at every single gate.
🎯Let’s Practice For Free:
IT/Security Reporter URL:
Reported By: Ifeoluwaakinyemi2017 Bossday – Hackers Feeds
Extra Hub: Undercode MoN
Basic Verification: Pass ✅


