Listen to this Post
Introduction:
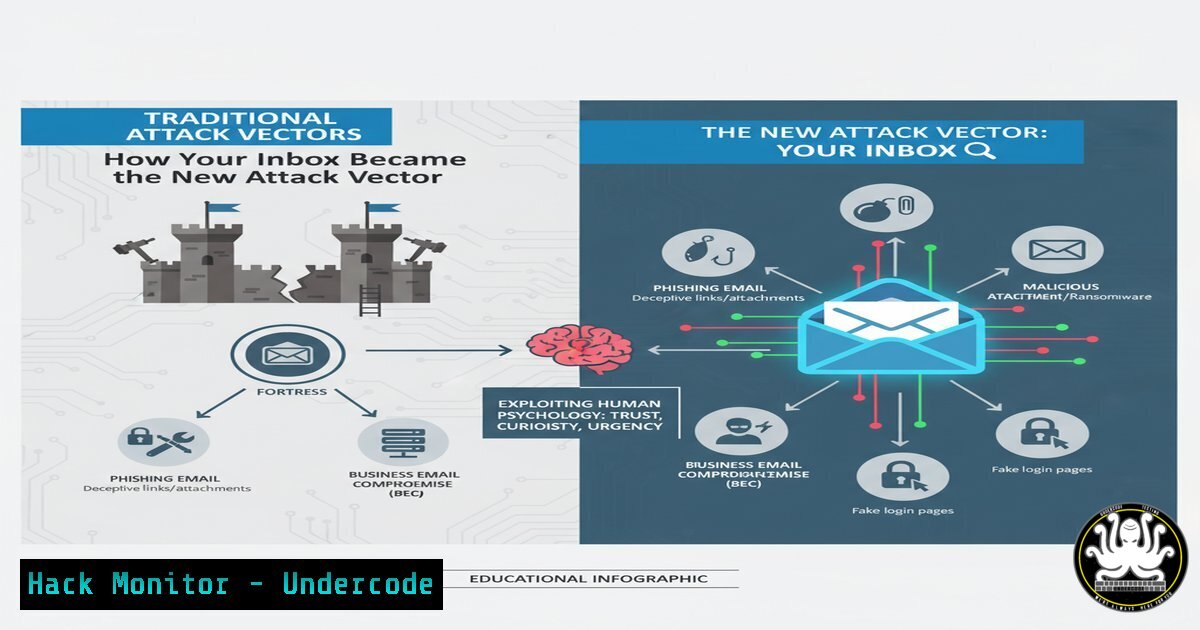
The modern professional inbox is a battleground where clarity and persuasion are the primary weapons. While the original LinkedIn post focused on productivity, these same communication principles are the exact tools leveraged by threat actors in sophisticated social engineering and Business Email Compromise (BEC) campaigns. Understanding the psychology behind effective email templates is no longer just a soft skill; it’s a critical component of organizational cybersecurity defense. This article deconstructs the anatomy of persuasive communication to build resilience against phishing and impersonation attacks.
Learning Objectives:
- Deconstruct the psychological principles used in both legitimate and malicious email communication.
- Implement technical controls to detect and prevent Business Email Compromise (BEC) and spear-phishing.
- Develop organizational policies for secure communication and email verification.
You Should Know:
1. Analyzing Email Headers for Impersonation
The first line of defense against a crafted phishing email is analyzing its digital metadata. Email headers contain the routing information that can reveal the true origin of a message, often unmasking spoofed addresses.
Verified Commands & Techniques:
Command-Line Header Analysis (Linux/macOS): `cat phishing_email.eml | grep -E “(From|Return-Path|Received|Message-ID)”`
Online Header Analyzer: Use a tool like MxToolbox Header Analyzer.
DMARC/DKIM/SPF Record Check: `dig +short txt _dmarc.example.com` & `dig +short txt example.com` (for SPF)
Microsoft Message Header Analyzer (Office 365): A built-in tool in the Security & Compliance Center.
Gmail: Open the email → Click the three dots → “Show original”.
Step-by-step guide:
To verify an email’s legitimacy, first view the full headers. Look for inconsistencies between the “From” header and the “Return-Path” header. Check the “Received” fields to trace the email’s path; if it passed through an unexpected or unlisted mail server, it’s a red flag. Finally, validate the domain’s DMARC, DKIM, and SPF records using `dig` commands to see if the sending server was authorized to send mail on behalf of that domain.
2. PowerShell for Mailflow Rule Auditing
Attackers who compromise an account often create mailflow rules to hide their activities, such as moving phishing replies to a hidden folder. Regular auditing of these rules is essential.
Verified PowerShell Commands:
`Get-TransportRule` | `Select-Object Name, State, Priority, Description`
`Get-InboxRule -Mailbox “[email protected]”` | `Select-Object Name, Enabled, Description`
`Set-InboxRule -Identity “SuspiciousRule” -Enabled $false`
`Remove-InboxRule -Identity “SuspiciousRule” -Confirm:$false`
Step-by-step guide:
Connect to Exchange Online PowerShell using Connect-ExchangeOnline. Run `Get-InboxRule` for a specific mailbox to list all auto-processing rules. Scrutinize any rules that are poorly named, lack a description, or are set to automatically delete or move messages, especially those containing keywords like “invoice” or “payment.” Use the `Set-InboxRule` cmdlet to disable a suspicious rule for investigation and `Remove-InboxRule` to delete it permanently.
3. Python Script for Domain Squatting Monitoring
BEC attacks often use domains that are visually similar to the target company (e.g., `cornpany.com` vs company.com). Automate the detection of these lookalike domains.
Verified Python Code Snippet:
import whois
import requests
from difflib import SequenceMatcher

def domain_similarity(domain1, domain2):
return SequenceMatcher(None, domain1, domain2).ratio()

def check_domain_squatting(legitimate_domain):
 This is a simplified example. Commercial APIs (e.g., SecurityTrails) are more robust.
potential_squats = [f"{legitimate_domain[:-4]}0.com", f"{legitimate_domain[:-4]}n.com"]
for squat in potential_squats:
try:
whois.whois(squat)
similarity = domain_similarity(legitimate_domain, squat)
if similarity > 0.8:
print(f"[!] Potential Squatting Domain Found: {squat} (Similarity: {similarity:.2f})")
except:
pass

Usage
check_domain_squatting("yourcompany.com")
Step-by-step guide:
This script defines a function to calculate the similarity ratio between two domain names. It then checks a list of common typos (like replacing ‘m’ with ‘rn’) by attempting a WHOIS lookup. If the domain exists and has a high similarity score, it flags it. For production use, integrate this with a domain registration API to systematically generate and check a wider list of permutations.
4. Hardening Cloud Email Security Settings
Proactive configuration of your cloud email environment is a powerful mitigation against credential phishing and malware.
Verified Microsoft 365 / Google Workspace Configurations:
Enable Safe Attachments: `New-SafeAttachmentPolicy -Name “Block Unknown” -Enable $true -Action Block`
Enable Safe Links: `New-SafeLinksPolicy -Name “Global Policy” -EnableSafeLinksForTeams $true -IsEnabled $true`
Set Anti-Phishing Policy: `Enable-AntiPhishPolicy -Identity “Standard Preset” -EnableAntiPhish $true`
Disable Legacy Authentication (IMAP, POP3): Via Azure AD Conditional Access.
Enforce Multi-Factor Authentication (MFA): `Get-MsolUser -All | Set-MsolUser -StrongAuthenticationRequirements @{}`
Step-by-step guide:
In the Microsoft 365 Defender portal, create a Safe Attachments policy that routes all emails with attachments through a detonation chamber before delivery. Configure a Safe Links policy to scan and rewrite URLs in real-time. Create an anti-phishing policy that impersonates your key executive domains and user names. Most critically, use Azure AD to create a Conditional Access policy to block all legacy authentication protocols, which are a common vector for password spray attacks.
5. Digital Signature Verification with GnuPG
Ensure the integrity and authenticity of sensitive communications by implementing digital signatures.
Verified Linux Commands (GnuPG):
`gpg –generate-key` (Generate a new keypair)
`gpg –import public-key.asc` (Import a contact’s public key)
`gpg –encrypt –sign –armor -r [email protected] document.txt` (Encrypt and sign a file)
`gpg –verify document.txt.asc` (Verify a detached signature)
`gpg –decrypt document.txt.asc.gpg > document.txt` (Decrypt a file)
Step-by-step guide:
First, generate your own public/private key pair using gpg --generate-key. Export your public key and share it with colleagues (gpg --export --armor your-email > mypubkey.asc). To send a verified message, create your file and then sign it with your private key using the `–sign` flag. The recipient can then import your public key and use the `–verify` command to be mathematically certain that the message came from you and was not altered in transit.
6. SIEM Query for Detecting Phishing Campaigns
A Security Information and Event Management (SIEM) system can correlate logs to identify broad phishing campaigns targeting your users.
Verified Splunk SPL Query:
index=email (src_user= OR dest_user=)
| transaction src_user, dest_user
| where eventcount > 5
| table src_user, dest_user, eventcount
| sort - eventcount
Verified Sigma Rule (YAML) for Phishing:
title: High Volume of Emails from Single External Sender
logsource:
product: email_gateway
detection:
selection:
src_user: '@external_domain.com'
aggregation:
src_user:
count: > 5
timespan: 15m
condition: selection and aggregation
Step-by-step guide:
This Splunk query looks for email logs and groups them into transactions based on the sender and receiver. It then filters for senders who have emailed more than 5 recipients, which could indicate a mass phishing attempt from a compromised internal account. The Sigma rule provides a vendor-agnostic definition for the same logic, which can be converted for use in SIEMs like Elasticsearch or Azure Sentinel, alerting when a single external sender emails many users in a short period.
What Undercode Say:
- The Weaponization of Professional Norms: The most dangerous threats are those that mirror legitimate behavior. The templates in the source post work because they build trust, establish credibility, and create a clear call to action—the same psychological triggers used in high-yield BEC attacks. Defenses must evolve beyond looking for malicious attachments to analyzing communication patterns and sender context.
- The Perimeter is Identity: The inbox is the new perimeter, and the primary credential is user awareness. Technical controls are vital, but they are a safety net. The most effective defense is a culture of verification, where employees are trained to be skeptical of urgency and to use out-of-band channels (like a phone call) to confirm sensitive requests, even if the email appears perfectly crafted and legitimate.
The analysis reveals a critical convergence between communication efficiency and security exploitation. As AI tools make it easier to generate flawless, context-aware emails, the traditional red flags of poor grammar will disappear. The future of email security lies in behavioral analytics, robust domain-level authentication policies, and an unwavering human principle: trust, but verify.
Prediction:
The proliferation of generative AI will lead to a new wave of hyper-personalized, polymorphic BEC attacks. These AI-powered campaigns will be dynamically tailored using publicly available data from LinkedIn and other sources, making them nearly indistinguishable from legitimate communication. This will force a paradigm shift in cybersecurity, moving defenses from signature-based email filtering to AI-driven anomaly detection that analyzes writing style, relationship graphs, and transaction context in real-time. The cat-and-mouse game will escalate from exploiting human psychology to a battle of algorithms, where the organization’s own AI will be required to defend against the attacker’s AI.
🎯Let’s Practice For Free:
IT/Security Reporter URL:
Reported By: Lucas Storm – Hackers Feeds
Extra Hub: Undercode MoN
Basic Verification: Pass ✅


