Listen to this Post
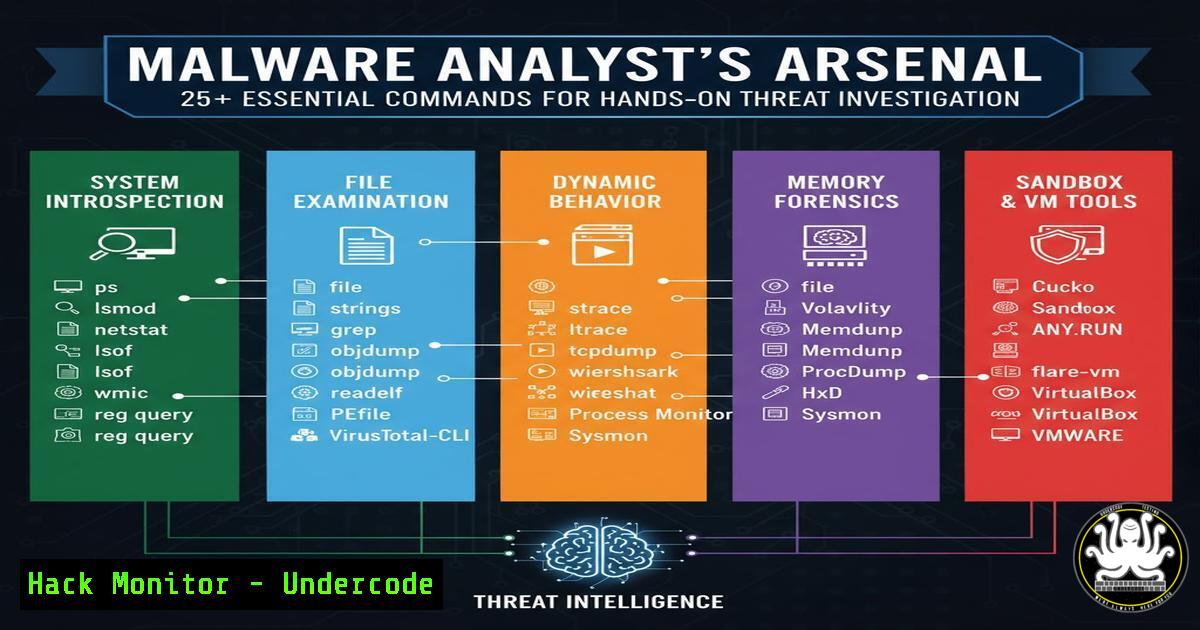
Introduction:
Malware analysis is a critical discipline in cybersecurity, enabling professionals to dissect malicious software, understand its behavior, and develop effective countermeasures. Moving from theoretical knowledge to practical, hands-on investigation requires a robust toolkit and a systematic methodology. This guide provides the essential commands and techniques to analyze real-world malware samples safely and effectively.
Learning Objectives:
- Master the fundamental commands for static, dynamic, and memory analysis of malware.
- Learn to set up and utilize a safe, isolated lab environment for forensic investigation.
- Develop the skills to extract critical indicators of compromise (IOCs) from malicious binaries.
You Should Know:
1. Setting Up Your Isolated Analysis Lab
Before any analysis begins, a secure, isolated environment is non-negotiable. This prevents the malware from infecting your host machine or escaping into your production network.
Verified Commands & Snippets:
VirtualBox CLI (Host): `VBoxManage modifyvm “MalwareAnalysisVM” –nictrace1 on –nictracefile1 /path/to/trace.pcap`
VMware Snapshot (GUI/CLI): Take a clean snapshot before executing malware.
Windows (cmd): `wmic computersystem where name=”%COMPUTERNAME%” call rename name=”MalwareLab-PC”` (Rename VM to avoid detection).
Innoteck (Host): `VBoxManage modifyvm “AnalysisVM” –nataliasmode1 proxy-only`
Step‑by‑step guide:
First, create a dedicated virtual machine (VM) using VirtualBox or VMware. Disable shared folders and drag-and-drop functionality. Use the `VBoxManage` command to enable network tracing for the VM’s adapter, which will log all network traffic to a file for later analysis in Wireshark. Before launching the malware, take a snapshot of the VM. This allows you to instantly revert the system to a clean state after analysis. Renaming the computer via the Windows command can help bypass malware that checks for common VM or analysis machine names.
2. Static Analysis: The First Look
Static analysis involves examining the malware without executing it. This phase focuses on gathering initial intelligence and IOCs.
Verified Commands & Snippets:
Linux (`file`): `file suspicious_sample.exe`
Linux (strings): `strings -n 8 suspicious_sample.exe | grep -i “http\\|registry\\|.dll”`
Linux (`md5sum` / `sha256sum`): `sha256sum suspicious_sample.exe`
Linux (`xxd`): `xxd suspicious_sample.exe | head -50`
Windows (PowerShell – Get-FileHash): `Get-FileHash -Algorithm SHA256 .\suspicious_sample.exe`
Linux (`binwalk`): `binwalk -Me suspicious_sample.exe`
Step‑by‑step guide:
Begin by identifying the file type using the `file` command. Calculate its cryptographic hash with `sha256sum` or PowerShell’s `Get-FileHash` to get a unique identifier for threat intelligence sharing. Use the `strings` command to extract all human-readable text from the binary; piping the output to `grep` allows you to search for potential URLs, registry keys, or library files. The `xxd` command provides a hexadecimal dump of the file’s header, which can reveal file signatures and packing information. `Binwalk` can be used to scan for and extract embedded files and hidden data.
3. Dynamic Analysis: Observing Runtime Behavior
Dynamic analysis involves running the malware in a controlled environment to observe its real-time behavior, including process creation, network calls, and file system modifications.
Verified Commands & Snippets:
Process Monitor (ProcMon – Filter): `Process Name | contains | sample.exe` then `Include`
Windows (`tasklist`): `tasklist /v | findstr “suspicious”`
Windows (`netstat`): `netstat -ano | findstr ESTABLISHED`
Windows (PowerShell – Get-Process): `Get-Process | Where-Object {$_.ProcessName -like “susp”}`
Wireshark (Display Filter): `ip.addr== and not dns`
Sysinternals (procmon.exe / CLI): `procmon.exe /AcceptEula /Minimized /BackingFile log.pml`
Step‑by‑step guide:
With your isolated VM running and your tools ready, execute the malware sample. Immediately open Process Monitor and apply a filter for the process name to focus your log. Use the `tasklist` or `Get-Process` PowerShell cmdlet to monitor for any child processes spawned by the malware. The `netstat` command is crucial for identifying any network connections the malware establishes back to its command-and-control (C2) server. Simultaneously, Wireshark should be running to capture all network traffic; applying a display filter for your VM’s IP address helps isolate the malicious traffic from background noise.
4. Memory Forensics with Volatility
After execution, analyzing the system’s RAM can uncover hidden processes, injected code, and other artifacts that reside only in memory.
Verified Commands & Snippets:
Volatility 2 (Linux): `volatility -f memory.dump imageinfo`
Volatility 2: `volatility -f memory.dump –profile=Win7SP1x64 pslist`
Volatility 2: `volatility -f memory.dump –profile=Win7SP1x64 pstree`
Volatility 2: `volatility -f memory.dump –profile=Win7SP1x64 netscan`
Volatility 2: `volatility -f memory.dump –profile=Win7SP1x64 malfind -D dumpdir/`
Volatility 3 (Linux): `vol -f memory.dump windows.info`
Volatility 3: `vol -f memory.dump windows.malfind`
Step‑by‑step guide:
First, acquire a memory dump from your infected VM using a tool like DumpIt or the built-in VM snapshot memory export. Use Volatility’s `imageinfo` or `windows.info` plugin to identify the correct profile for the operating system. Then, list the running processes with `pslist` and view them in a tree format with `pstree` to identify parent-child relationships, which can reveal process injection. The `netscan` plugin will show network connections that were active in memory, even if they have since closed. Finally, use the `malfind` plugin to scan for signs of code injection and dump any suspicious memory regions for further analysis.
5. Reverse Engineering Fundamentals
Reverse engineering involves disassembling the binary to understand its core logic and functionality.
Verified Commands & Snippets:
Ghidra (Headless Analyzer): `analyzeHeadless /path/to/project Import -overwrite -postscript script.java suspicious_sample.exe`
Radare2 (Linux): `r2 -AA suspicious_sample.exe`
Radare2: `[bash]> pdf @ main` (print disassembly of main function)
Objdump (Linux): `objdump -d -M intel suspicious_sample.exe | head -200`
Strings with Floss (Linux): `floss suspicious_sample.exe` (deobfuscates strings)
PEiD/Exeinfo PE: (Tool to detect packers and compilers)
Step‑by‑step guide:
Load the malware sample into a disassembler like Ghidra. Begin by analyzing the binary’s import address table (IAT) to see which Windows API functions it calls; functions like `WriteProcessMemory` or `RegSetValue` are immediate red flags. Use command-line tools like `objdump` for a quick look at the disassembly or Radare2 for a more interactive session. Search for and deobfuscate strings using a tool like FLOSS, which is more resistant to common obfuscation techniques than the standard `strings` command. Identifying the packer used is a critical first step, as the binary may need to be unpacked before its true code can be analyzed.
6. API Monitoring for Deeper Inspection
Malware often leverages Windows API calls to perform malicious actions. Monitoring these calls provides a granular view of its behavior.
Verified Commands & Snippets:
Windows (PowerShell – `Get-Process` & DLLs): `(Get-Process notepad).Modules | Select-Object ModuleName, FileName`
API Monitor (Tool Filter): Monitor CreateRemoteThread, SetWindowsHookEx, URLDownloadToFile.
Sysinternals (`handle.exe`): `handle.exe -p malware.exe`
Sysinternals (`listdlls.exe`): `listdlls.exe malware.exe`
Step‑by‑step guide:
Use a specialized tool like API Monitor to trace the Windows API functions called by the malware. Focus on key functions such as `CreateRemoteThread` (used for process injection), `VirtualAllocEx` (for memory allocation in another process), and `URLDownloadToFile` (for downloading secondary payloads). In PowerShell, you can inspect the DLLs loaded by a process to look for suspicious libraries. The Sysinternals `handle` utility can show you what files, registry keys, and other objects the malware has open, providing insight into the resources it is attempting to access or modify.
7. Persistence Mechanism Discovery
A key objective of malware is to maintain persistence on an infected system. Identifying how it achieves this is crucial for eradication.
Verified Commands & Snippets:
Windows (`wmic`): `wmic startup get caption,command`
Windows (PowerShell): `Get-CimInstance Win32_StartupCommand | Select-Object Name, command, Location`
Windows (Registry – reg query): `reg query “HKLM\SOFTWARE\Microsoft\Windows\CurrentVersion\Run”`
Windows (Registry): `reg query “HKCU\SOFTWARE\Microsoft\Windows\CurrentVersion\Run”`
Windows (Scheduled Tasks – schtasks): `schtasks /query /fo LIST /v`
Windows (PowerShell): `Get-ScheduledTask | Where-Object {$_.State -ne “Disabled”} | Get-ScheduledTaskInfo`
Step‑by‑step guide:
After executing the malware, scan the system for new persistence mechanisms. Use the `wmic startup` command or the PowerShell equivalent to list all programs that launch at boot. Manually inspect the common “Run” registry keys in both the local machine (HKLM) and current user (HKCU) hives using the `reg query` command. Don’t forget to check for scheduled tasks, a common persistence technique, using either the `schtasks` command or the more powerful `Get-ScheduledTask` PowerShell cmdlet. Any unfamiliar entries in these locations should be investigated thoroughly.
What Undercode Say:
- A methodical approach, combining static, dynamic, and memory analysis, is non-negotiable for uncovering the full scope of a malware’s capabilities.
- The true skill lies not just in running tools, but in correlating artifacts from different sources—a network connection in Wireshark tied to a specific process in Volatility, for example—to build an irrefutable narrative of the attack.
The professional malware analyst operates like a digital forensic scientist. The tools are merely instruments; the critical factor is the analytical mind that wields them. Success hinges on the ability to form a hypothesis based on an initial finding—a suspicious string, an anomalous network packet—and then systematically use the appropriate commands to validate or disprove that hypothesis. This iterative process of discovery transforms a list of Indicators of Compromise (IOCs) into a deep understanding of the adversary’s tactics, techniques, and procedures (TTPs), which is far more valuable for building durable defenses than simply blocking a hash.
Prediction:
The automation of malware analysis through AI will accelerate initial triage, but sophisticated adversaries will simultaneously develop AI-driven malware that can dynamically adapt its behavior to evade analysis environments. This will create an arms race, forcing cybersecurity professionals to rely even more heavily on low-level memory forensics and hardware-assisted isolation technologies to detect and dissect threats that are consciously designed to be “analysis-aware.” The role of the human analyst will evolve from manual tool operator to an interpreter of complex, AI-generated threat intelligence and a hunter of stealthy, adaptive threats.
🎯Let’s Practice For Free:
IT/Security Reporter URL:
Reported By: Ouardi Mohamed – Hackers Feeds
Extra Hub: Undercode MoN
Basic Verification: Pass ✅


