Listen to this Post
Introduction:
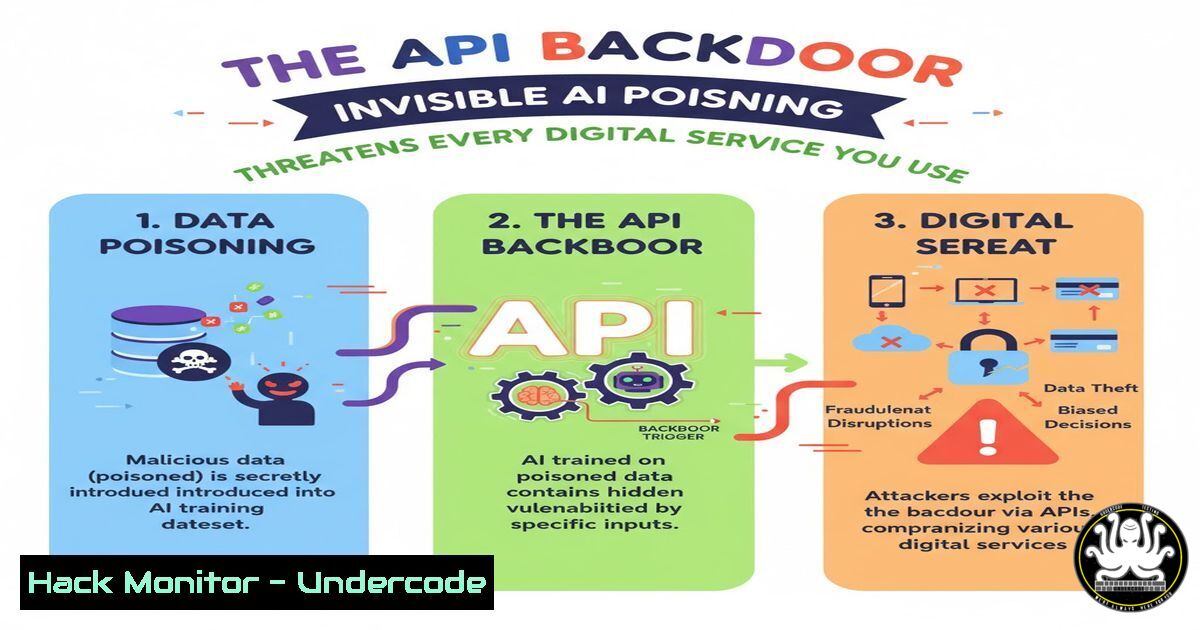
A new, insidious form of AI attack is emerging, targeting the very application programming interfaces (APIs) that power modern digital services. Unlike traditional data breaches, this method involves poisoning the AI models that process API data, leading to manipulated outcomes, data leaks, and systemic vulnerabilities that are incredibly difficult to detect. As organizations rush to integrate AI into their core operations, understanding and mitigating this threat is paramount for cybersecurity professionals.
Learning Objectives:
- Understand the mechanism of AI model poisoning through API data streams.
- Learn to identify anomalous patterns in API traffic that may indicate a poisoning attack.
- Implement defensive strategies and monitoring techniques to secure AI-powered APIs.
You Should Know:
- The Anatomy of an API-Driven Data Poisoning Attack
API-driven data poisoning is a sophisticated attack where an adversary injects carefully crafted malicious data into the training pipeline of a machine learning model via its API. The model then learns from this poisoned data, causing it to make specific, attacker-desired errors or classifications when presented with certain inputs in the future. This creates a hidden backdoor.
Step-by-step guide:
- Step 1: Reconnaissance. The attacker identifies the target API endpoint that feeds data into a live learning model. Tools like `curl` can be used for initial probing.
- Step 2: Payload Crafting. The attacker designs data samples that appear normal but contain a “trigger” (a specific pattern, word, or pixel arrangement) and a corrupted label or output.
- Step 3: Slow Injection. To avoid detection, the attacker slowly injects these poisoned samples over a long period, blending them with legitimate API traffic. The model retrains periodically, gradually incorporating the malicious logic.
- Step 4: Trigger Activation. Once the model is poisoned, the attacker uses the predefined trigger via the API to activate the backdoor, causing the model to malfunction—for example, misclassifying a malicious transaction as legitimate.
- Detecting Data Drift and Anomalies in API Logs
A key indicator of a poisoning attack is a statistical shift in the data received by the API, known as data drift. Monitoring for this requires analyzing API logs for unexpected patterns.
Linux Command & Script:
 Use awk and jq to parse JSON API logs and count unique data patterns
awk '{print $7}' /var/log/api/access.log | jq '.input_data' | sort | uniq -c | sort -nr | head -20

Python script snippet for calculating data drift (using scikit-learn)
from sklearn.datasets import make_classification
from sklearn.ensemble import IsolationForest
import pandas as pd

Load current API data batch
current_data = pd.read_json('api_batch_log.json')
clf = IsolationForest(contamination=0.01)
clf.fit(training_data)  Fit on known good data
predictions = clf.predict(current_data)
anomalies = current_data[predictions == -1]
print(f"Detected {len(anomalies)} anomalous inputs.")
Step-by-step guide:
- Step 1: Log Aggregation. Centralize your API logs using a SIEM or a simple `syslog` server.
- Step 2: Baseline Establishment. Use historical, clean log data to establish a baseline distribution for your model’s input features.
- Step 3: Continuous Monitoring. Run statistical process control or machine learning models like the Isolation Forest (shown above) on incoming data batches to flag significant deviations from the baseline.
- Step 4: Alerting. Configure alerts to trigger when the anomaly count or the magnitude of data drift exceeds a predefined threshold, prompting immediate investigation.
3. Hardening API Endpoints with Robust Input Validation
The first line of defense is ensuring that malicious data cannot easily enter the system through the API. This goes beyond standard SQL injection protection.
Python/Flask Code Snippet:
from flask import request, jsonify, abort
from pydantic import BaseModel, ValidationError, conlist, constr
import numpy as np

Define a strict schema using Pydantic
class APIDataSchema(BaseModel):
feature_vector: conlist(item_type=float, min_items=10, max_items=10)  Must be exactly 10 floats
user_id: constr(strict=True, min_length=5, max_length=10)
timestamp: int

@app.route('/api/v1/predict', methods=['POST'])
def predict():
try:
 Validate input against the strict schema
validated_data = APIDataSchema(request.get_json())
except ValidationError as e:
app.logger.warning(f"API Input Validation Failed: {e}")
abort(400, description="Invalid input format.")

Proceed with prediction logic
 ... [rest of the code]
Step-by-step guide:
- Step 1: Define a Strict Schema. Use a library like Pydantic (Python) or Joi (JavaScript) to define a strict, typed schema for all incoming API requests. This rejects any data that doesn’t conform exactly.
- Step 2: Implement Data Type and Range Checks. Enforce constraints on data types, string lengths, numerical ranges, and the size of arrays. The example above mandates a feature vector of exactly 10 floating-point numbers.
- Step 3: Log Validation Failures. Log all failed validation attempts with high severity. A sudden spike in these logs can indicate a probing or active poisoning attack.
- Step 4: Use API Gateways. Employ an API gateway to enforce rate limiting, which can throttle the slow injection of poisoned data.
4. Implementing Canary Models for Early Poisoning Detection
A canary model is a sacrificial model trained on a small, clean, and highly sensitive dataset. It is deployed alongside your production model to act as an early warning system.
Linux Command to Deploy a Separate Canary Endpoint:
 Using Docker to deploy the canary model on a separate port
docker run -d -p 8081:8081 --name canary-model your-ml-image:latest --config canary_config.yaml
Step-by-step guide:
- Step 1: Train the Canary. Train a small, simple model on a pristine, verified dataset. This model should be highly accurate on its specific task.
- Step 2: Deploy in Parallel. Deploy the canary model on a separate API endpoint (e.g.,
:8081) that receives the exact same live traffic as your production model. - Step 3: Monitor Performance Discrepancy. Continuously monitor the performance (e.g., accuracy, F1-score) of the canary model. Because it was trained on clean data, it will degrade in performance much faster than your production model if the incoming data is poisoned.
- Step 4: Set Triggers. If the canary model’s performance drops by a certain percentage, automatically trigger an alert and consider quarantining the production model for analysis.
5. Leveraging Differential Privacy during Model Training
Differential privacy adds calibrated noise to the training data or the training process, making it statistically difficult for an attacker to determine if any specific data point (including their poisoned sample) was used in training. This dilutes the impact of any single malicious sample.
Python Code Snippet (using TensorFlow Privacy):
import tensorflow as tf
import tensorflow_privacy as tfp

Define your model
model = tf.keras.Sequential([...])

Choose a differential privacy optimizer
optimizer = tfp.DPKerasSGDOptimizer(
l2_norm_clip=1.0,
noise_multiplier=0.5,
num_microbatches=1,
learning_rate=0.1
)

Compile the model with privacy guarantee
model.compile(optimizer=optimizer, loss='categorical_crossentropy', metrics=['accuracy'])

Train the model with differential privacy
model.fit(train_data, train_labels, epochs=10, validation_data=(val_data, val_labels))
Step-by-step guide:
- Step 1: Install Privacy Libraries. Install necessary libraries like `tensorflow-privacy` or `opacus` for PyTorch.
- Step 2: Configure Privacy Parameters. Set the `l2_norm_clip` (limits the influence of any single sample) and `noise_multiplier` (adds noise). Higher noise provides more privacy but can reduce model accuracy.
- Step 3: Replace Standard Optimizer. Swap your standard optimizer (e.g., SGD, Adam) with its differentially private version, as shown in the code.
- Step 4: Calculate Privacy Budget. Use accounting tools provided by the library to track the total privacy loss (
epsilon) over training epochs. Ensure it stays within an acceptable bound.
6. Forensic Analysis of a Potentially Poisoned Model
If poisoning is suspected, you need to dissect the model to find evidence.
Python Code Snippet for Activation Clustering:
from sklearn.cluster import KMeans
import matplotlib.pyplot as plt

Extract internal layer activations for a set of inputs
intermediate_output_model = tf.keras.Model(inputs=model.input, outputs=model.layers[-2].output)
activations = intermediate_output_model.predict(suspected_data)

Perform clustering on the activations
kmeans = KMeans(n_clusters=2, random_state=0).fit(activations)
labels = kmeans.labels_

Visualize the clusters (assuming 2D via PCA)
from sklearn.decomposition import PCA
pca = PCA(n_components=2)
activations_2d = pca.fit_transform(activations)

plt.scatter(activations_2d[labels==0, 0], activations_2d[labels==0, 1], c='blue', label='Clean')
plt.scatter(activations_2d[labels==1, 0], activations_2d[labels==1, 1], c='red', label='Poisoned')
plt.legend()
plt.show()
Step-by-step guide:
- Step 1: Extract Activations. Choose an internal layer of your neural network and create a new model that outputs the activations of that layer.
- Step 2: Gather Suspect Data. Run a batch of data that is suspected to contain poisoned samples through this new model to get their activation vectors.
- Step 3: Cluster the Activations. Use an unsupervised clustering algorithm like K-Means on the activation vectors. Poisoned samples with a common trigger often form a separate, tight cluster distinct from clean samples.
- Step 4: Visualize and Investigate. Reduce the dimensionality of the activations (e.g., using PCA) and plot them. A clear separation into two clusters is strong evidence of poisoning. The samples in the anomalous cluster should be manually reviewed.
What Undercode Say:
- The Attack Surface is Expanding Exponentially. The integration of AI into every API is not just an evolution; it’s a fundamental change that creates a new, complex attack surface. We are moving from securing data at rest to securing the continuous learning process itself.
- Defense Requires a Machine Learning Mindset. Traditional WAFs and input sanitization are necessary but insufficient. Defending against model poisoning requires leveraging ML techniques for defense: anomaly detection on data streams, canary models, and differential privacy. The defender must now also be a data scientist.
The core analysis from the original post highlights a critical blind spot. Most API security discussions focus on availability, authentication, and data exfiltration. The concept of “Grey Zone” attacks, where the API is used not to crash a service or steal data, but to subtly corrupt its intelligence, is a paradigm shift. This isn’t a smash-and-grab; it’s a long-term, strategic compromise of a system’s decision-making core. The verification of this threat is complex because the system continues to function, often with only a slight, unexplained degradation in performance that is easily attributed to other factors. This makes it a perfect vector for sophisticated, state-level actors or industrial espionage.
Prediction:
Within the next 18-24 months, API-based AI model poisoning will escalate from a theoretical threat to a common root cause of major, systemic failures in financial trading algorithms, content recommendation systems, and autonomous vehicle networks. We will see the first public, high-profile case of a corporation’s stock value being manipulated or a political narrative being skewed not through a direct hack, but through the long-term, deliberate poisoning of a predictive model via its public-facing API. This will force a new regulatory focus on the integrity of AI training pipelines, similar to current data privacy regulations, making “Model Integrity Assurance” a standard line item in every security audit.
🎯Let’s Practice For Free:
IT/Security Reporter URL:
Reported By: Lionelklein Ia – Hackers Feeds
Extra Hub: Undercode MoN
Basic Verification: Pass ✅


