Listen to this Post
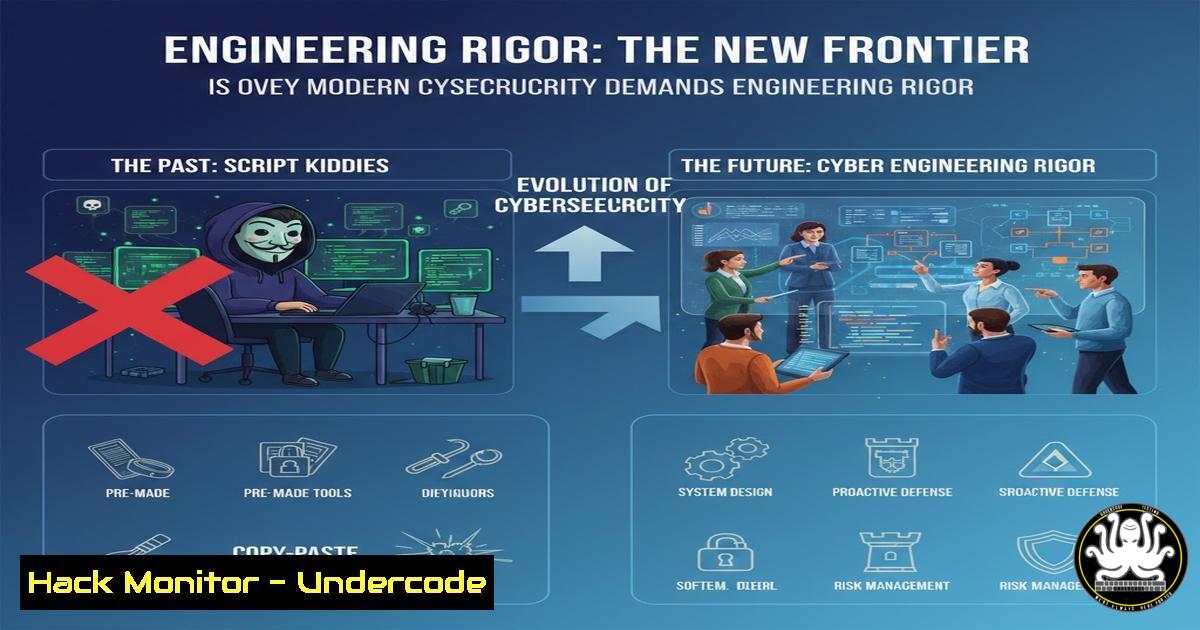
Introduction:
The romanticized image of a lone hacker in a hoodie exploiting systems with a single, magical command is a dangerous fallacy. As the LinkedIn post by Borgia MASSAMBA emphatically states, “La Cybersécurité n’est pas un domaine d’amateurs !!!!!” (Cybersecurity is not a field for amateurs!). In today’s threat landscape, characterized by sophisticated nation-state actors, complex supply chain attacks, and AI-driven malware, cybersecurity has evolved from a technical hobby into a stringent engineering discipline. It demands a deep, verifiable mastery of systems, networks, and human psychology, underpinned by continuous learning and hands-on experience. This article dissects the technical and organizational rigor required to transition from an amateur enthusiast to a professional defender.
Learning Objectives:
- Understand the critical distinction between amateur tool usage and professional security engineering.
- Master essential command-line utilities for system hardening and incident response across Linux and Windows environments.
- Identify the key pillars of a professional security posture, including proactive hardening, continuous monitoring, and structured vulnerability management.
You Should Know:
- Beyond the GUI: The Command Line Imperative for Incident Response
Professionals live in the terminal. When a breach occurs, the graphical user interface is often the first casualty or may be disabled to prevent further compromise. Mastery of the command line is non-negotiable for rapid triage and remediation. Amateurs rely on point-and-click tools; professionals automate and investigate with scripts and built-in OS tools.
Step‑by‑step guide: Initial Triage Commands
When responding to an incident, a professional must quickly gather system state. Here are foundational commands for any incident responder:
- Linux/macOS:
- Check listening ports and established connections: `sudo netstat -tulnp` or
sudo ss -tulwn. This reveals any services the attacker might have opened for backdoor access. - Review authentication logs: `sudo tail -100 /var/log/auth.log` (Debian/Ubuntu) or `sudo tail -100 /var/log/secure` (RHEL/CentOS). Look for `Failed password` and `Accepted password` entries to identify brute-force attempts or successful logins.
- List all running processes:
ps auxf. The `f` flag creates a forest view, showing parent-child relationships which can help identify malicious processes spawned by a legitimate one. - Check for scheduled tasks/cron jobs: `crontab -l` (for current user) and `sudo crontab -l` (for root). Also, check system-wide crons in `/etc/crontab` and
/etc/cron.d/. Attackers often establish persistence here. -
Windows (PowerShell as Administrator):
- Check active network connections: `Get-NetTCPConnection -State Established` or
netstat -anob. The `-anob` flag in cmd shows connections, ports, and the owning process identifier (PID). - Review Security Event Logs:
Get-EventLog -LogName Security -Newest 50 | Format-Table -AutoSize. Filter for specific Event IDs like 4624 (successful logon), 4625 (failed logon), or 4688 (new process creation). - List all running processes with details:
Get-Process | Where-Object {$_.CPU -gt 10}. This filters processes that have used more than 10 seconds of CPU time, a quick way to spot resource-intensive malware. - Examine Scheduled Tasks:
Get-ScheduledTask | Where-Object {$_.State -eq "Ready"}. Look for tasks with suspicious names or triggers.
2. Proactive System Hardening: The Foundation of Defense
An amateur builds a system and hopes for the best. A professional builds a system with the assumption it will be attacked, implementing layers of defense from the very first command. Hardening involves reducing the attack surface by disabling unnecessary services, enforcing strict permissions, and applying the principle of least privilege.
Step‑by‑step guide: Linux Server Hardening Essentials
This guide walks through initial steps to secure a fresh Linux server (Ubuntu 22.04 LTS used here).
- Step 1: Update and Patch.
sudo apt update && sudo apt upgrade -y. This is the most basic yet critical step. - Step 2: Secure SSH Access.
- Edit the SSH daemon config:
sudo nano /etc/ssh/sshd_config. - Disable root login: Change `PermitRootLogin prohibit-password` to
PermitRootLogin no. - Disable password authentication (use SSH keys only): Change `PasswordAuthentication yes` to
PasswordAuthentication no. - Change the default port (optional, but reduces bot noise): Change `Port 22` to
Port 2222. - Restart SSH:
sudo systemctl restart sshd. - Step 3: Implement a Basic Firewall (UFW).
- Set default policies: `sudo ufw default deny incoming` and
sudo ufw default allow outgoing. - Allow SSH on your new port:
sudo ufw allow 2222/tcp. - Allow web traffic: `sudo ufw allow 80/tcp` and
sudo ufw allow 443/tcp. - Enable the firewall:
sudo ufw enable. - Check status:
sudo ufw status verbose. - Step 4: Automate Security Updates. `sudo apt install unattended-upgrades` and configure it to apply critical security patches automatically.
3. Network Fortification and Segmentation
Modern attacks rarely come from a single vector. They often involve lateral movement, where an attacker compromises a low-value asset and pivots to a high-value target. Professional network defense relies on strict segmentation and monitoring east-west traffic, not just north-south.
Step‑by‑step guide: Implementing Basic Network Segmentation with iptables on a Gateway
Imagine a simple network with a public-facing web server and an internal database server. A gateway firewall must restrict the database server to only accept connections from the web server on a specific port.
- Assumptions:
- Web Server IP: `192.168.1.10`
– Database Server IP: `192.168.1.20`
– Gateway’s internal interface: `eth1` (network192.168.1.0/24) - Database port (e.g., MySQL): 3306
-
Commands on the Gateway Firewall:
- Flush existing rules: `sudo iptables -F`
– Set default policies to DROP: `sudo iptables -P INPUT DROP` and `sudo iptables -P FORWARD DROP`
– Allow established connections: `sudo iptables -A FORWARD -m state –state ESTABLISHED,RELATED -j ACCEPT`
– CRITICAL RULE: Allow forwarding from Web Server to Database Server on port 3306 only.
`sudo iptables -A FORWARD -s 192.168.1.10 -d 192.168.1.20 -p tcp –dport 3306 -j ACCEPT`
– Allow general internet access for all (optional, but common):
`sudo iptables -A FORWARD -i eth1 -o eth0 -j ACCEPT` (Adjust `eth0` as your WAN interface). This rule must be carefully considered; a stricter approach would define rules per host.
This simple rule ensures that even if an attacker compromises a workstation on the same subnet, they cannot directly access the database server.
4. Vulnerability Management: From Scanning to Remediation
Amateurs scan for vulnerabilities using tools like Nessus or OpenVAS but fail to contextualize the results. Professionals understand that a vulnerability scan is just the first step. True expertise lies in verifying the vulnerability, understanding its exploitability in the current environment, and prioritizing remediation based on business risk, not just the CVSS score.
Step‑by‑step guide: Manual Verification of a Vulnerability (CVE-2021-41773 – Path Traversal in Apache)
A scanner might report a potential path traversal vulnerability in Apache HTTP Server 2.4.49. A professional will manually verify it.
- Step 1: Confirm the Version (Ethically, on your own test system).
– `curl -I http://vulnerable-server.com` | grep -i server
– Step 2: Attempt the Exploit (Proof of Concept).
– The vulnerability allowed accessing files outside the web root using a specific path.
– Command: `curl -v ‘http://vulnerable-server.com/cgi-bin/.%2e/%2e%2e/%2e%2e/%2e%2e/etc/passwd’` - Step 3: Analyze the Response.
- If the command returns the contents of
/etc/passwd, the vulnerability is confirmed. - If it returns a 403 Forbidden or 404 Not Found, the server might be patched or configured differently.
- Step 4: Recommend Mitigation.
- Based on the verification, the professional doesn’t just say “patch Apache.” They provide the exact command: `sudo apt update && sudo apt upgrade apache2` (for Debian/Ubuntu) or confirm the specific patch version required (2.4.51+).
- Cloud Security Hardening: Identity is the New Perimeter
As organizations migrate to the cloud, the security model shifts from protecting the network to protecting identities and configurations. A misconfigured S3 bucket or an overprivileged IAM role can be far more damaging than an unpatched on-premise server.
Step‑by‑step guide: Auditing AWS S3 Bucket Permissions with AWS CLI
An amateur might grant “Public Access” to an S3 bucket for quick sharing. A professional audits and enforces private access.
- Prerequisites: AWS CLI installed and configured with appropriate credentials.
- Step 1: List your buckets. `aws s3 ls`
– Step 2: Check the bucket’s Access Control List (ACL). `aws s3api get-bucket-acl –bucket your-bucket-name`
– Look for `Grantee` entries with `URI` set to `http://acs.amazonaws.com/groups/global/AllUsers`. This indicates public read access. Any `Permission` like `READ` for this group is a critical finding. - Step 3: Check the bucket policy. `aws s3api get-bucket-policy –bucket your-bucket-name`
– Examine the JSON policy. A policy like the one below would grant public read access to all objects, a massive risk.{ "Version": "2012-10-17", "Statement": [ { "Sid": "PublicReadGetObject", "Effect": "Allow", "Principal": "", "Action": "s3:GetObject", "Resource": "arn:aws:s3:::your-bucket-name/" } ] } - Step 4: Remediate.
- To block all public access: `aws s3api put-public-access-block –bucket your-bucket-name –public-access-block-configuration BlockPublicAcls=true,IgnorePublicAcls=true,BlockPublicPolicy=true,RestrictPublicBuckets=true`
– To remove a specific public policy, you can delete it:aws s3api delete-bucket-policy --bucket your-bucket-name.
What Undercode Say:
- Tool Proficiency ≠ Security Expertise: Knowing how to run a script or a scanner is the entry fee, not the destination. True expertise is understanding why a tool returns a specific result and validating its implications within a unique environment.
- The Human Element is the Hardest Surface to Harden: While we harden systems with precise commands, the most sophisticated defense can be undone by a single successful phishing email. Professional security must integrate continuous, engaging security awareness training that goes beyond annual compliance checkboxes.
Analysis:
The post’s emphasis on “une approche méthodique” (a methodical approach) and “une expérience pratique” (practical experience) cuts to the heart of the matter. Cybersecurity is not about collecting certifications like badges; it’s about applying a structured, engineering mindset to solve complex problems under pressure. The amateur seeks a magic bullet; the professional builds a resilient system, knowing that compromise is inevitable and focuses on rapid detection, containment, and recovery. The commands and configurations detailed above are not just technical steps; they are the tangible manifestation of a disciplined, professional methodology. They represent the difference between hoping for security and engineering it.
Prediction:
As Artificial Intelligence lowers the barrier to entry for creating sophisticated malware and deepfakes, the gap between amateur and professional defenders will widen dramatically. We will see a bifurcation of the industry. On one side, “amateur” defenders will be overwhelmed by automated, AI-generated attacks. On the other, “professional” cybersecurity will evolve into a highly specialized engineering field, leveraging AI for autonomous threat hunting, automated incident response, and predictive vulnerability patching. The demand for professionals with deep systems knowledge, coding ability, and adaptive, methodical thinking will outstrip supply, making the rigorous, hands-on expertise championed in the original post more valuable than ever.
▶️ Related Video (80% Match):
🎯Let’s Practice For Free:
IT/Security Reporter URL:
Reported By: Borgia Massamba – Hackers Feeds
Extra Hub: Undercode MoN
Basic Verification: Pass ✅


