Listen to this Post
Introduction:
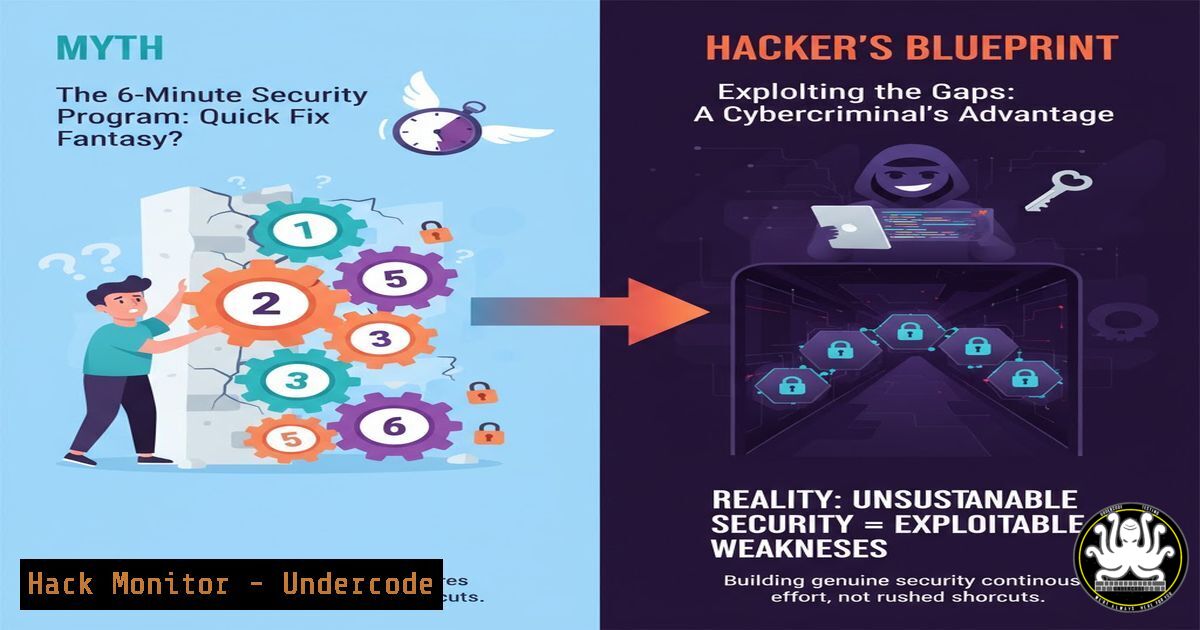
The concept of a “6-minute security program” is a provocative thought experiment that highlights the absolute fundamentals of a cyber defense strategy. While not a replacement for a mature program, it forces a critical focus on the foundational controls that deliver the most significant risk reduction. This article deconstructs this concept into actionable, technical commands and configurations across key domains.
Learning Objectives:
- Implement immediate, high-impact security hardening on Linux and Windows systems.
- Configure essential network and application security controls to shrink the attack surface.
- Establish foundational monitoring and incident response capabilities to detect and contain threats.
You Should Know:
1. Foundational System Hardening
A hardened operating system is the bedrock of security. These commands address common misconfigurations that attackers exploit for initial access and privilege escalation.
Linux: Restrict SUID/SGID Binaries to Reduce Privilege Escalation Vectors
 Find all SUID files
find / -perm /4000 -type f 2>/dev/null

Find all SGID files
find / -perm /2000 -type f 2>/dev/null

Remove SUID bit from a non-essential binary (e.g., if found on vim)
sudo chmod u-s /usr/bin/vim

Set restrictive permissions on /etc/passwd and /etc/shadow
sudo chmod 644 /etc/passwd
sudo chmod 000 /etc/shadow
Step-by-step guide:
- Run the `find` commands to audit for SUID/SGID executables. Research any that are non-standard.
- Use `chmod u-s` or `chmod g-s` to remove the special permission from any unnecessary binaries, drastically reducing privilege escalation paths.
- Ensure critical identity files are locked down. The `000` permission on `/etc/shadow` prevents all users except root from reading password hashes.
Windows: Enforce Strong Password Policy and Disable SMBv1
 Enforce password complexity policy
secedit /export /cfg C:\sec_policy.cfg
 Edit the generated sec_policy.cfg file, set "PasswordComplexity = 1", then:
secedit /configure /db C:\Windows\security\local.sdb /cfg C:\sec_policy.cfg /areas SECURITYPOLICY

Disable the legacy and insecure SMBv1 protocol
Disable-WindowsOptionalFeature -Online -FeatureName SMB1Protocol
Set-SmbServerConfiguration -EnableSMB1Protocol $false

Enable Windows Defender Firewall on all profiles
Set-NetFirewallProfile -Profile Domain,Public,Private -Enabled True
Step-by-step guide:
- The `secedit` commands export the current security policy, allow you to manually enable password complexity, and then re-import it.
- The `Disable-WindowsOptionalFeature` and `Set-SmbServerConfiguration` cmdlets work together to remove the SMBv1 client and server components, mitigating a wide range of known exploits.
3. `Set-NetFirewallProfile` ensures the host-based firewall is active, providing a critical network control layer.
2. Network Security & Access Control
Controlling network traffic is a zero-trust principle that limits lateral movement and contains breaches. These rules act as a default-deny posture.
Linux: Implement Basic Firewall Rules with UFW
 Deny all incoming traffic by default
sudo ufw default deny incoming

Allow outgoing traffic by default
sudo ufw default allow outgoing

Allow SSH on a non-standard port (e.g., 8022)
sudo ufw allow 8022/tcp

Enable the firewall
sudo ufw enable
Step-by-step guide:
- The `ufw default` commands set the foundational policy. Incoming connections are blocked unless explicitly allowed.
- The `ufw allow` command creates a pinhole for your administrative access. Using a non-standard port reduces automated scanning noise.
3. `ufw enable` activates the rules. Always ensure your SSH rule is correct before enabling, or you may lock yourself out.
Windows: Block Inbound Network Traffic with PowerShell
 Block all inbound traffic on all profiles
Set-NetFirewallProfile -Profile Domain,Public,Private -DefaultInboundAction Block

Create a rule to allow RDP from a specific management subnet only
New-NetFirewallRule -DisplayName "Allow RDP from Management" -Direction Inbound -Protocol TCP -LocalPort 3389 -RemoteAddress 192.168.1.0/24 -Action Allow
Step-by-step guide:
1. `Set-NetFirewallProfile` with the `-DefaultInboundAction Block` parameter implements a default-deny stance for all network interfaces.
2. `New-NetFirewallRule` demonstrates a principle of least privilege for a service like RDP, restricting access to a specific, trusted source IP range.
3. Application & API Security Fundamentals
Applications, especially their APIs, are a primary attack vector. Simple checks can reveal critical weaknesses.
Command Line: Scan for Common Web Vulnerabilities with curl & Nuclei
 Check for security headers on a target URL
curl -I https://your-target-api.com/ | grep -i "strict-transport-security|x-content-type-options|x-frame-options"

Basic Nuclei template scan for common vulnerabilities (requires nuclei installed)
nuclei -u https://your-target-api.com/ -t exposures/configuration/ -t vulnerabilities/
Step-by-step guide:
- The `curl -I` command fetches the HTTP headers. The `grep` searches for key security headers that mitigate attacks like clickjacking and MIME-sniffing.
- Nuclei is a powerful scanner. The command runs specific template checks for configuration exposures and known vulnerabilities, providing a rapid security assessment.
4. Proactive Monitoring & Auditing
You cannot defend what you cannot see. Establishing basic logging and auditing is crucial for detecting malicious activity.
Linux: Monitor for Failed SSH Login Attempts
 View recent failed SSH attempts
sudo grep "Failed password" /var/log/auth.log

Count failed attempts by IP address to identify brute-force attacks
sudo grep "Failed password" /var/log/auth.log | awk '{print $11}' | sort | uniq -c | sort -nr
Step-by-step guide:
- The first `grep` command filters the authentication log for failed password events, giving a raw list of attempts.
- The second, more advanced command pipeline uses `awk` to extract the IP address, then `sort` and `uniq -c` to count and rank the attempts, highlighting persistent attackers.
Windows: Enable and Query PowerShell Script Block Logging
 Enable Module, ScriptBlock, and Transcription Logging via Group Policy (or registry)
 Query the event logs for PowerShell script blocks
Get-WinEvent -LogName "Microsoft-Windows-PowerShell/Operational" | Where-Object {$_.Id -eq 4104} | Select-Object -First 5

Search for specific suspicious commands across logs
Get-WinEvent -Path C:\Windows\System32\winevt\Logs\Security.evtx | Where-Object { $_.Message -like "Invoke-Expression" }
Step-by-step guide:
- Configuring Script Block Logging (via GPO) is a prerequisite. The `Get-WinEvent` cmdlet then queries the operational log for Event ID 4104, which records the full contents of executed scripts, invaluable for forensic analysis.
- The second command demonstrates hunting for a specific, high-risk PowerShell cmdlet (
Invoke-Expression) across the security log.
5. Cloud Infrastructure Hardening
Cloud misconfigurations are a leading cause of data breaches. These commands lock down identity and storage in AWS.
AWS CLI: Revoke Excessive S3 Permissions and Secure IAM
 Identify S3 buckets with public read/write permissions
aws s3api list-buckets --query "Buckets[].Name" --output text
aws s3api get-bucket-acl --bucket YOUR_BUCKET_NAME

Apply a bucket policy to enforce encryption and block public access
aws s3api put-bucket-policy --bucket YOUR_BUCKET_NAME --policy file://secure-bucket-policy.json

Attach a policy to an IAM user to require MFA
aws iam attach-user-policy --user-name YOUR_USER --policy-arn arn:aws:iam::aws:policy/IAMUserChangePassword
Step-by-step guide:
- The `list-buckets` and `get-bucket-acl` commands are for auditing. They help you find buckets and check their permissions.
2. `put-bucket-policy` is the remediation step, applying a JSON policy file that can enforce TLS (SSL) encryption and deny non-secure and public access.
3. `attach-user-policy` applies a managed policy that forces users to change their password on first login and allows them to manage their own MFA device.
What Undercode Say:
- A “6-minute program” is not a program, but a prioritization framework. It forces a triage of controls that provide the highest ROI in risk reduction, focusing on foundational hygiene over advanced, complex tools.
- The technical implementation of these basics—system hardening, network segmentation, and access control—will stop a significant percentage of automated and low-skill attacks, forming a resilient security baseline.
Analysis:
The value of the “6-minute” concept is its stark emphasis on execution over planning. Many organizations suffer from “paralysis by analysis,” drafting extensive policies but failing to implement basic technical controls. The commands and configurations detailed here are the embodiment of that execution. They are immediate, verifiable, and directly impact the attack surface. However, this approach is a starting point, not an end state. It creates a foundation of hygiene upon which a mature, defense-in-depth strategy—including threat intelligence, advanced detection, and incident response playbooks—must be built. Ignoring the basics makes advanced tools irrelevant, but relying solely on them leaves an organization vulnerable to determined adversaries.
Prediction:
The future of cybersecurity will see an increased automation of these “6-minute” fundamentals. Cloud and endpoint management platforms will increasingly embed secure-by-default configurations, and security posture management tools will automatically remediate common misconfigurations like public S3 buckets or disabled firewalls. The human focus will shift from manual implementation to overseeing these automated systems and responding to the higher-fidelity alerts they generate, ultimately making a robust security baseline a ubiquitous and expected feature of any IT environment.
🎯Let’s Practice For Free:
IT/Security Reporter URL:
Reported By: Philvenables Building – Hackers Feeds
Extra Hub: Undercode MoN
Basic Verification: Pass ✅


