Listen to this Post
Introduction:
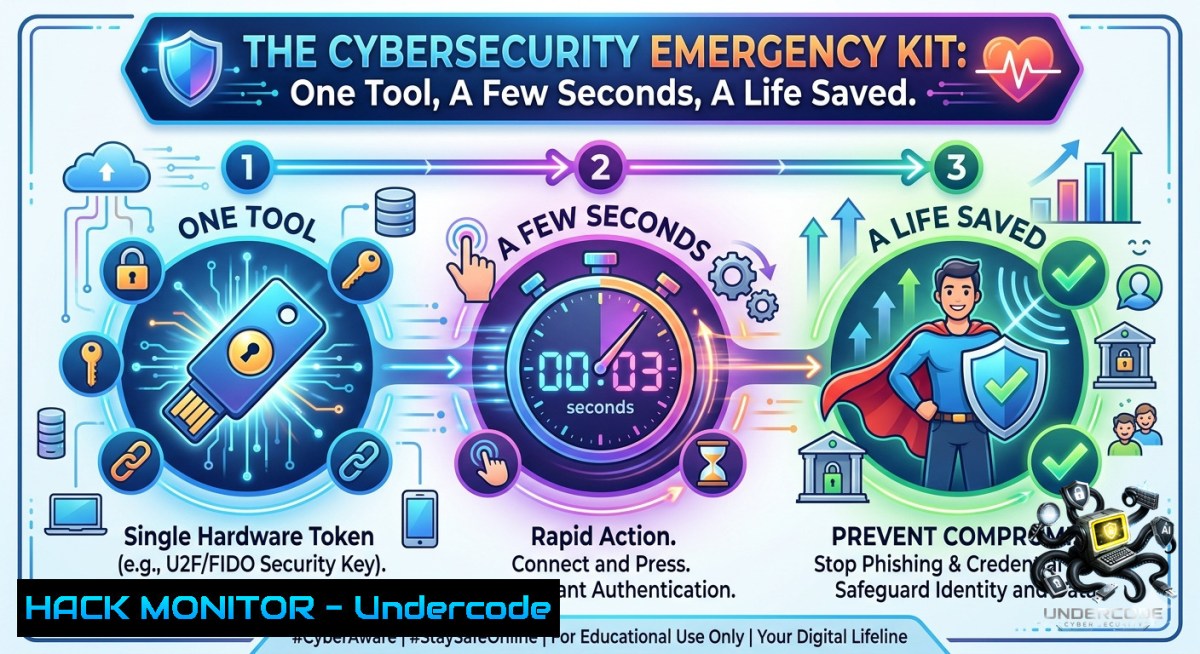
In cybersecurity, emergencies never announce themselves. No warning, no second chances—just a critical moment where the right action can change everything from a minor breach to a catastrophic data loss. Just as a physical emergency tool buys precious seconds in a crisis, a digital incident response (IR) toolkit and pre‑configured commands can mean the difference between containment and chaos, saving your organization’s data, reputation, and operational life.
Learning Objectives:
– Master rapid incident containment using built‑in Linux/Windows commands and open‑source IR tools.
– Build a portable “cyber emergency kit” for offline threat hunting, log collection, and forensic triage.
– Automate immediate response actions to isolate compromised hosts and preserve evidence within seconds.
You Should Know:
1. The Digital “Life Saver” – Incident Response Triage Toolkit
The core concept mirrors a physical emergency tool: compact, powerful, and ready to act when panic takes over. In cybersecurity, this means a pre‑staged USB drive or cloud‑synced folder containing verified scripts, binaries, and command snippets that run without additional downloads. Below is an extended step‑by‑step guide to building and using a Linux/Windows IR triage kit.
Step‑by‑step guide – Building and deploying a portable IR toolkit:
On Linux:
1. Create a dedicated directory: `mkdir /mnt/emergency_kit && cd /mnt/emergency_kit`
2. Copy essential tools:
cp /usr/bin/{lsof,netstat,ps,kill,fuser,ss,iptables,logger} .
cp /usr/sbin/tcpdump .
wget https://github.com/Sysinternals/SysinternalsEula/raw/master/PsExec -O psexec 2>/dev/null || echo "Manual download needed"
3. Create a rapid isolation script `isolate.sh`:
!/bin/bash
 Kill suspicious network connections
ss -tunp | grep ESTAB | awk '{print $7}' | cut -d',' -f2 | cut -d'=' -f2 | xargs -r kill -9
 Block all outbound traffic except to IR collection server
iptables -P OUTPUT DROP
iptables -A OUTPUT -d 192.168.1.100 -j ACCEPT  change to your collector IP
 Capture volatile memory
sudo dd if=/dev/mem of=./memory_dump.raw bs=1M count=1024
echo "Isolation complete. Logs saved."
4. Run with: `sudo bash isolate.sh`
On Windows (PowerShell as Admin):
1. Create folder `C:\EmergencyKit` and download Sysinternals Suite via:
Invoke-WebRequest -Uri 'https://live.sysinternals.com/Files/SysinternalsSuite.zip' -OutFile 'C:\EmergencyKit\Suite.zip'
Expand-Archive -Path C:\EmergencyKit\Suite.zip -DestinationPath C:\EmergencyKit\Tools
2. Build a one‑click responder `FastContain.ps1`:
 Kill all non‑system network processes
Get-1etTCPConnection | Where-Object {$_.State -eq 'Established' -and $_.OwningProcess -1e 4} | ForEach-Object { Stop-Process -Id $_.OwningProcess -Force }
 Enable Windows Firewall block all inbound/outbound
New-1etFirewallRule -DisplayName "EMERGENCY_BLOCK_ALL" -Direction Outbound -Action Block -Profile Any
New-1etFirewallRule -DisplayName "EMERGENCY_BLOCK_ALL_IN" -Direction Inbound -Action Block -Profile Any
 Collect forensic artefacts
cmd.exe /c "systeminfo > C:\EmergencyKit\systeminfo.txt"
reg export HKLM\SYSTEM\CurrentControlSet\Services\Tcpip\Parameters C:\EmergencyKit\tcpip_params.reg
3. Execute: `powershell -ExecutionPolicy Bypass -File C:\EmergencyKit\FastContain.ps1`
What this does: Immediately kills suspicious connections, applies network isolation, and captures memory/registry evidence—all within seconds.
2. API Security – The Unannounced Emergency
Just like a physical accident, API breaches often come without warning. A misconfigured endpoint or exposed key can lead to data exfiltration in minutes. Prepare an API emergency checklist and automated revocation script.
Step‑by‑step guide – Hardening and emergency API revocation:
Step 1 – Audit exposed keys (Linux/Windows with curl & jq):
 Search for hardcoded secrets in recent files
grep -r --include=".{env,json,conf,yaml,yml}" -E "API_KEY|SECRET|TOKEN" /var/www/ 2>/dev/null
 Test for overly permissive CORS or missing auth
curl -X OPTIONS https://api.target.com/endpoint -i | grep -i "access-control-allow-origin"
Step 2 – Emergency API key revocation (example with AWS CLI):
aws iam list-access-keys --user-1ame compromised_user
aws iam delete-access-key --access-key-id AKIA... --user-1ame compromised_user
 Rotate immediately
aws iam create-access-key --user-1ame compromised_user
Step 3 – Rate‑limit and WAF activation (cloud‑agnostic via curl):
 For Cloudflare API (example)
curl -X PATCH "https://api.cloudflare.com/client/v4/zones/ZONE_ID/settings/security_level" \
-H "Authorization: Bearer $CF_TOKEN" -H "Content-Type: application/json" \
--data '{"value":"under_attack"}'
Step 4 – Simulate a token leak response:
 Windows: Revoke all active Azure AD sessions
Revoke-AzureADUserAllRefreshToken -ObjectId "[email protected]"
 Force reauthentication
Update-MgUser -UserId "[email protected]" -PasswordPolicies "DisablePasswordExpiration,DisableStrongPassword"
What this does: Locates exposed credentials, immediately revokes access, enforces WAF lockdown, and invalidates active sessions—turning minutes of exposure into seconds of response.
3. Cloud Hardening – The “No Second Chances” Checklist
Cloud misconfigurations are silent killers. Use these pre‑prepared commands to lock down AWS, Azure, or GCP within a few seconds after alert detection.
Step‑by‑step guide – Rapid cloud containment:
AWS emergency isolation:
 Attach a deny‑all policy to the compromised EC2 instance role
aws iam put-role-policy --role-1ame CompromisedRole --policy-1ame EmergencyDenyAll --policy-document '{"Version":"2012-10-17","Statement":[{"Effect":"Deny","Action":"","Resource":""}]}'
 Snapshot critical EBS volumes before potential ransomware
aws ec2 create-snapshot --volume-id vol-0abcdef123456789 --description "Emergency backup $(date)"
 Isolate security group – remove all egress
aws ec2 revoke-security-group-egress --group-id sg-12345678 --protocol all --port all --cidr 0.0.0.0/0
Azure emergency response (Azure CLI):
 Block all inbound traffic to a VM
az network nsg rule create --1sg-1ame EmergencyNSG -g MyRG --1ame BlockAll --priority 100 --direction Inbound --access Deny --protocol '' --source-address-prefixes '' --destination-address-prefixes ''
 Enable Defender for Cloud emergency scan
az security assessment metadata create --1ame "emergency-scan" --display-1ame "Rapid Incident Response" --severity "High"
GCP quick isolation:
 Remove public IP from compromised instance
gcloud compute instances delete-access-config --zone us-central1-a instance-1ame --access-config-1ame "external-1at"
 Apply a firewall rule to block all traffic
gcloud compute firewall-rules create emergency-block-all --1etwork default --action deny --rules all --direction ingress --priority 0 --source-ranges 0.0.0.0/0
4. Vulnerability Exploitation & Mitigation – Simulating the Emergency
To truly be prepared, practice “red team in a box” drills using these safe commands.
Step‑by‑step guide – Simulate & mitigate credential replay:
1. Simulate (authorized environment only):
 Using hydra for SSH password brute force (LAB ONLY)
hydra -l admin -P /usr/share/wordlists/rockyou.txt ssh://192.168.1.10 -t 4 -w 30
2. Mitigation – Deploy fail2ban emergency config:
sudo apt install fail2ban -y
sudo systemctl stop fail2ban
echo -e "[bash]\nenabled = true\nmaxretry = 3\nbantime = 3600" | sudo tee /etc/fail2ban/jail.local
sudo systemctl start fail2ban
 Manual block of offending IP
sudo iptables -A INPUT -s 192.168.1.200 -j DROP
3. Windows equivalent – Block IP via netsh:
netsh advfirewall firewall add rule name="BlockEmerg" dir=in action=block remoteip=192.168.1.200/32
What Undercode Say:
– Key Takeaway 1: Preparedness transforms panic into procedure. The difference between a near‑miss and a full breach is having pre‑tested commands and a portable toolkit within arm’s reach.
– Key Takeaway 2: Automation is your “life saver.” Scripts that isolate, collect, and revoke in under 5 seconds outperform any manual response, just as an emergency tool outperforms hesitation.
Prediction:
– -1 By 2027, 60% of organizations without an automated “emergency button” (IR playbook + offline toolkit) will suffer extended downtime due to human error during first‑response seconds.
– +1 Emergence of open‑source “digital emergency kits” (DEKs) will become a compliance baseline for SOC 2 and ISO 27001, driving a new market of lightweight, auditable IR appliances.
– +1 AI‑powered incident prediction will shrink detection-to-containment from minutes to milliseconds, but the need for a reliable, offline “kill‑switch” toolkit will remain critical for air‑gapped and edge environments.
– -1 Attackers will increasingly target first‑response tools themselves—supply chain compromises of popular IR scripts will rise by 40% by 2026, demanding signed binaries and hash verification before deployment.
▶️ Related Video (78% Match):
🎯Let’s Practice For Free:
🎓 Live Courses & Certifications:
[Join Undercode Academy for Verified Certifications](https://undercode.co.uk/certifications/)
🚀 Request a Custom Project:
Secure, high-velocity infrastructure and disruptive technological engineering. Contact our engineering team for high-tier development and proprietary systems:
[[email protected]](mailto:[email protected])
💎 Smart Architecture | 🛡️ Secure by Design | ⭐ Trusted by Thousands
IT/Security Reporter URL:
Reported By: [Emergencykit Emergencytool](https://www.linkedin.com/posts/emergencykit-emergencytool-caraccessories-ugcPost-7469660903077183488-I5b-/) – Hackers Feeds
Extra Hub: Undercode MoN
Basic Verification: Pass ✅
🔐JOIN OUR CYBER WORLD [ CVE News • HackMonitor • UndercodeNews ]
[💬 Whatsapp](https://undercode.help/whatsapp) | [💬 Telegram](https://t.me/UndercodeCommunity)
📢 Follow UndercodeTesting & Stay Tuned:
[𝕏 formerly Twitter 🐦](https://x.com/undercodeupdate) | [@ Threads](https://www.threads.net/@undercodetesting) | [🔗 Linkedin](https://www.linkedin.com/company/undercodetesting/) | [🦋BlueSky](https://bsky.app/profile/undercode.bsky.social)


