Listen to this Post
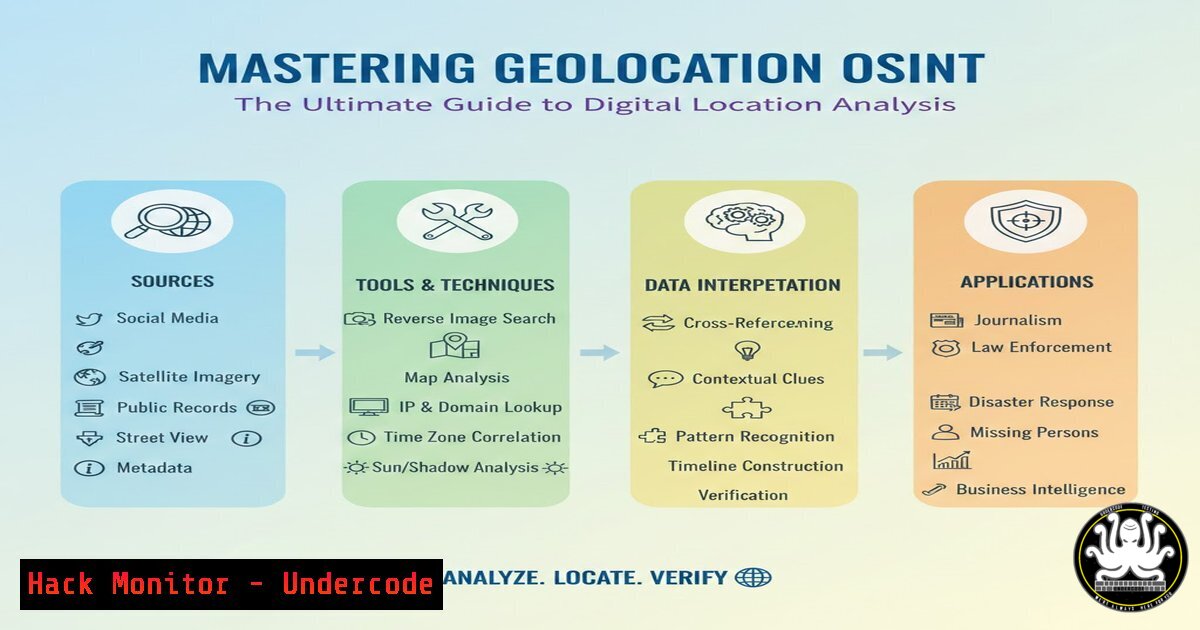
Introduction:
In the realm of cybersecurity and open-source intelligence, geolocation (GEOINT) is the art of pinpointing the exact location of an image, video, or event using only publicly available data. For security professionals, this technique is vital for verifying threat actor claims, identifying infrastructure in ransomware notes, or mapping out physical security perimeters. This guide breaks down the systematic approach to manual geolocation, transforming visual clues into actionable intelligence.
Learning Objectives:
- Understand the core principles and “two hemispheres” of geolocation analysis.
- Build a comprehensive toolkit of core GEOINT platforms and manual techniques.
- Master a step-by-step checklist for extracting and analyzing visual metadata and contextual clues.
- Apply these techniques to real-world scenarios for threat verification and incident response.
- Recognize the strengths, limitations, and future trajectory of geolocation in cybersecurity.
You Should Know:
1. The Two Hemispheres of Geolocation Analysis
Geolocation OSINT operates on two distinct analytical planes. The first is Macro-Geolocation, which focuses on regional characteristics such as language on signs, architectural styles, vegetation, soil color, and the angle of the sun. The second is Micro-Geolocation, which zooms in on unique identifiers like store logos, specific business names, vehicle license plates, or mountain silhouettes. A successful analysis weaves these two data sets together to narrow down a location from a continent to a specific street corner.
2. The Analyst’s Toolkit: Core GEOINT Platforms
While a search engine is a start, dedicated platforms accelerate the investigation. Here are essential tools for your workflow:
Google Earth Pro (Desktop): Offers historical imagery, a crucial feature for seeing how a location has changed over time, which can confirm whether a structure existed when a photo was taken.
SunCalc.net: Determines the sun’s position (azimuth and altitude) for any location and time. By analyzing shadows in an image, you can verify if the lighting matches the alleged time and location.
GeoCreepy: A tool that plots geolocation information from social media posts and photos on a map, helping to visualize a subject’s movements.
Overpass Turbo: An API-based tool that queries OpenStreetMap data. You can search for specific amenities (e.g., “pizza shop” or “blue mailbox”) within a specific radius, which is invaluable for micro-geolocation.
3. Manual Geolocation Checklist: What to Look For
Before opening any tool, perform a systematic visual sweep of the image. Create a checklist:
- Sky and Weather: Cloud types, sun position (for time of day), and visibility of celestial bodies (moon phase).
- Infrastructure: Power lines (pylon shapes vary by country), road markings (yellow vs. white lines), manhole covers, and signage.
- Language and Script: Street signs, billboards, shop names. Even a single word can narrow down a region.
- Flora and Fauna: Specific tree species (palm trees vs. pine trees) and soil composition.
- Cultural Markers: Flags, religious buildings, architectural styles, and vehicle models (e.g., prevalent American cars vs. European hatchbacks).
4. Extracting Hidden Data: The Command Line Approach
Modern smartphones strip GPS data from social media uploads, but not always. A crucial first step is checking the file itself. For locally stored images or those found in data leaks, you can extract metadata using command-line tools.
On Linux:
You can use exiftool, a powerful Perl application for reading and writing metadata.
 Install exiftool
sudo apt install exiftool  Debian/Ubuntu
 or
sudo yum install perl-Image-ExifTool  RHEL/CentOS

Extract all metadata from an image
exiftool -a -u -g1 image.jpg

Specifically filter for GPS coordinates
exiftool -GPSPosition -GPSLatitude -GPSLongitude image.jpg
On Windows:
You can use PowerShell or download the Windows version of exiftool.
 Using PowerShell to check for basic metadata
Get-ItemProperty -Path "C:\path\to\image.jpg" | Format-List -Property

For comprehensive EXIF data, download ExifTool for Windows.
 Once added to PATH, run in Command
exiftool.exe -a -u -g1 image.jpg
If GPS data exists, you now have a precise location. If not, the timestamp can be used with tools like SunCalc.
5. Geolocation OSINT in Action: A Scenario
Imagine a threat actor posts a photo of a ransom note on a public forum. The note is held against a window showing a view of a bridge and a distinctive red-brick building.
Step 1: Macro Analysis. The architecture of the bridge is arched stone. The sky is overcast. The language on a distant sign is English. This suggests the UK or possibly the Northeastern US.
Step 2: Feature Extraction. The red-brick building has a unique white clock tower. Search image databases or reverse image search (Google Images, Yandex) for “red brick clock tower [bash]”.
Step 3: Terrain Matching. Using Google Earth, fly over the area identified by the search. Align the bridge’s curvature and the viewing angle from the window. By comparing the angle of the bridge relative to the building, you can triangulate the specific window or floor the photo was taken from.
Step 4: Verification. Use SunCalc to check the shadows in the photo against the time of the post to ensure consistency.
6. Strengths and Limits of Geolocation OSINT
The primary strength is verification. It turns circumstantial evidence into concrete proof. However, its limits are significant:
Deepfakes and AI: Generative AI can create “locations” that don’t exist, blending architectural styles from different continents.
Obfuscation: Sophisticated actors will strip metadata and avoid including recognizable landmarks.
Time Decay: Landscapes change. A photo from 2015 might show a building that was demolished in 2018. Historical imagery is vital to counter this.
7. Vulnerability Exploitation/Mitigation: A Defender’s View
Understanding geolocation helps both attackers and defenders.
For the Attacker (Red Team): Use GEOINT to map a target’s physical perimeter. Identify unguarded entrances, nearby public Wi-Fi access points (war driving), or the locations of employees (via social media posts) for phishing pretexts.
Example Command (War Driving Recon): `airodump-ng wlan0 –write survey` (Captures nearby Wi-Fi networks and their BSSIDs for physical mapping).
For the Defender (Blue Team): Conduct regular “digital perimeter” audits. Search your own organization’s social media for images that expose sensitive information (keycards, whiteboards, server room layouts). Implement policies against geotagging posts from secure areas. Use OSINT tools proactively to see what a potential attacker can learn about your physical infrastructure.
What Undercode Say:
- The Human Element is Key: While AI and automated tools are advancing, the most resilient geolocation skills remain fundamentally human—pattern recognition, cultural knowledge, and deductive reasoning. Tools assist, but the analyst’s intuition drives the breakthrough.
- Data is a Double-Edged Sword: The very metadata and visual breadcrumbs that allow for powerful intelligence gathering are the same vectors that expose organizations to physical breaches. In the age of remote work, the line between digital footprint and physical vulnerability has completely eroded.
Prediction:
As generative AI becomes indistinguishable from reality, the field of geolocation will bifurcate. We will see the rise of “Digital Provenance Analysis”—tools that analyze lighting inconsistencies, atmospheric lensing, and shadow physics to differentiate real photographs from synthetic ones. The future of GEOINT won’t just be about where a photo was taken, but if it was taken at all, forcing analysts to become digital physicists as much as detectives.
▶️ Related Video (88% Match):
🎯Let’s Practice For Free:
IT/Security Reporter URL:
Reported By: Https: – Hackers Feeds
Extra Hub: Undercode MoN
Basic Verification: Pass ✅


