Listen to this Post
Introduction:
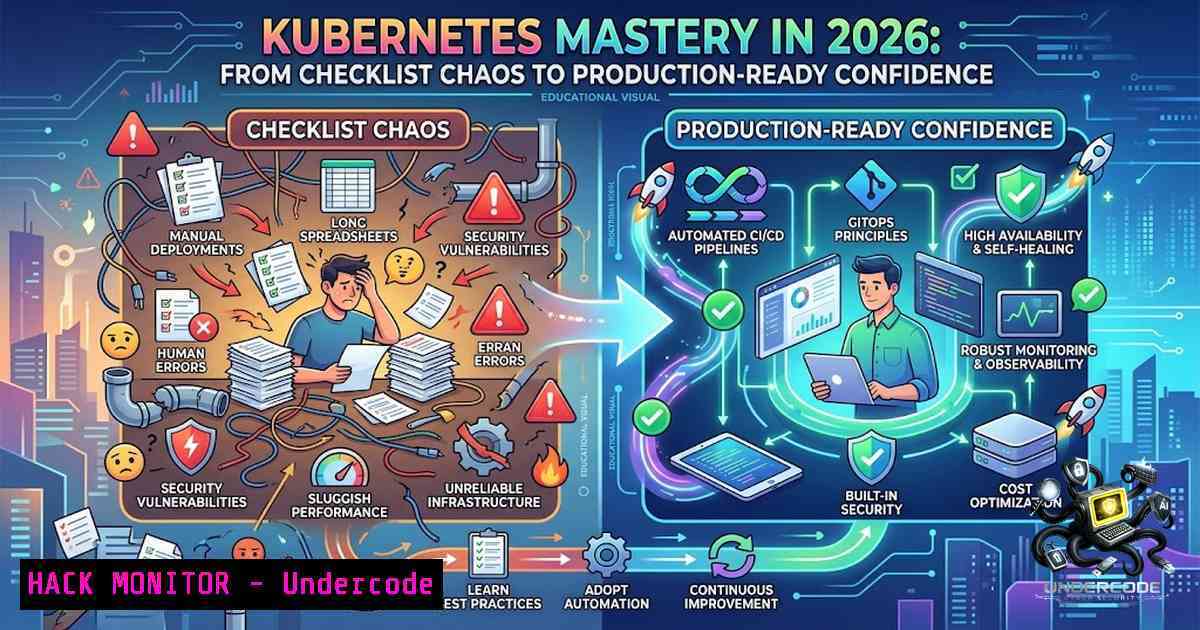
The Kubernetes ecosystem has grown so vast that even seasoned engineers often find themselves drowning in a sea of components—Pods, Services, Ingress, RBAC, Helm, Operators, CRDs, and Admission Webhooks. The common trap is treating this orchestration platform like a checklist, collecting topics without ever building the practical confidence needed to ship resilient applications. This article transforms that scattered approach into a structured, layer-by-layer roadmap that prioritizes production skills over theoretical breadth, ensuring you become truly Kubernetes-ready by solving real deployment problems one at a time.
Learning Objectives:
- Understand the critical difference between collecting Kubernetes topics and connecting them into a functional mental model.
- Master the foundational workflow of deploying, exposing, securing, and monitoring a single application.
- Trace the end-to-end path of a `kubectl apply` request through the API Server, Scheduler, Controller Manager, and Kubelet.
- Implement essential production safeguards including RBAC, liveness/readiness probes, and basic monitoring before touching advanced features.
- Gain the confidence to troubleshoot and break systems deliberately to identify improvement areas.
You Should Know:
1. The Layer-by-Layer Learning Roadmap
The journey to Kubernetes proficiency is not a sprint through every available feature. It is a strategic climb through distinct layers of understanding. Many junior engineers mistakenly believe they need to master Custom Resource Definitions (CRDs) or Admission Webhooks before they can deploy a reliable application. This is a fallacy. The correct order prioritizes immediate, actionable skills that build upon each other.
Start with the essentials: Pods, Deployments, Services, ConfigMaps, and Secrets. These are the building blocks of any application. Deploy a simple stateless application, like a web server, and configure its environment variables and sensitive data using ConfigMaps and Secrets. Once your application is running, the next step is to understand the control plane. Follow a single `kubectl apply` request as it traverses the API Server (which authenticates and validates), the Scheduler (which assigns the pod to a node), the Controller Manager (which ensures the desired state), and finally the Kubelet on the node (which runs the containers). This trace gives you a mental map of the entire system.
Only after you have a firm grasp of these fundamentals should you layer on production-critical features like RBAC (Role-Based Access Control) for security, liveness and readiness probes for application health, and basic monitoring with tools like Prometheus. Advanced topics like Helm, Operators, CRDs, and Admission Webhooks will make significantly more sense once you have wrestled with real-world deployment problems and understand the gaps they are designed to fill.
Step-by-Step Guide: Deploying Your First Production-Ready Application
This guide will walk you through deploying a simple Nginx application with environment variables and a readiness probe.
1. Create a Namespace: Isolate your work.
kubectl create namespace my-app
2. Create a ConfigMap: Store non-sensitive configuration.
 configmap.yaml
apiVersion: v1
kind: ConfigMap
metadata:
name: app-config
namespace: my-app
data:
APP_ENV: "production"
LOG_LEVEL: "info"
Apply it: `kubectl apply -f configmap.yaml`
- Create a Secret: Store sensitive data (base64 encoded).
kubectl create secret generic app-secret --1amespace my-app --from-literal=DB_PASSWORD=MySecurePassword123
- Create a Deployment: Define your application pods with probes.
deployment.yaml
apiVersion: apps/v1
kind: Deployment
metadata:
name: nginx-app
namespace: my-app
spec:
replicas: 2
selector:
matchLabels:
app: nginx
template:
metadata:
labels:
app: nginx
spec:
containers:</li>
</ol>

- name: nginx
image: nginx:1.21
ports:
- containerPort: 80
envFrom:
- configMapRef:
name: app-config
- secretRef:
name: app-secret
livenessProbe:
httpGet:
path: /
port: 80
initialDelaySeconds: 30
periodSeconds: 10
readinessProbe:
httpGet:
path: /
port: 80
initialDelaySeconds: 5
periodSeconds: 5
Apply it: `kubectl apply -f deployment.yaml`
- Create a Service: Expose your application internally or externally.
service.yaml
apiVersion: v1
kind: Service
metadata:
name: nginx-service
namespace: my-app
spec:
selector:
app: nginx
ports:</li>
</ol>

- protocol: TCP
port: 80
targetPort: 80
type: ClusterIP
Apply it: `kubectl apply -f service.yaml`
6. Verify the Deployment:
kubectl get pods -1 my-app
kubectl get svc -1 my-app
kubectl describe pod <pod-1ame> -1 my-app
- Shifting from Theory to Practice: The “Break and Fix” Mindset
A significant gap exists between watching videos and shipping code. An engineer who has deployed, exposed, secured, and monitored one application is already ahead of someone who has watched 50 hours of Kubernetes videos without shipping anything. The core skill is not memorization; it is the ability to solve one deployment problem at a time.
This is where the “break and fix” methodology becomes invaluable. Instead of aiming for a perfect deployment on the first try, deliberately introduce faults into your cluster to understand how Kubernetes responds. This practice builds deep, intuitive knowledge of the system’s resilience and failure modes. It is the difference between being a user of Kubernetes and being an engineer who can tame it.
Step-by-Step Guide: Breaking and Troubleshooting Your Cluster
- Simulate a Pod Failure: Delete a running pod and observe the replication controller or deployment bringing it back.
kubectl delete pod <pod-1ame> -1 my-app
watch kubectl get pods -1 my-app
- Simulate a Node Failure: (In a test environment) cordon and drain a node to see how pods are rescheduled.
kubectl cordon <node-1ame>
kubectl drain <node-1ame> --ignore-daemonsets --delete-emptydir-data
- Introduce Network Policy: Create a restrictive NetworkPolicy and see how it affects communication between pods.
- Cause a CrashLoopBackOff: Introduce an error in your application image or its configuration (e.g., a wrong port in the readiness probe) and watch the pod status change.
kubectl get events -1 my-app --sort-by='.lastTimestamp'
kubectl logs <pod-1ame> -1 my-app
- Analyze Resource Constraints: Set a CPU or memory limit that is too low and observe the pod being OOMKilled.
resources:
limits:
memory: "128Mi"
cpu: "100m"
-
Essential Linux and Windows Commands for Kubernetes Troubleshooting
While `kubectl` is your primary tool, deep troubleshooting often requires stepping inside the node or the container itself. Here are essential commands for both Linux and Windows environments.
Linux Commands (Inside the Node or Container):
- Process and Resource Inspection:
– `top` /htop: View real-time process and resource usage. ps aux: List all running processes.free -m: Check memory usage.df -h: Check disk space.netstat -tulpn: List all listening ports and the associated processes.- Container Runtime Inspection (Docker/containerd):
– `docker ps` /crictl ps: List running containers.
– `docker logs` / crictl logs <container-id>: View container logs. docker exec -it <container-id> /bin/bash: Get an interactive shell inside a container.- Network Debugging:
ping <ip-address>: Test basic connectivity.curl -v <service-url>: Debug HTTP requests.tcpdump -i any port 80: Capture network traffic on a specific port.
Windows Commands (For Windows Nodes or Admin Workstations):
- Process and Resource Inspection:
tasklist: List all running processes.wmic os get freephysicalmemory, TotalVisibleMemorySize: Check memory usage.wmic logicaldisk get size, freespace, caption: Check disk space.netstat -ano: List all listening ports and the associated process IDs.- Network Debugging:
ping <ip-address>: Test basic connectivity.Test-1etConnection <ip-address> -Port <port>: Test connectivity to a specific port.curl.exe -v <service-url>: Debug HTTP requests.
4. Hardening Your Kubernetes Cluster: Security Best Practices
Security in Kubernetes is not an afterthought; it is a fundamental layer that must be integrated from the start. Misconfigurations are a primary vector for attacks. The principle of least privilege should guide every decision.
Step-by-Step Guide: Implementing Core Security Controls
- Enable and Configure RBAC: Never use the default `cluster-admin` for everyday tasks. Create specific Roles and RoleBindings for different users and service accounts.
role.yaml
apiVersion: rbac.authorization.k8s.io/v1
kind: Role
metadata:
namespace: my-app
name: pod-reader
rules:</li>
</ol>

- apiGroups: [""]  "" indicates the core API group
resources: ["pods"]
verbs: ["get", "watch", "list"]
2. Implement Network Policies: By default, all pods can communicate with each other. Use NetworkPolicies to segment traffic and enforce zero-trust principles.
3. Secure Secrets: Avoid storing secrets in environment variables if possible. Use a dedicated secrets management solution or mount them as volumes. Ensure etcd is encrypted at rest.Enable encryption at rest for etcd This is a cluster-level configuration in the API server manifest
4. Use Pod Security Standards (PSS) / Pod Security Admissions (PSA): Enforce policies like “restricted” to prevent privileged containers, hostPath mounts, and other risky configurations.
5. Regularly Scan Images: Use tools like Trivy or Clair to scan your container images for known vulnerabilities before deployment.5. API Security and Cloud-1ative Hardening
As you move towards a cloud-1ative architecture, the security perimeter shifts from the network edge to the identity of workloads and APIs. Securing your Kubernetes API server and the applications running on it is paramount.
Step-by-Step Guide: Securing Your API and Cloud Environment
1. Secure the Kubernetes API Server:
- Authentication: Use strong authentication mechanisms like OIDC or client certificates. Disable anonymous access.
- Authorization: Always use RBAC. Regularly audit your RBAC configurations.
- TLS: Ensure all communication with the API server is over TLS. Use a trusted Certificate Authority (CA).
- Implement Service Mesh (e.g., Istio, Linkerd): A service mesh provides mTLS encryption between services, fine-grained traffic policies, and observability. This adds a powerful security layer without modifying application code.
3. Cloud Provider Hardening:
- IAM Roles: Assign the minimum necessary IAM permissions to your worker nodes and control plane.
- Network Security Groups (NSGs) / Firewalls: Restrict access to your cluster’s API server to only trusted IP ranges.
- Audit Logging: Enable and centralize audit logs for all cloud and Kubernetes API calls.
- API Gateway (e.g., Kong, Ambassador): Use an API Gateway to manage, secure, and monitor traffic entering your cluster. It can handle authentication, rate limiting, and request transformation.
What Undercode Say:
- Key Takeaway 1: True Kubernetes proficiency is achieved by connecting concepts through practical application, not by passively collecting topics. The most effective learning path is to deploy, break, fix, and repeat.
- Key Takeaway 2: A structured, layer-by-layer approach that prioritizes foundational components (Pods, Deployments, Services) and production safeguards (RBAC, probes, monitoring) is far more effective than jumping into advanced features like CRDs and Operators too early.
Analysis:
The post by Anusha Sundaramurthi highlights a critical pedagogical failure in the Kubernetes community: the obsession with breadth over depth. Many learners are paralyzed by the sheer volume of tools and concepts, mistaking familiarity for competence. The solution is not to learn more, but to learn with intention. By focusing on a single, end-to-end deployment and systematically exploring its failure modes, an engineer builds a resilient mental model that can be applied to any new problem. This approach aligns with the principles of “deliberate practice” and is the most efficient way to achieve true mastery. The emphasis on “shipping” something—getting an application into production—is the ultimate differentiator between a hobbyist and a professional. The future of Kubernetes education will likely shift from certification-driven checklists to project-based, problem-solving bootcamps that simulate real-world chaos.
Prediction:
- +1 The shift towards practical, project-based learning will accelerate, leading to a new generation of engineers who are more resilient and capable of handling complex, distributed systems from day one.
- +1 The “break and fix” methodology will become a standard part of Kubernetes training, with more formalized chaos engineering curricula being integrated into DevOps bootcamps.
- -1 The gap between certified professionals and production-ready engineers will widen, potentially devaluing traditional Kubernetes certifications that do not adequately test practical problem-solving skills.
- -1 As the ecosystem continues to grow, the “checklist” mentality will persist, creating a market for simplified, opinionated platforms that abstract away complexity, potentially leading to vendor lock-in and a loss of deep, foundational knowledge.
▶️ Related Video (88% Match):
🎯Let’s Practice For Free:
🎓 Live Courses & Certifications:
Join Undercode Academy for Verified Certifications
🚀 Request a Custom Project:
Secure, high-velocity infrastructure and disruptive technological engineering. Contact our engineering team for high-tier development and proprietary systems:
[email protected]
💎 Smart Architecture | 🛡️ Secure by Design | ⭐ Trusted by ThousandsIT/Security Reporter URL:
Reported By: Anusha Sundaramurthi1728 – Hackers Feeds
Extra Hub: Undercode MoN
Basic Verification: Pass ✅🔐JOIN OUR CYBER WORLD [ CVE News • HackMonitor • UndercodeNews ]
📢 Follow UndercodeTesting & Stay Tuned:
- Create a Service: Expose your application internally or externally.


