Listen to this Post
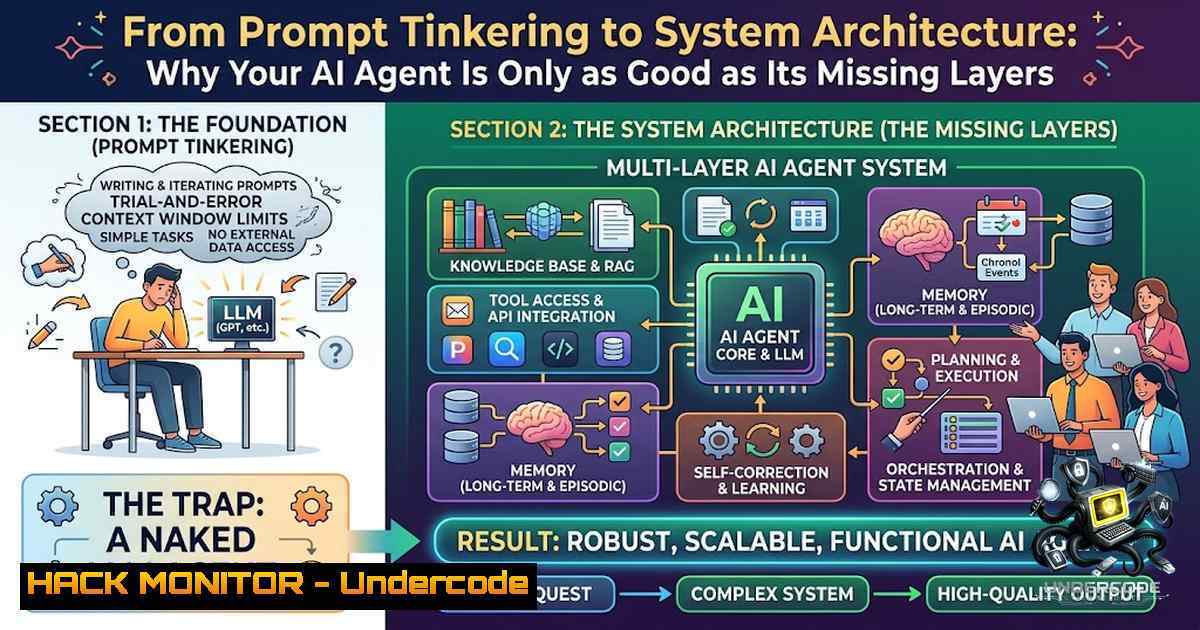
Introduction:
For two years, the AI engineering community has been obsessed with a single question: “Can I write a better prompt?” That question is now obsolete. In production AI systems, prompt engineering has been demoted from the entire game to merely the first layer of a five‑stack architecture. The real differentiator isn’t which model you use—it’s which of the five layers your system is still missing. As Usman Ghani aptly puts it, “The model is turning into a commodity. The system built around it is where the real work—and the real edge—actually lives.”
Learning Objectives:
- Understand the five‑layer architecture of production AI systems: Prompt, Context, Harness, Loop, and Graph Engineering.
- Learn how to implement token‑aware context management and memory hierarchies using tools like `anchor` and LangChain.
- Master harness engineering patterns including tool registration, verification gates, and guardrail enforcement.
- Build autonomous feedback loops with iteration caps, budget controls, and verifiable stop conditions.
- Design multi‑agent graphs with specialized roles, handoffs, and human‑in‑the‑loop approval.
1. Prompt Engineering — The Message
Prompt engineering remains the foundation, but it is no longer sufficient. It shapes the wording of a single request: the role, instructions, examples, and format. In 2026, the paradigm has evolved from simple prompting to “Flow Engineering” and “Agentic Orchestration,” with techniques like Chain‑of‑Thought (CoT), Tree‑of‑Thoughts, and Graph‑of‑Thought outperforming linear structures. The CTCO Framework now replaces conversational prompts in production, and `reasoning_effort` has replaced temperature as the primary control.
Step‑by‑step guide: Building a production‑grade prompt
- Define the goal clearly rather than sharing a broad idea.
2. Use short, declarative, testable instructions.
- Include 3 to 8 input‑output examples for few‑shot learning.
- Implement Instruction Hierarchy for security (OWASP 1 risk).
- Add XML scaffolding to delimit different sections and prevent injection.
Example system prompt template:
<system>
You are a senior software engineer specializing in API security.
<instructions>
- Think step by step before responding.
- Always validate input parameters against an allowlist.
- Never expose internal error stack traces to the client.
</instructions>
<examples>
Input: "GET /users? id=1 OR 1=1"
Output: "Detected SQL injection attempt. Blocked."
</examples>
</system>
2. Context Engineering — The Memory
Context engineering decides what fills the model’s context window: docs, memory, tools, and past turns. As Andrej Karpathy noted, it is “the delicate art and science of filling the context window with just the right information for the next step”. This layer is the difference between a model that feels sharp and one that feels forgetful. Key challenges include Context Pollution—overloading the window with too much data, exceeding token limits, and introducing noise that increases hallucination rates.
Step‑by‑step guide: Implementing token‑aware context management
1. Install a context engineering toolkit like `anchor`:
pip install astro-anchor[bash]  For BM25 sparse retrieval
pip install astro-anchor[bash]  For Anthropic Claude support
pip install astro-anchor[bash]  For CLI tools
- Build a token‑aware pipeline with smart budgets and hybrid retrieval:
from anchor import ContextPipeline, MemoryManager, AnthropicFormatter</li> </ol> pipeline = ( ContextPipeline(max_tokens=8192) .with_memory(MemoryManager(conversation_tokens=4096)) .with_formatter(AnthropicFormatter()) .add_system_prompt("You are a helpful assistant.") ) result = pipeline.build("What is context engineering?") print(result.formatted_output) Ready for Claude API print(result.diagnostics) Token usage, timing, overflow info- Implement hybrid RAG with dense embeddings and BM25 sparse retrieval:
from anchor import ContextPipeline, DenseRetriever, InMemoryVectorStore</li> </ol> dense = DenseRetriever( vector_store=InMemoryVectorStore(), context_store=InMemoryContextStore(), embed_fn=my_embed_fn, ) items = [ ContextItem(content="Python is great for data science.", source=SourceType.RETRIEVAL), ContextItem(content="RAG combines retrieval with generation.", source=SourceType.RETRIEVAL), ] dense.index(items) pipeline = ContextPipeline(max_tokens=8192).add_step(retriever_step("search", dense, top_k=5))- Manage short‑term and long‑term memory using sliding windows and semantic memory via vector‑enabled datastores like Elasticsearch.
3. Harness Engineering — The Machine
A harness is the software system that governs how an AI agent operates. It manages tools, memory, retries, context engineering, and verification so the model can focus on reasoning. This layer turns a chatbot into a system: tools fire, sub‑agents get pulled in, and a verifier checks the output before a person ever sees it. Quality control is wired in from the start.
Step‑by‑step guide: Building an agent harness
- Set up the harness core with six components: Tool Integration, Memory & State, Context Engineering, Planning, Verification & Guardrails, and Modularity.
2. Register tools with risk levels (low/medium/high):
from harness_core import ToolRegistry

registry = ToolRegistry()
registry.register("calculator", risk="low")
registry.register("web_search", risk="medium")
registry.register("code_execute", risk="high")
3. Implement verification and guardrails:
 Rule-based checks + PII detection, toxicity filtering, code injection prevention
verifier = Verifier()
guardrails = Guardrails(
pii_detection=True,  email, phone, SSN, credit card, IP
toxicity_filtering=True,
code_injection_prevention=True,
response_length_limit=4096
)
4. Add human‑in‑the‑loop approval for high‑risk tools:
High-risk tools require approval before execution if tool.risk == "high": approval = input(f"Approve execution of {tool.name}? (y/n): ") if approval.lower() != 'y': return "Execution blocked by user."- Load configuration from YAML presets (autonomous, conservative, minimal, guardrails, budget‑limited).
4. Loop Engineering — The System
Loop engineering decides when the model runs again and when it stops. As Boris Cherny (creator of Claude Code) put it: “I don’t prompt Claude anymore. I have loops running that prompt Claude.” A loop is a recursive goal: you define what “done” looks like, and the agent iterates until it gets there. This layer brings autonomy together with discipline through iteration caps, budget controls, and progress checks.
Step‑by‑step guide: Implementing autonomous feedback loops
1. Install OpenLoop, a universal loop engineering framework:
python -m venv .venv
source .venv/bin/activate
pip install -e .
openloop init .openloop/demo --project-root examples/demo_project \
--mission "Keep the demo project working and above baseline"
2. Configure the loop with `openloop.json`:
{ "version": 1, "mission": "Keep the project playable, verified, and above baseline.", "total_rounds": 3, "project_root": ".", "commands": { "play": "python app.py", "scan": "python -m unittest discover -s . -p 'test_.py'", "fix": "your-agent-cli --workspace {project_root} --task 'Fix the latest failure'", "verify": "python -m unittest discover -s . -p 'test_.py'" }, "baseline": { "enabled": true, "command": "python benchmark.py", "metric_name": "score", "regex": "score=([0-9]+(?:\.[0-9]+)?)", "value": 0.9 } }- Run the loop with budget caps and iteration limits:
openloop run .openloop/demo --max-rounds 1
openloop status .openloop/demo
-
Use LoopFlow for Claude Code with YAML workflows:
name: test-and-fix
description: Run the test suite, fix failures, verify the fix.
budget:
max_usd: 2.00  hard ceiling for the whole run
max_iterations: 3  how many attempts the gate may allow
5. Run the loop:
npx @loopflow/cli run test-and-fix --dry-run  preview
npx @loopflow/cli run test-and-fix  execute
5. Graph Engineering — The Organization
The final layer isn’t one agent—it’s a team. Planner, Researcher, Builder, Reviewer, Distributor—all working off shared memory, with a human approving where it matters. Multi‑agent system (MAS) workflows can be naturally modeled as directed computation graphs, where nodes execute agents or sub‑workflows and edges encode dependencies and message passing.
Step‑by‑step guide: Building a multi‑agent graph with LangGraph
1. Install LangGraph:
pip install langgraph langchain-openai
- Define specialized agents (Research Agent, Writer Agent, etc.):
from langchain_openai import ChatOpenAI from langgraph.graph import StateGraph, END</li> </ol> model = ChatOpenAI(model="gpt-4") def research_agent(state): Research logic return {"research": "Research findings..."} def writer_agent(state): Writing logic based on research return {"draft": "Draft content..."} def reviewer_agent(state): Review and verification logic return {"approved": True}- Build the graph with handoffs using `Command(goto=…)` for routing:
from langgraph.graph import StateGraph, Command</li>
</ol>

graph = StateGraph(dict)
graph.add_node("researcher", research_agent)
graph.add_node("writer", writer_agent)
graph.add_node("reviewer", reviewer_agent)

graph.add_edge("researcher", "writer")
graph.add_conditional_edges(
"reviewer",
lambda state: "writer" if not state["approved"] else END
)
graph.set_entry_point("researcher")
app = graph.compile()
4. Implement subgraphs for reusable workflows:
A subgraph is a graph used as a node in another graph subgraph = StateGraph(dict) ... define subgraph nodes and edges main_graph.add_node("sub_workflow", subgraph.compile())- Add parallel execution with the `Send` API for fan‑out to multiple agents:
from langgraph.constants import Send</li>
</ol>

def continue_to_reviewers(state):
return [Send("reviewer", {"draft": draft}) for draft in state["drafts"]]
What Undercode Say:
- Key Takeaway 1: The model is commoditizing—the real competitive advantage lies in the five‑layer system you build around it. Prompt engineering alone is no longer enough; context, harness, loop, and graph engineering are where the real work happens.
-
Key Takeaway 2: Context engineering is fundamentally a curation problem, not a writing one. Managing token budgets, memory hierarchies, and hybrid retrieval is what separates sharp, responsive agents from forgetful, hallucinating ones.
-
Key Takeaway 3: Harness engineering introduces quality control from the start—verification gates, guardrails, and human‑in‑the‑loop approval prevent agents from running wild. This is the layer that builds trust in autonomous systems.
-
Key Takeaway 4: Loop engineering transforms agents from one‑shot responders to persistent, self‑improving systems. With iteration caps, budget enforcement, and verifiable stop conditions, autonomy meets discipline.
-
Key Takeaway 5: Graph engineering orchestrates entire teams of specialized agents. The future of AI isn’t a single super‑intelligent model—it’s a coordinated system of models, each doing what it does best, with humans in the loop where it matters.
Analysis: The five‑layer architecture represents a fundamental shift in how we think about AI systems. The progression from prompt to graph mirrors the evolution from scripting to distributed systems in traditional software engineering. Each layer adds complexity but also capability—context adds memory, harness adds reliability, loop adds persistence, and graph adds coordination. Organizations that master all five layers will have a significant edge over those still stuck at the prompt level. The tools are maturing rapidly: `anchor` for context, `harness` frameworks for governance, `OpenLoop` and `LoopFlow` for loops, and `LangGraph` for multi‑agent orchestration. The barrier to entry is lowering, but the depth of expertise required is increasing.
Prediction:
- +1 The five‑layer architecture will become the de facto standard for production AI systems within 18 months, with major cloud providers offering managed services for each layer.
-
+1 Context engineering toolkits like `anchor` will become as essential as vector databases are today, with token‑aware pipelines becoming a standard part of every AI stack.
-
-1 Organizations that continue to treat prompt engineering as the only layer will fall behind, unable to build reliable, scalable AI systems that can operate autonomously.
-
+1 Loop engineering will give rise to a new category of “AI operations” (AIOps) professionals who specialize in designing and monitoring autonomous feedback loops.
-
-1 The complexity of graph engineering will introduce new failure modes—agent miscommunication, coordination overhead, and debugging challenges—that will require entirely new observability tooling.
-
+1 By 2027, multi‑agent graphs will be the primary architecture for enterprise AI, with specialized agents for every business function, coordinated through shared memory and human approval workflows.
▶️ Related Video (72% Match):
https://www.youtube.com/watch?v=6JA-oO4ywaU
🎯Let’s Practice For Free:
🎓 Live Courses & Certifications:
Join Undercode Academy for Verified Certifications
🚀 Request a Custom Project:
Secure, high-velocity infrastructure and disruptive technological engineering. Contact our engineering team for high-tier development and proprietary systems:
[email protected]
💎 Smart Architecture | 🛡️ Secure by Design | ⭐ Trusted by ThousandsIT/Security Reporter URL:
Reported By: Usman Ghani – Hackers Feeds
Extra Hub: Undercode MoN
Basic Verification: Pass ✅🔐JOIN OUR CYBER WORLD [ CVE News • HackMonitor • UndercodeNews ]
📢 Follow UndercodeTesting & Stay Tuned:
- Add parallel execution with the `Send` API for fan‑out to multiple agents:
- Build the graph with handoffs using `Command(goto=…)` for routing:
- Implement hybrid RAG with dense embeddings and BM25 sparse retrieval:


