Listen to this Post
Introduction:
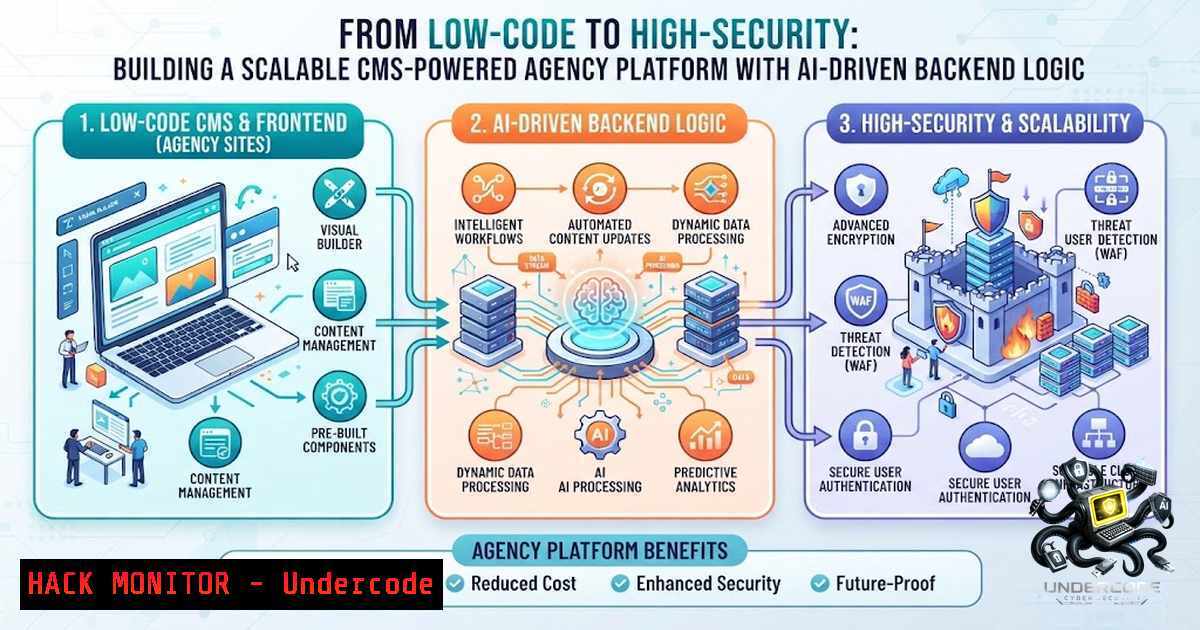
Modern digital agencies require more than a static landing page—they need dynamic, scalable solutions that reflect luxury brand identities while streamlining operations. This project involved architecting and deploying a comprehensive web platform for Dubai Digital Marketing, a creative agency based in Benha, Egypt, using a modern tech stack that includes Lovable for rapid frontend development and Supabase for backend data management【1†L8-L11】. The integration of AI-driven concepts from academic studies enabled the creation of an optimized, secure, and user-friendly system that merges strategic business needs with cutting-edge technical execution【1†L14-L16】.
Learning Objectives:
- Understand how to architect a dynamic CMS with an admin dashboard for portfolio management.
- Learn to implement secure consultation pipelines and lead capture workflows.
- Explore the integration of low-code platforms with robust backend services for scalable web solutions.
- Gain insights into applying AI and data science principles to real-world web development projects.
You Should Know:
1. Dynamic CMS and Admin Dashboard Development
Building a secure backend portal that allows non-technical users to manage content dynamically is a cornerstone of modern web platforms. For the Dubai Digital Marketing project, the admin dashboard was designed to enable easy editing and categorization of the “Selected Works” portfolio【1†L10-L11】. This required a robust authentication system, role-based access control (RBAC), and a user-friendly interface.
Step-by-Step Guide to Implementing a Secure CMS Dashboard:
Step 1: Define Data Models
Start by defining the data structure for your portfolio items. For a Supabase backend, this involves creating tables in PostgreSQL. Example SQL schema:
CREATE TABLE portfolio_items (
id UUID PRIMARY KEY DEFAULT gen_random_uuid(),
title VARCHAR(255) NOT NULL,
category VARCHAR(100),
description TEXT,
image_url TEXT,
created_at TIMESTAMP WITH TIME ZONE DEFAULT NOW(),
updated_at TIMESTAMP WITH TIME ZONE DEFAULT NOW()
);
Step 2: Set Up Authentication and Row-Level Security (RLS)
Supabase provides built-in authentication. Enable RLS on your tables to ensure users can only access data they are authorized to see.
ALTER TABLE portfolio_items ENABLE ROW LEVEL SECURITY;

CREATE POLICY "Allow authenticated users to select" ON portfolio_items
FOR SELECT USING (auth.role() = 'authenticated');

CREATE POLICY "Allow authenticated users to insert" ON portfolio_items
FOR INSERT WITH CHECK (auth.role() = 'authenticated');
Step 3: Build the Admin Frontend with Lovable
Lovable is a low-code platform that accelerates frontend development【1†L13】. Connect it to your Supabase backend using the Supabase JavaScript client. Create components for listing, adding, editing, and deleting portfolio items. Implement form validation and real-time updates using Supabase’s Realtime subscriptions.
Step 4: Implement Role-Based Access Control (RBAC)
Define user roles (e.g., admin, editor, viewer) in your authentication system. Use custom claims or a separate user_roles table to manage permissions. On the frontend, conditionally render UI elements based on the user’s role.
Step 5: Secure API Endpoints
If you’re using custom API endpoints (e.g., via Supabase Edge Functions or a separate backend), ensure they are secured with JWT validation. Example using Supabase Edge Function:
import { serve } from "https://deno.land/[email protected]/http/server.ts";
import { createClient } from "https://esm.sh/@supabase/supabase-js@2";

serve(async (req) => {
const { pathname } = new URL(req.url);
const authHeader = req.headers.get('Authorization')!;
const token = authHeader.replace('Bearer ', '');
const supabase = createClient(
Deno.env.get('SUPABASE_URL') ?? '',
Deno.env.get('SUPABASE_ANON_KEY') ?? '',
{ global: { headers: { Authorization: `Bearer ${token}` } } }
);
const { data: { user }, error } = await supabase.auth.getUser(token);
if (error || !user) {
return new Response(JSON.stringify({ error: 'Unauthorized' }), { status: 401 });
}
// Proceed with authorized logic
});
Step 6: Deploy and Monitor
Deploy the frontend (Lovable projects can be exported or deployed via their platform) and the backend (Supabase provides hosting for Edge Functions). Set up monitoring and logging to track errors and performance.
2. Integrated Consultation Pipeline and Lead Capture
The platform features a seamless “Book Appointment” flow that captures client leads and project briefs directly into the admin panel【1†L12】. This integration streamlines the sales process and ensures that no lead is lost.
Step-by-Step Guide to Building a Secure Consultation Pipeline:
Step 1: Design the Appointment Form
Create a user-friendly form with fields for name, email, phone, project type, budget, and a message. Use frontend validation to ensure data integrity.
Step 2: Set Up a Secure Database Table
In Supabase, create a table to store appointment requests:
CREATE TABLE appointments (
id UUID PRIMARY KEY DEFAULT gen_random_uuid(),
name VARCHAR(255) NOT NULL,
email VARCHAR(255) NOT NULL,
phone VARCHAR(20),
project_type VARCHAR(100),
budget VARCHAR(50),
message TEXT,
status VARCHAR(50) DEFAULT 'pending',
created_at TIMESTAMP WITH TIME ZONE DEFAULT NOW()
);
Enable RLS and create policies to allow public insert (for form submissions) but restrict read/update to authenticated admins.
CREATE POLICY "Allow public insert" ON appointments
FOR INSERT WITH CHECK (true);

CREATE POLICY "Allow authenticated read" ON appointments
FOR SELECT USING (auth.role() = 'authenticated');
Step 3: Implement Form Submission with CSRF Protection
Use Supabase’s anonymous key for public inserts, but ensure you have CSRF protection in place. Generate a token for each form session and validate it on submission.
Step 4: Build the Admin Interface for Lead Management
Create a dashboard view in the admin panel that lists all appointments with filtering and sorting capabilities. Allow admins to update the status (e.g., contacted, scheduled, completed) and add notes.
Step 5: Set Up Email Notifications
Use Supabase Edge Functions or a third-party service like SendGrid to send email notifications to the agency when a new appointment is booked. Ensure that sensitive information (like email content) is encrypted in transit.
Step 6: Implement Data Validation and Sanitization
Sanitize all input data to prevent SQL injection and XSS attacks. Supabase’s parameterized queries handle SQL injection, but you should also validate data types and lengths on the backend.
3. Leveraging Low-Code Platforms with Secure Backend Integration
Lovable is a low-code platform that enables rapid development of web applications【1†L13】. When combined with a secure backend like Supabase, it offers a powerful and efficient development workflow.
Step-by-Step Guide to Secure Low-Code Development:
Step 1: Understand the Low-Code Platform’s Capabilities
Lovable provides a visual editor for building React-based applications. It offers pre-built components, AI-assisted coding, and seamless deployment options.
Step 2: Connect to Supabase
Use the Supabase JavaScript client within Lovable’s custom code blocks. Store your Supabase URL and anonymous key in environment variables to keep them secure.
Step 3: Implement Authentication Flows
Lovable’s built-in authentication components can be integrated with Supabase Auth. Use Supabase’s signIn, signUp, and `signOut` methods. Implement password reset and email verification flows.
Step 4: Secure Data Fetching
When fetching data from Supabase, use RLS policies to ensure that users only see data they are authorized to access. Avoid exposing sensitive data in client-side code.
Step 5: Use Edge Functions for Sensitive Operations
For operations that require server-side logic (e.g., payment processing, complex data transformations), use Supabase Edge Functions. These functions run on the server and can securely access your database and external APIs.
Step 6: Regular Security Audits
Conduct regular security audits of your low-code application. Review RLS policies, API endpoints, and third-party dependencies for vulnerabilities.
- Applying AI and Data Science Principles to Web Development
The project applied advanced development concepts from AI studies at 3D University Technology【1†L14-L15】. This involves using data-driven insights to optimize user experience and business operations.
Step-by-Step Guide to Integrating AI Concepts:
Step 1: Identify Use Cases for AI
Determine where AI can add value, such as personalized content recommendations, predictive analytics for lead scoring, or automated chatbots for customer support.
Step 2: Collect and Preprocess Data
Gather data from user interactions, form submissions, and portfolio views. Preprocess this data to make it suitable for machine learning models.
Step 3: Build and Train Models
Use Python libraries like scikit-learn or TensorFlow to build models. For lead scoring, you might use a classification model to predict which leads are most likely to convert.
Step 4: Deploy Models via API
Deploy your trained models as a REST API using Flask or FastAPI. Secure the API with API keys and JWT authentication.
Step 5: Integrate with the Web Platform
Call the AI API from your web application (e.g., via Lovable’s custom code or Supabase Edge Functions) to display predictions or recommendations in real-time.
Step 6: Monitor and Improve
Continuously monitor the performance of your AI models and retrain them with new data to improve accuracy.
5. Odoo ERP Integration and Tech Innovation
The post mentions Odoo ERP as part of the tech stack【1†L19】. Odoo is a powerful open-source ERP system that can be integrated with web platforms for seamless business management.
Step-by-Step Guide to Integrating Odoo with a Web Platform:
Step 1: Set Up Odoo Instance
Deploy Odoo on a server (cloud or on-premises). Configure the necessary modules (e.g., Sales, CRM, Accounting).
Step 2: Expose Odoo APIs
Odoo provides a JSON-RPC API for external access. Enable the API and generate API keys for authentication.
Step 3: Connect from Web Platform
From your web platform (e.g., Lovable frontend), make API calls to Odoo to create leads, sync data, or fetch product information. Use secure HTTPS connections and store API keys in environment variables.
Step 4: Implement Data Synchronization
Set up scheduled jobs (e.g., using Supabase Edge Functions or cron jobs) to synchronize data between your web platform and Odoo. Handle conflicts and ensure data consistency.
Step 5: Secure the Integration
Use HTTPS, API keys, and IP whitelisting to secure the connection. Monitor API usage for unusual activity.
Step 6: User Training and Documentation
Provide training to the agency’s staff on how to use the integrated system. Create documentation for common tasks and troubleshooting.
What Undercode Say:
- Key Takeaway 1: The integration of low-code platforms like Lovable with robust backends such as Supabase enables rapid development without compromising on security or scalability, making it ideal for agencies needing quick time-to-market【1†L13】.
- Key Takeaway 2: Applying AI and data science principles to web development—from lead scoring to personalized content—can significantly enhance business operations and user engagement, as demonstrated by the project’s optimized solutions【1†L14-L15】.
- Key Takeaway 3: A secure CMS with role-based access control and a well-designed consultation pipeline are critical for modern agencies to manage their digital presence efficiently and securely【1†L10-L12】.
Prediction:
- +1 The demand for integrated, AI-driven web platforms will continue to rise, with low-code solutions becoming the go-to for agencies seeking to balance speed, cost, and functionality.
- +1 The convergence of ERP systems like Odoo with custom web applications will become standard practice, enabling seamless business process automation and data unification.
- -1 As low-code platforms proliferate, security vulnerabilities may increase if developers neglect proper authentication, authorization, and data validation practices.
- -1 The reliance on third-party services (e.g., Supabase, Lovable) introduces supply chain risks, necessitating rigorous vendor security assessments and contingency planning.
- +1 AI-powered analytics will transform how agencies understand and engage their audiences, leading to more personalized and effective marketing strategies.
▶️ Related Video (76% Match):
🎯Let’s Practice For Free:
🎓 Live Courses & Certifications:
Join Undercode Academy for Verified Certifications
🚀 Request a Custom Project:
Secure, high-velocity infrastructure and disruptive technological engineering. Contact our engineering team for high-tier development and proprietary systems:
[email protected]
💎 Smart Architecture | 🛡️ Secure by Design | ⭐ Trusted by Thousands
IT/Security Reporter URL:
Reported By: Ahmed Salemeg – Hackers Feeds
Extra Hub: Undercode MoN
Basic Verification: Pass ✅


