Listen to this Post
Introduction
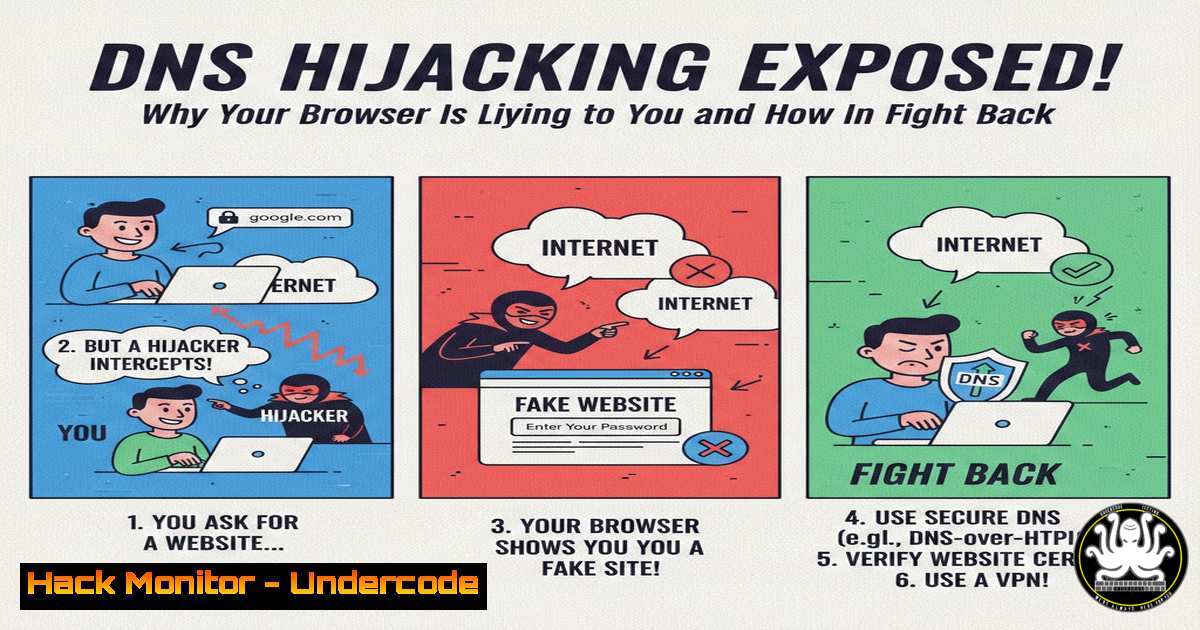
DNS hijacking remains one of the most insidious yet overlooked threats in modern cybersecurity. This attack manipulates the very foundation of how we navigate the internet—the Domain Name System—silently redirecting users from legitimate websites to malicious clones designed to steal credentials, inject malware, or conduct surveillance. Understanding this threat requires diving deep into network protocols, system configurations, and the critical distinction between encryption and trust.
Learning Objectives
- Understand the technical mechanics of DNS hijacking and how attackers compromise resolution pathways
- Master detection techniques across Windows and Linux environments using native tools
- Implement enterprise-grade DNS security controls and verify their effectiveness
- Differentiate between encryption (HTTPS) and endpoint authenticity to avoid common trust pitfalls
You Should Know
- The Anatomy of DNS Hijacking: How Attackers Rewrite the Internet’s Phonebook
DNS hijacking occurs when an attacker successfully modifies the resolution process that converts human-readable domain names into machine-routable IP addresses. This manipulation can occur at multiple points: your local machine, your router, your ISP, or even upstream DNS servers.
To understand if you’re a victim, start with local system checks. On Windows, open Command Prompt as administrator and examine your DNS settings:
 Check current DNS server assignments
ipconfig /all | findstr "DNS Servers"

Flush existing DNS cache to remove poisoned entries
ipconfig /flushdns

View the contents of the hosts file (a legacy but still exploited vector)
notepad C:\Windows\System32\drivers\etc\hosts
On Linux systems, the verification process differs:
 Check systemd-resolved DNS settings
resolvectl status

View current DNS servers from resolv.conf
cat /etc/resolv.conf

Flush DNS cache (depending on your DNS resolver)
sudo systemd-resolve --flush-caches
 OR for older systems
sudo /etc/init.d/dns-clean restart

Examine hosts file for unauthorized entries
cat /etc/hosts
Attackers often compromise routers first, since they act as the gateway for all connected devices. To check your router, access its admin interface (typically 192.168.0.1 or 192.168.1.1) and navigate to WAN or Internet settings. Look for DNS fields—if they’re set to anything other than your preferred secure providers or your ISP’s legitimate servers, you’ve been hijacked.
- The Padlock Paradox: Why HTTPS Provides False Comfort
One of the most dangerous misconceptions in cybersecurity is equating the padlock icon with safety. While HTTPS encrypts the tunnel between your browser and the destination server, it does absolutely nothing to verify that destination is legitimate. Attackers can obtain SSL/TLS certificates for domains they control—including convincing misspellings like “googIe.com” (with a capital I instead of L) or “faceb00k.com.”
To verify certificate authenticity, always click the padlock icon and examine the certificate details:
 Using OpenSSL to manually verify a certificate chain
openssl s_client -connect example.com:443 -showcerts

Check certificate issuance and validity dates
echo | openssl s_client -connect example.com:443 2>/dev/null | openssl x509 -noout -issuer -subject -dates
In Firefox, click the padlock → Connection secure → More information → View Certificate. In Chrome, click padlock → Connection is secure → Certificate is valid. Look for:
– Issuer matches a trusted Certificate Authority
– Subject matches exactly the domain you intended to visit
– No anomalies in the validity period or fingerprint
- Securing Your Digital GPS: Implementing Trusted DNS Resolvers
Manual DNS configuration remains your first line of defense. For Windows systems, navigate to Network Settings → Change adapter options → Right-click your active connection → Properties → Internet Protocol Version 4 (TCP/IPv4) → Properties → Use the following DNS server addresses.
For enterprise-grade protection, consider these verified resolvers:
Cloudflare (Privacy-focused, DNSSEC validated):
- Primary: 1.1.1.1
- Secondary: 1.0.0.1
- Malware-blocking variant: 1.1.1.2 (blocks known malicious domains)
Google Public DNS (High availability, global anycast):
- Primary: 8.8.8.8
- Secondary: 8.8.4.4
Quad9 (Threat intelligence integration):
- Primary: 9.9.9.9
- Secondary: 149.112.112.112
On Linux, you can persist DNS settings by editing /etc/resolv.conf:
sudo nano /etc/resolv.conf
 Add these lines:
nameserver 1.1.1.1
nameserver 8.8.8.8
For systemd-resolved systems:
sudo nano /etc/systemd/resolved.conf
 Modify or add:
[bash]
DNS=1.1.1.1 8.8.8.8
FallbackDNS=9.9.9.9
DNSSEC=allow-downgrade
DNSOverTLS=opportunistic
4. Router Hardening: Fortifying Your Network Perimeter
Router compromise represents the most dangerous form of DNS hijacking because it affects every device on your network. Begin with a factory reset if you suspect tampering, then immediately change default credentials:
 Common router default credentials (CHANGE THESE)
 admin/admin, admin/password, admin/1234, root/root
 Access via browser or curl:
curl -X GET http://192.168.1.1/setup.cgi?todo=save_settings --user admin:new_secure_password
After changing credentials, disable remote administration, UPnP if not needed, and force DNS settings at the router level rather than allowing clients to override. Most consumer routers have a “DNS Relay” or “DNS Proxy” setting—enable it and specify your chosen secure DNS servers.
For advanced protection, consider flashing open-source firmware like DD-WRT or OpenWrt, which provide granular control:
 On OpenWrt, set DNS via UCI
uci set network.wan.peerdns=0
uci add_list network.wan.dns="1.1.1.1"
uci add_list network.wan.dns="8.8.8.8"
uci commit network
/etc/init.d/network restart
5. Active Detection: Monitoring for DNS Anomalies
Proactive monitoring catches hijacking attempts before credentials are stolen. Implement DNS query logging and analyze for suspicious patterns. On Linux, use tcpdump to capture DNS traffic:
 Capture all DNS queries and responses
sudo tcpdump -i any -n port 53 -v

Look for responses from unexpected servers
sudo tcpdump -i any -n 'udp port 53 and (dst host ! 1.1.1.1 and dst host ! 8.8.8.8)'
On Windows, use PowerShell with NetAdapter diagnostics:
 Monitor DNS client events
Get-WinEvent -LogName Microsoft-Windows-DNS-Client/Operational | Select-Object -First 20

Test DNS resolution consistency
Resolve-DnsName google.com -Server 1.1.1.1
Resolve-DnsName google.com -Server 8.8.8.8
 Compare results—they should match
Implement DNSSEC validation to cryptographically verify DNS responses:
 Test DNSSEC validation with dig
dig +dnssec google.com

Look for the 'ad' flag (authentic data) in the response
6. Browser-Level Defenses and Certificate Pinning
Modern browsers offer built-in protections against DNS hijacking and rogue certificates. Enable DNS-over-HTTPS (DoH) in your browser settings to encrypt DNS queries between your browser and the resolver:
Firefox: Settings → Network Settings → Enable DNS over HTTPS → Use Cloudflare or NextDNS
Chrome: chrome://settings/security → Use secure DNS → Choose Custom provider
For advanced users, implement certificate pinning in your applications:
 Python example of certificate pinning
import requests
from requests.packages.urllib3.exceptions import InsecureRequestWarning
requests.packages.urllib3.disable_warnings(InsecureRequestWarning)

Pin a specific certificate public key
PINNED_PUBLIC_KEY = "sha256//47DEQpj8HBSa+/TImW+5JCeuQeRkm5NMpJWZG3hSuFU="

response = requests.get('https://example.com', verify=True)
 In production, compare the server's public key against pinned value
- Incident Response: What to Do When You’ve Been Hijacked
If you discover active DNS hijacking, follow this incident response protocol:
- Immediate isolation: Disconnect the affected device from the network to prevent credential theft
- Evidence collection: Capture DNS settings, recent browsing history, and network traffic logs
- Password rotation: Change passwords for all accounts accessed during the compromise period
- System restoration: Perform malware scans, reset hosts file, flush DNS cache, and verify system integrity
 Comprehensive Windows scan
sfc /scannow
DISM /Online /Cleanup-Image /RestoreHealth
 Reset network stack
netsh int ip reset
netsh winsock reset

Linux integrity verification
sudo apt install debsums
sudo debsums -c  Check for modified package files
sudo rkhunter --check
sudo chkrootkit
What Undercode Say
Key Takeaway 1: Encryption ≠ Authentication
The padlock icon guarantees confidentiality, not identity. Attackers routinely obtain valid certificates for lookalike domains, rendering HTTPS useless as a trust indicator without additional verification. Always examine certificate details and question unexpected redirects.
Key Takeaway 2: Defense Requires Layered Verification
Protecting against DNS hijacking demands multiple overlapping controls: secure resolvers, hardened routers, DNSSEC validation, browser DoH, and manual verification. No single measure provides complete protection; defense in depth is non-negotiable.
Analysis: DNS hijacking persists because it exploits fundamental trust relationships in internet infrastructure. While technical controls like DNSSEC and DoH address some vulnerabilities, human factors—typosquatting, phishing awareness, and security hygiene—remain critical. The sophistication of attacks continues to evolve, with nation-state actors now combining DNS manipulation with valid SSL certificates and convincing social engineering. Organizations must treat DNS infrastructure as critical attack surface, implementing continuous monitoring and treating every redirect as potentially hostile until verified.
Prediction
DNS-based attacks will increasingly target the encrypted DNS protocols themselves, with attackers pivoting to compromise DoH providers or execute man-in-the-middle attacks on DNS-over-TLS connections. By 2026, we’ll likely see the emergence of DNS-specific Security Information and Event Management (SIEM) solutions and mandatory DNSSEC adoption for critical infrastructure. The arms race between DNS manipulation and detection will accelerate, pushing DNS security from optional best practice to core regulatory requirement.
▶️ Related Video (78% Match):
🎯Let’s Practice For Free:
IT/Security Reporter URL:
Reported By: Toheebadeagbo Techtips – Hackers Feeds
Extra Hub: Undercode MoN
Basic Verification: Pass ✅


