
Listen to this Post
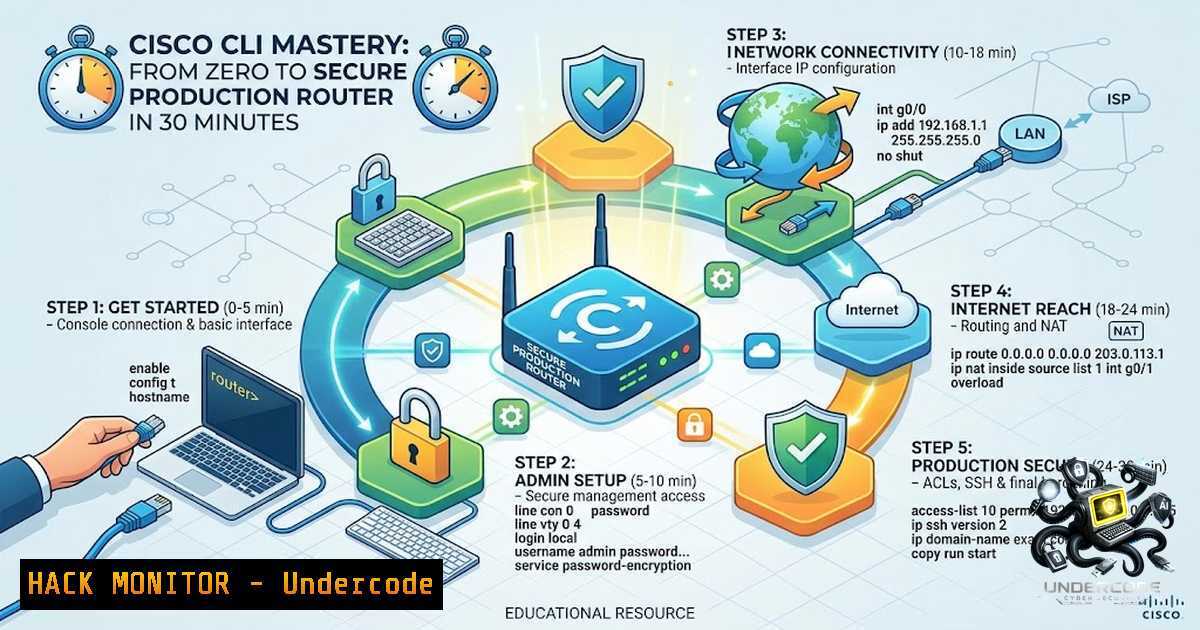
Introduction:
Initial router configuration is the foundational rite of passage for any network engineer, transforming a bare-metal appliance into a secure, traffic-forwarding powerhouse. This guide moves beyond basic connectivity, embedding security and operational best practices directly into the setup workflow to ensure your network is resilient from Day 1. By integrating SSH, Access Control Lists (ACLs), and Network Address Translation (NAT), you will establish a robust management plane and a functional data plane ready for production deployment.
Learning Objectives:
- Master the Cisco IOS command-line interface to perform initial hardware setup and administrative hardening.
- Implement secure remote access using SSHv2, encrypted passwords, and VTY access control lists.
- Configure and verify Static Routing, Default Routing, and NAT Overload (PAT) to enable private network internet access.
You Should Know:
- Initial Access & Basic Hardening (The “Out-of-Box” Experience)
This section details the immediate steps required to secure the router and establish its administrative identity. The first action is to enter Global Configuration Mode from Privileged EXEC (enable). Properly setting the hostname, domain name, and enabling password encryption prevents clear-text credential exposure in configuration files.
Step-by-Step Guide:
- Connect via console cable and access the terminal (Baud rate: 9600). Enter `enable` to access privileged mode.
- Configure basic global parameters:
enable
configure terminal
hostname R1
ip domain-1ame yourcompany.local
enable secret YourSuperSecurePassword123
service password-encryption
- Set a banner to notify unauthorized users of legal policies (e.g.,
banner motd Unauthorized Access Prohibited). - Pro Tip: Always use `enable secret` over `enable password` as it employs MD5 hashing (which, while older, is better than plaintext).
2. Secure Remote Access (SSH Over Telnet)
Telnet transmits data in plaintext, making it a severe security liability. This guide mandates the disabling of Telnet and the exclusive configuration of SSHv2 for management access. This process generates a cryptographic RSA key and defines the authentication methods.
Step-by-Step Guide:
- Generate the RSA key pair for SSH (the modulus size should be at least 2048 bits for modern security standards):
crypto key generate rsa general-keys modulus 2048
- Configure the VTY lines (virtual terminal lines 0-15) to accept only SSH:
line vty 0 15
transport input ssh
login local
exit
- Create a local user database for login credentials (e.g.,
username admin privilege 15 secret StrongUserPass). - Linux Command Equivalent: If you are managing a Linux server, securing SSH requires editing `/etc/ssh/sshd_config` to set `PasswordAuthentication no` and
PermitRootLogin no, then restarting the service withsystemctl restart sshd.
- VTY Line Security with Access Control Lists (ACLs)
Simply enabling SSH is insufficient; you must restrict who can attempt to connect. This involves creating an ACL that explicitly permits only specific management host IPs and applying it directly to the VTY lines to filter inbound management traffic.
Step-by-Step Guide:
- Create a standard ACL to define authorized management stations (e.g., 192.168.1.10):
access-list 10 permit 192.168.1.10
access-list 10 deny any log
- Apply this ACL to the VTY lines to filter incoming connections:
line vty 0 15
access-class 10 in
- Windows Verification: On Windows, you can verify connectivity using
ssh -l admin 192.168.1.1. If you are unable to connect, check the Windows Firewall to ensure port 22/tcp is allowed inbound.
4. Management IP Configuration (Loopback & Gateway)
Configuring a Loopback interface provides a stable management IP that is not dependent on the state of physical interfaces. This is crucial for consistent router access and routing protocol identification (like OSPF Router IDs).
Step-by-Step Guide:
- Create the Loopback interface and assign an IP:
interface loopback 0
ip address 10.10.10.1 255.255.255.255
no shutdown
- Set the default gateway (specifically for the router’s IP management traffic) if the router is not participating in dynamic routing for its own management route:
ip default-gateway 192.168.0.1
- Note: In production, a loopback is often used for syslog and SNMP sources to ensure logs are tied to a consistent source IP regardless of hardware failures.
5. Interface Configuration (LAN & ISP Connectivity)
Physical interfaces must be correctly configured with IP addresses and activated. This typically involves assigning an “Inside” IP for the local network and an “Outside” IP for the ISP connection. The `no shutdown` command is critical to bring the interface up.
Step-by-Step Guide:
- Configure the LAN interface (often Gi0/0):
interface gigabitEthernet 0/0
ip address 192.168.1.1 255.255.255.0
ip nat inside
no shutdown
- Configure the WAN/ISP interface (often Gi0/1) with the public IP provided by the ISP:
interface gigabitEthernet 0/1
ip address 203.0.113.1 255.255.255.252
ip nat outside
no shutdown
6. Static & Default Routing
A Default Route is essential for directing traffic destined for the internet to the ISP’s next-hop gateway. Static routes are useful for directing traffic to specific internal subnets that are not directly connected.
Step-by-Step Guide:
- Point all unknown destination traffic to the ISP’s next-hop IP:
ip route 0.0.0.0 0.0.0.0 203.0.113.2
- Linux Command Equivalent: In a Linux environment, a default route is added via
ip route add default via 203.0.113.2 dev eth0. To make it persistent, you would need to edit the `/etc/network/interfaces` file or usenmcli.
7. NAT (Inside/Outside + PAT Overload)
Network Address Translation (NAT) allows devices on the private LAN to use a single public IP to access the internet. Port Address Translation (PAT) differentiates sessions by utilizing source ports, conserving public IPv4 addresses.
Step-by-Step Guide:
- Define which internal network addresses are eligible for translation using an ACL:
access-list 1 permit 192.168.1.0 0.0.0.255
- Configure the NAT rule to translate traffic from ACL 1 to the public interface IP, enabling “overload” (PAT):
ip nat inside source list 1 interface gigabitEthernet 0/1 overload
- Verification: Use `show ip nat translations` to see active dynamic entries. A common Windows troubleshooting command is
tracert 8.8.8.8, which should show the hop leaving your router to ensure the default route and NAT are functioning.
8. Save & Verify Configuration
This final step ensures the running configuration is written to Non-Volatile RAM (NVRAM) so it survives a reload or power cycle. Verification steps confirm that all configured elements are operational.
Step-by-Step Guide:
- Copy the running-config to the startup-config:
copy running-config startup-config
- Verify interface statuses with
show ip interface brief. Ensure all critical interfaces show “up/up”. - Verify SSH operation by initiating a session from a permitted host:
ssh -l admin 192.168.1.1.
What Undercode Say:
- Key Takeaway 1: Security is not a “Phase 2” consideration. Implementing SSH, encrypted passwords, and VTY ACLs during the initial boot sequence is crucial for preventing unauthorized tampering before the router is even fully functional.
- Key Takeaway 2: Logical interfaces like Loopbacks aren’t just for routing protocols; they provide a permanent, hardware-independent management anchor that ensures consistent logging and remote access even when physical links fail.
- Analysis: The progression from console access to production-ready routing emphasizes a holistic approach. It demonstrates that configuration is not merely about connectivity but about establishing a maintainable, auditable, and secure operational baseline. By integrating NAT, administrators reduce the attack surface by hiding internal IP schemes. This guide mirrors the modernization of networking, where “perimeter” security starts at the device CLI itself. The ability to quickly deploy such a configuration separates a technician from an engineer, laying the groundwork for more advanced concepts like BGP peering and MPLS VPNs where these basics are the bedrock.
Prediction:
+1: The integration of AI-driven network analytics will increasingly demand that foundational configurations are strictly standardized to ensure predictable data flows. Engineers who master this CLI foundation will seamlessly adapt to platforms like Cisco DNA Center, as the underlying protocols remain unchanged.
+N: As network automation tools like Ansible and Python scripts become mandatory, a lack of understanding regarding these core CLI commands will hinder an engineer’s ability to debug automation failures, creating a skills gap reliant on “black-box” solutions.
▶️ Related Video (84% Match):
🎯Let’s Practice For Free:
🎓 Live Courses & Certifications:
Join Undercode Academy for Verified Certifications
🚀 Request a Custom Project:
Secure, high-velocity infrastructure and disruptive technological engineering. Contact our engineering team for high-tier development and proprietary systems:
[email protected]
💎 Smart Architecture | 🛡️ Secure by Design | ⭐ Trusted by Thousands
IT/Security Reporter URL:
Reported By: Sayed Hamza – Hackers Feeds
Extra Hub: Undercode MoN
Basic Verification: Pass ✅


