Listen to this Post
Introduction:
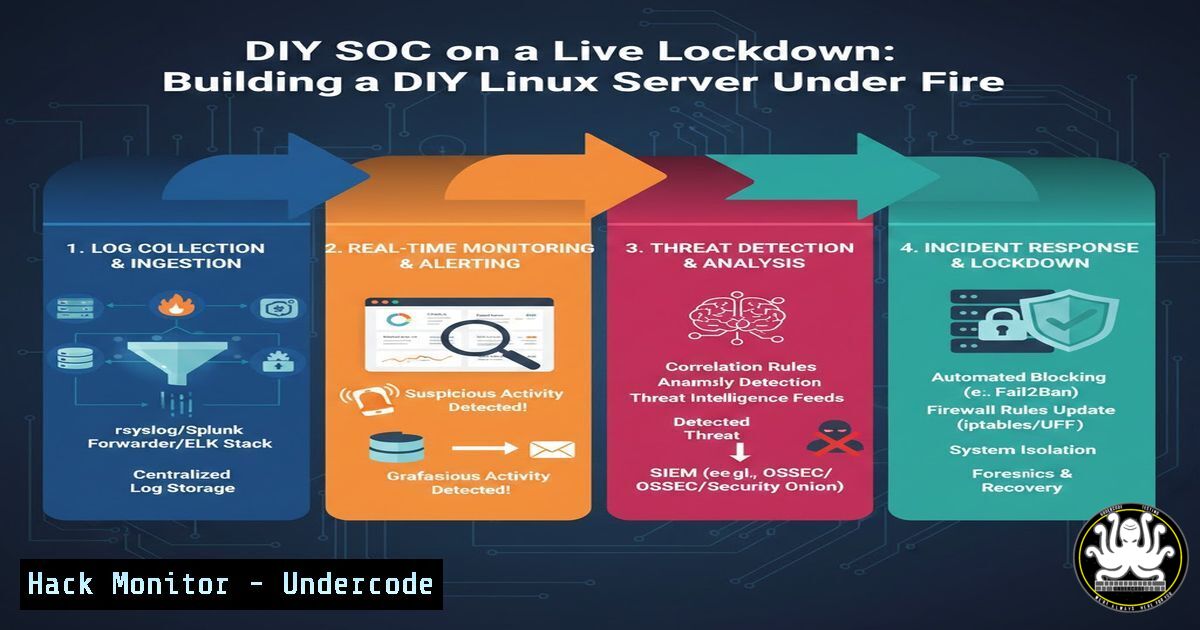
In an era of automated attacks and relentless scanning, proactive security monitoring is no longer optional. One cybersecurity professional’s hands-on project demonstrates how to transform a standard Linux server into a vigilant Security Operations Center (SOC), detecting and responding to real-world brute-force attempts, web exploitation scans, and DDoS probes using open-source tools. This practical guide moves beyond theory to showcase the implementation of centralized logging, automated threat response, and actionable intelligence gathering.
Learning Objectives:
- Implement a centralized logging infrastructure to monitor SSH, web servers, and databases.
- Configure Fail2ban with custom filters to automatically ban malicious IPs based on attack patterns.
- Generate real-time reports and perform Geo-IP analysis to understand threat origins and tactics.
You Should Know:
1. Centralizing Logs: The Foundation of Visibility
The first step in any effective monitoring strategy is aggregating logs from all critical services. Using the `rsyslog` or `syslog-ng` daemon, you can funnel logs to a single location for analysis. For containerized environments, Docker logging drivers can forward logs to this central system.
Step‑by‑step guide:
Install and Configure Rsyslog: Ensure `rsyslog` is installed. Modify its configuration to act as a central server.
 On the central log server (e.g., /etc/rsyslog.conf)
sudo nano /etc/rsyslog.conf
 Uncomment/modify these lines to accept UDP/TCP logs
module(load="imudp")
input(type="imudp" port="514")
module(load="imtcp")
input(type="imtcp" port="514")
Configure Clients: Point application and system logs from other servers to your central log host.
 On a client server (e.g., /etc/rsyslog.d/10-forward.conf)
. @<CENTRAL_SERVER_IP>:514  UDP forwarding
 or
. @@<CENTRAL_SERVER_IP>:514  TCP forwarding (more reliable)
Restart Services: Apply the changes.
sudo systemctl restart rsyslog
Monitor Key Log Files: Essential logs to watch include:
`/var/log/auth.log` (Debian/Ubuntu) or `/var/log/secure` (RHEL/CentOS) for SSH.
Web server logs (e.g., `/var/log/nginx/access.log`, `/var/log/apache2/access.log`).
Database logs (e.g., MSSQL error logs).
- Automating Defense with Fail2ban: From Detection to Action
Fail2ban scans log files for predefined patterns (like multiple failed SSH logins) and automatically modifies firewall rules to ban the offending IP addresses for a specified time.
Step‑by‑step guide:
Install Fail2ban: Use your package manager.
sudo apt install fail2ban  Debian/Ubuntu
sudo yum install fail2ban  RHEL/CentOS
Create a Local Configuration: Copy the default `jail.conf` to `jail.local` to make your customizations.
sudo cp /etc/fail2ban/jail.conf /etc/fail2ban/jail.local
sudo nano /etc/fail2ban/jail.local
Configure a Jail for Nginx (Example – Blocking WP-Login Scans): Create a custom filter to detect WordPress admin probing.
 Create a filter file
sudo nano /etc/fail2ban/filter.d/nginx-wp-login.conf
Add the following content to detect multiple requests to /wp-login.php:
[bash]
failregex = ^<HOST>."POST /wp-login.php. 200
ignoreregex =
Activate the Jail: In jail.local, add a new jail section.
[nginx-wp-login]
enabled = true
port = http,https
filter = nginx-wp-login
logpath = /var/log/nginx/access.log
maxretry = 3
bantime = 3600
findtime = 600
Restart and Monitor Fail2ban:
sudo systemctl restart fail2ban
 Check status
sudo fail2ban-client status nginx-wp-login
3. Implementing Geo-IP Analysis for Threat Context
Understanding where attacks originate provides crucial context. Tools like `fail2ban` with GeoIP databases or a custom Python script can enrich logs with country data.
Step‑by‑step guide:
Install the GeoIP Database (for Fail2ban):
sudo apt install geoip-database Debian/Ubuntu
Configure Fail2ban to Use GeoIP: Modify an action file to include country code in ban notifications.
sudo nano /etc/fail2ban/action.d/iptables-multiport.conf
Locate the `actionban` section and modify the logging line (this is a simplified example):
actionban = /usr/bin/printf %%b "Ban <ip> from <geoip_country> at $(date)\n" | tee -a <logfile>
<iptables> -I fail2ban-<name> 1 -s <ip> -j <blocktype>
Alternative: Use a Python Script for Log Analysis: Create a script to parse logs and use the `geoip2` library.
pip3 install geoip2
 Example snippet for log enrichment
import geoip2.database
reader = geoip2.database.Reader('/usr/share/GeoIP/GeoLite2-Country.mmdb')
try:
response = reader.country('ATTACKER_IP')
country = response.country.name
except:
country = "Unknown"
4. Structuring Incident Logs and Creating Snapshots
For proper SOC documentation, automate the creation of structured incident logs and system state snapshots when an attack is detected.
Step‑by‑step guide:
Create an Incident Logging Directory:
sudo mkdir -p /var/log/incidents/$(date +%Y-%m-%d)
Use Fail2ban’s `action` to Trigger Evidence Collection: Create a custom action script that runs when an IP is banned.
sudo nano /etc/fail2ban/action.d/my_evidence.conf
[bash]
actionban = /usr/local/bin/log_incident.sh <ip> <failregex>
Sample Evidence Script (`/usr/local/bin/log_incident.sh`):
!/bin/bash
BANNED_IP=$1
REASON=$2
INCIDENT_DIR="/var/log/incidents/$(date +%Y-%m-%d)/$BANNED_IP-$(date +%H%M%S)"
mkdir -p $INCIDENT_DIR
 Log the event
echo "$(date) - Banned $BANNED_IP for reason: $REASON" >> $INCIDENT_DIR/incident.log
 Take a snapshot of current connections from that IP (if any)
netstat -an | grep $BANNED_IP > $INCIDENT_DIR/netstat_snapshot.txt
 Capture recent relevant logs
grep $BANNED_IP /var/log/nginx/access.log | tail -50 > $INCIDENT_DIR/nginx_entries.log
 Document the active firewall rule
iptables -L -n | grep $BANNED_IP > $INCIDENT_DIR/iptables_rule.txt
5. Generating Real-Time and Periodic Security Reports
Automate the generation of digestible reports to maintain visibility. Use simple cron jobs and shell scripts to parse logs and summarize activity.
Step‑by‑step guide:
Create a Daily Summary Report Script:
sudo nano /usr/local/bin/daily_security_report.sh
!/bin/bash
REPORT_FILE="/var/log/security/daily_report_$(date +%Y%m%d).txt"
echo "=== DAILY SECURITY SUMMARY - $(date) ===" > $REPORT_FILE
echo "" >> $REPORT_FILE
echo "1. SSH Login Failures (Top 10 IPs):" >> $REPORT_FILE
grep "Failed password" /var/log/auth.log | awk '{print $(NF-3)}' | sort | uniq -c | sort -nr | head -10 >> $REPORT_FILE
echo "" >> $REPORT_FILE
echo "2. Fail2ban Ban Statistics:" >> $REPORT_FILE
sudo fail2ban-client status sshd | grep "Banned IP list" -A 10 >> $REPORT_FILE 2>/dev/null || echo "No data" >> $REPORT_FILE
echo "" >> $REPORT_FILE
echo "3. Top 10 Requested URLs (Nginx):" >> $REPORT_FILE
awk '{print $7}' /var/log/nginx/access.log | sort | uniq -c | sort -nr | head -10 >> $REPORT_FILE
 Send report via email (requires mail utils)
 mail -s "Daily Security Report" [email protected] < $REPORT_FILE
Schedule with Cron:
sudo crontab -e
 Add line to run daily at 23:55
55 23    /usr/local/bin/daily_security_report.sh
What Undercode Say:
- Proactive, Automated Defense is Accessible: A fully functional monitoring and automated response system can be built with free, open-source tools, democratizing advanced SOC capabilities for organizations of all sizes.
- Context Transforms Data into Intelligence: Simply banning IPs is insufficient. Correlating logs with Geo-IP data, attack patterns, and timing transforms raw alerts into actionable threat intelligence, revealing the “who” and “why” behind the attacks.
+ analysis around 10 lines.
This project underscores a critical shift in cybersecurity: the barrier to entry for robust, automated defense is lower than ever, but it requires moving from passive to active configuration. The real-world attack patterns observed—mass WordPress probing, random PHP execution attempts, and MSSQL brute-forcing—are not sophisticated zero-days but widespread, automated noise. The value of this DIY SOC lies not in stopping advanced persistent threats (yet), but in efficiently eliminating this pervasive background radiation, freeing up an analyst’s time to focus on more subtle anomalies. It proves that understanding the baseline of “normal” attack traffic is the first and most crucial step in any security posture, turning endless log files into a curated feed of high-fidelity alerts.
Prediction:
The methodology demonstrated will rapidly evolve from server-only to encompass entire cloud-native and hybrid environments. We predict the integration of these log-driven, automated ban systems with threat intelligence platforms (TIPs) and Security Orchestration, Automation, and Response (SOAR) platforms will become standard even for small teams. Furthermore, as attacks become more distributed and low-speed, future DIY SOC builds will increasingly leverage machine learning models on top of this aggregated log data to detect subtle, behavioral anomalies that simple pattern matching misses, making advanced threat hunting an automated function.
▶️ Related Video (78% Match):
🎯Let’s Practice For Free:
IT/Security Reporter URL:
Reported By: Ibrahim Husi%C4%87 – Hackers Feeds
Extra Hub: Undercode MoN
Basic Verification: Pass ✅


